
Subscribers
The Subscribers menu shows everyone who receives your emails. This is where you search and filter, add new addresses, import lists, and handle unsubscribes and data deletion.
The subscriber list
Section titled “The subscriber list”Open Subscribers in the left menu. The All subscribers tab shows the list. Next to it are the other tabs: Segments, Groups, Fields, Stats, Clean up inactive and History. Groups and segments are covered in the Groups and segments chapter.
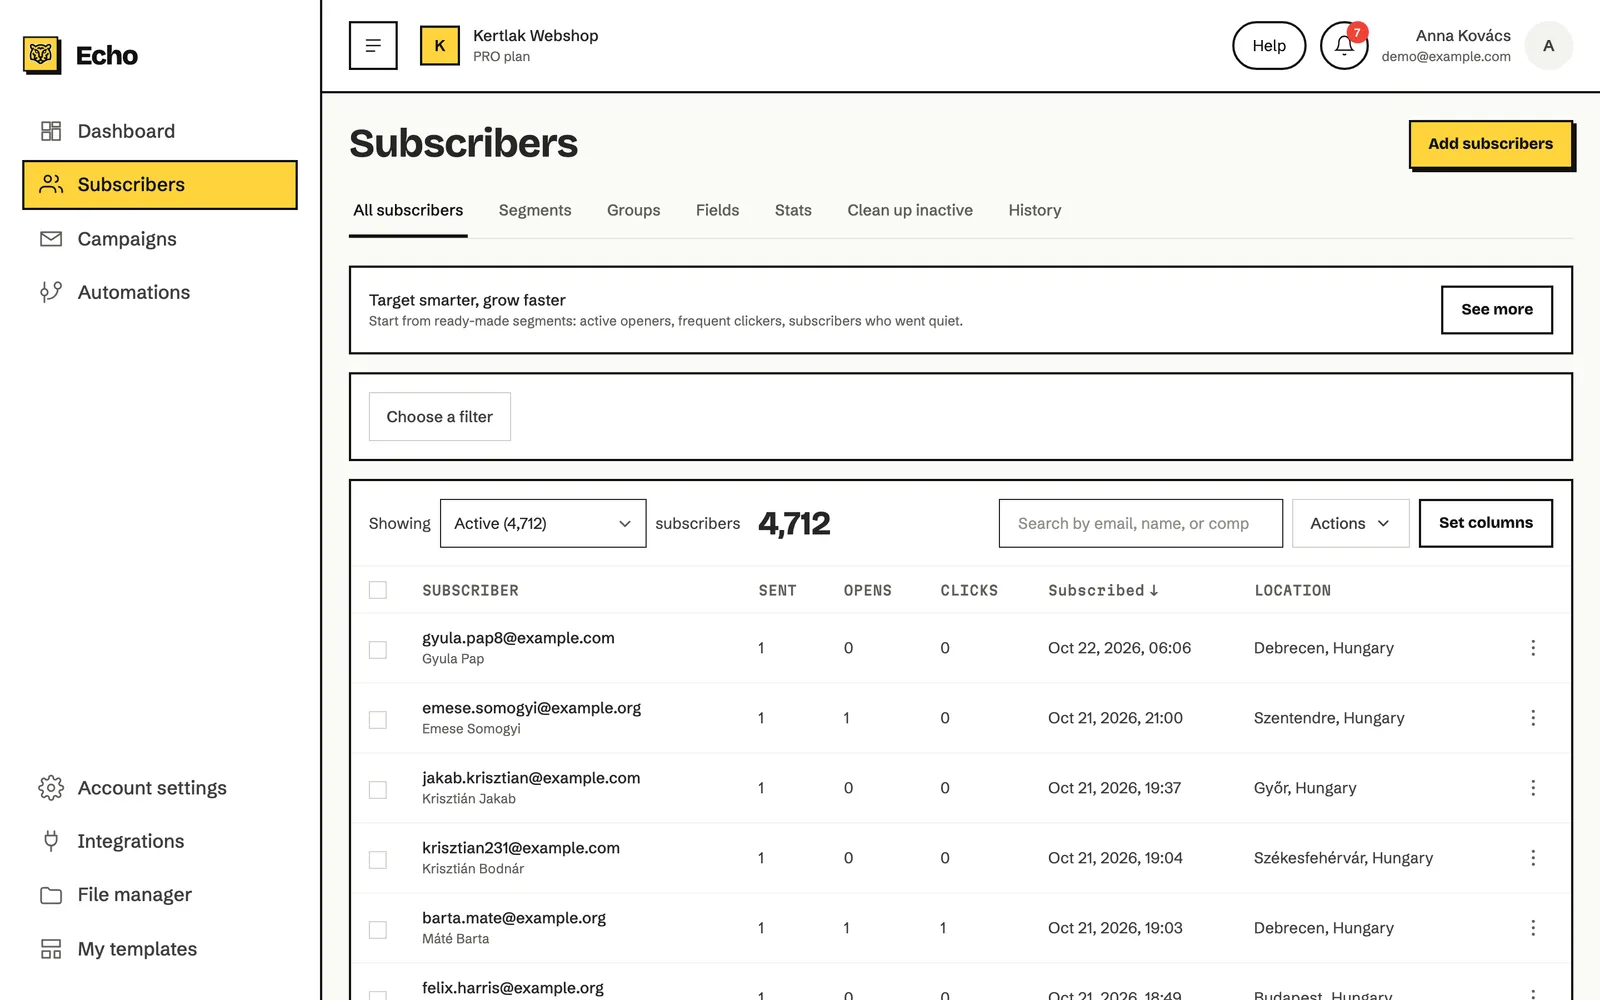
Each row of the table is one subscriber: the email address with the name below it, then the number of emails sent to them, their opens and clicks, when they subscribed and where they are. Click an email address to open the subscriber’s profile.
Subscriber statuses
Section titled “Subscriber statuses”Every subscriber has one status. Campaigns go only to Active subscribers.
| Status | What it means | How someone gets there |
|---|---|---|
| Active | Receives your emails. | Added by hand, imported, signed up through a form or the API, or confirmed through the confirmation email. |
| Unconfirmed | Signed up but hasn’t clicked the link in the confirmation email yet. Gets no campaigns until they confirm. | Sign-ups with double opt-in. After confirming they become Active. |
| Unsubscribed | Doesn’t want any more emails. | Unsubscribed through the link at the bottom of an email or in the preference center, or you moved them there. |
| Bounced | Emails to this address can’t be delivered. | After a permanent bounce, or after three emails in a row bounced temporarily with no delivery in between. |
| Spam complaints | Marked your email as spam in their mail app. | Automatically, based on the report from their email provider. |
How to search and filter the list
Section titled “How to search and filter the list”
- In the list next to Showing, choose which status you want to see. Active subscribers are shown by default, and each status shows its count. All shows everyone.
- Type part of an address, a name or a company name into Search by email, name, or company. The list updates as you type.
- For a more detailed filter, click Choose a filter and set the condition (for example a group, a field value or an opened campaign). Combine conditions with + And and + Or.
- To reuse the filter later, click Save segment. Clear removes the filters.
How to act on many subscribers at once
Section titled “How to act on many subscribers at once”- Tick the checkbox at the start of each row you want to work with. The checkbox in the header selects every row on the page.
- When the whole page is selected and the filter has more matches, the link Select all … subscribers appears above the table. Click it to apply the action to every match, not only to the rows on screen.
- Click Actions and choose what to do.
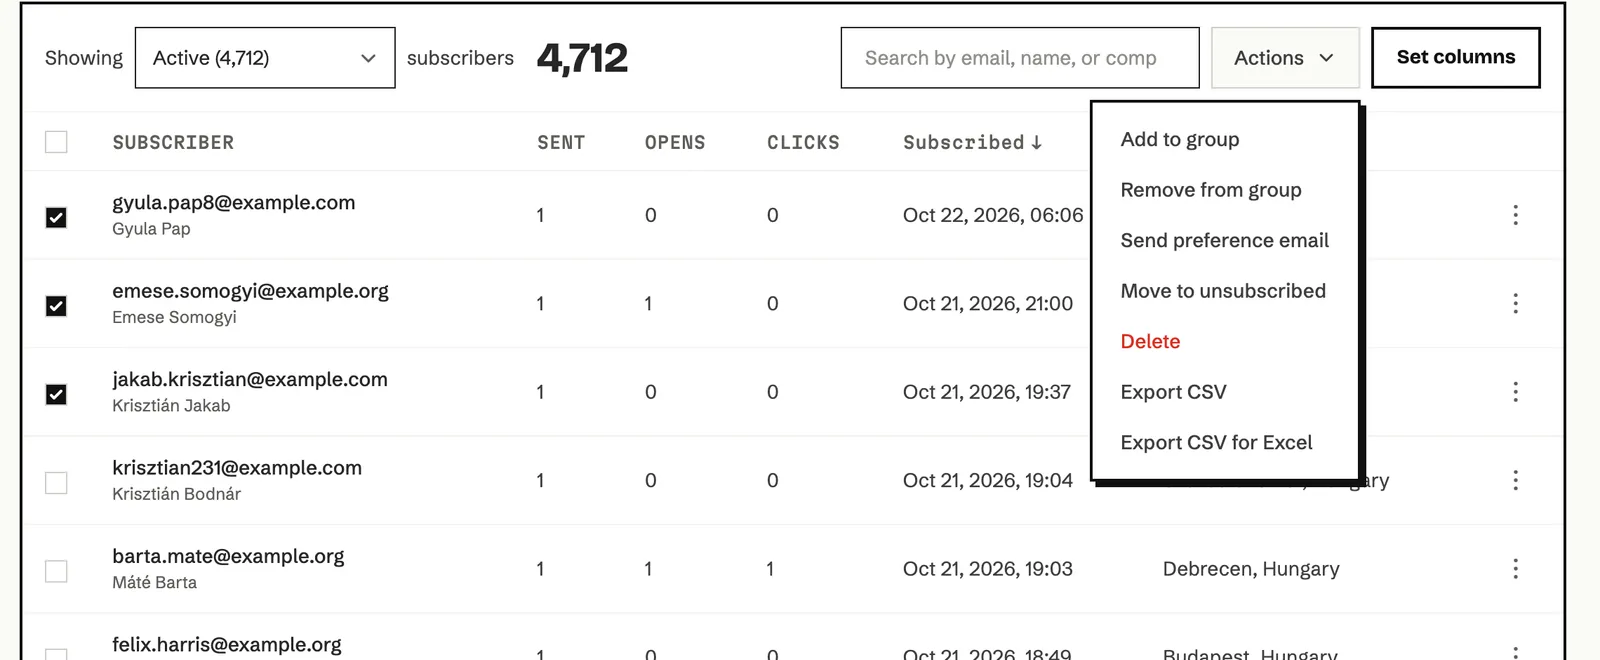
| Action | What it does |
|---|---|
| Add to group | Adds the selected subscribers to the group you choose. |
| Remove from group | Takes the selected subscribers out of the group you choose. The subscribers themselves stay. |
| Send preference email | Sends the link to the preference center, where subscribers choose which emails they want. Available only when the preference center is on. |
| Move to unsubscribed | Sets the selected subscribers to unsubscribed. They get no more emails. |
| Delete | Removes the selected subscribers from your account. Campaign statistics stay. |
| Export CSV / Export CSV for Excel | Downloads the selected subscribers as a CSV file. With nothing selected, every match is exported. Excel opens the Excel version with correct accented letters on a double click. |
How to add a single subscriber
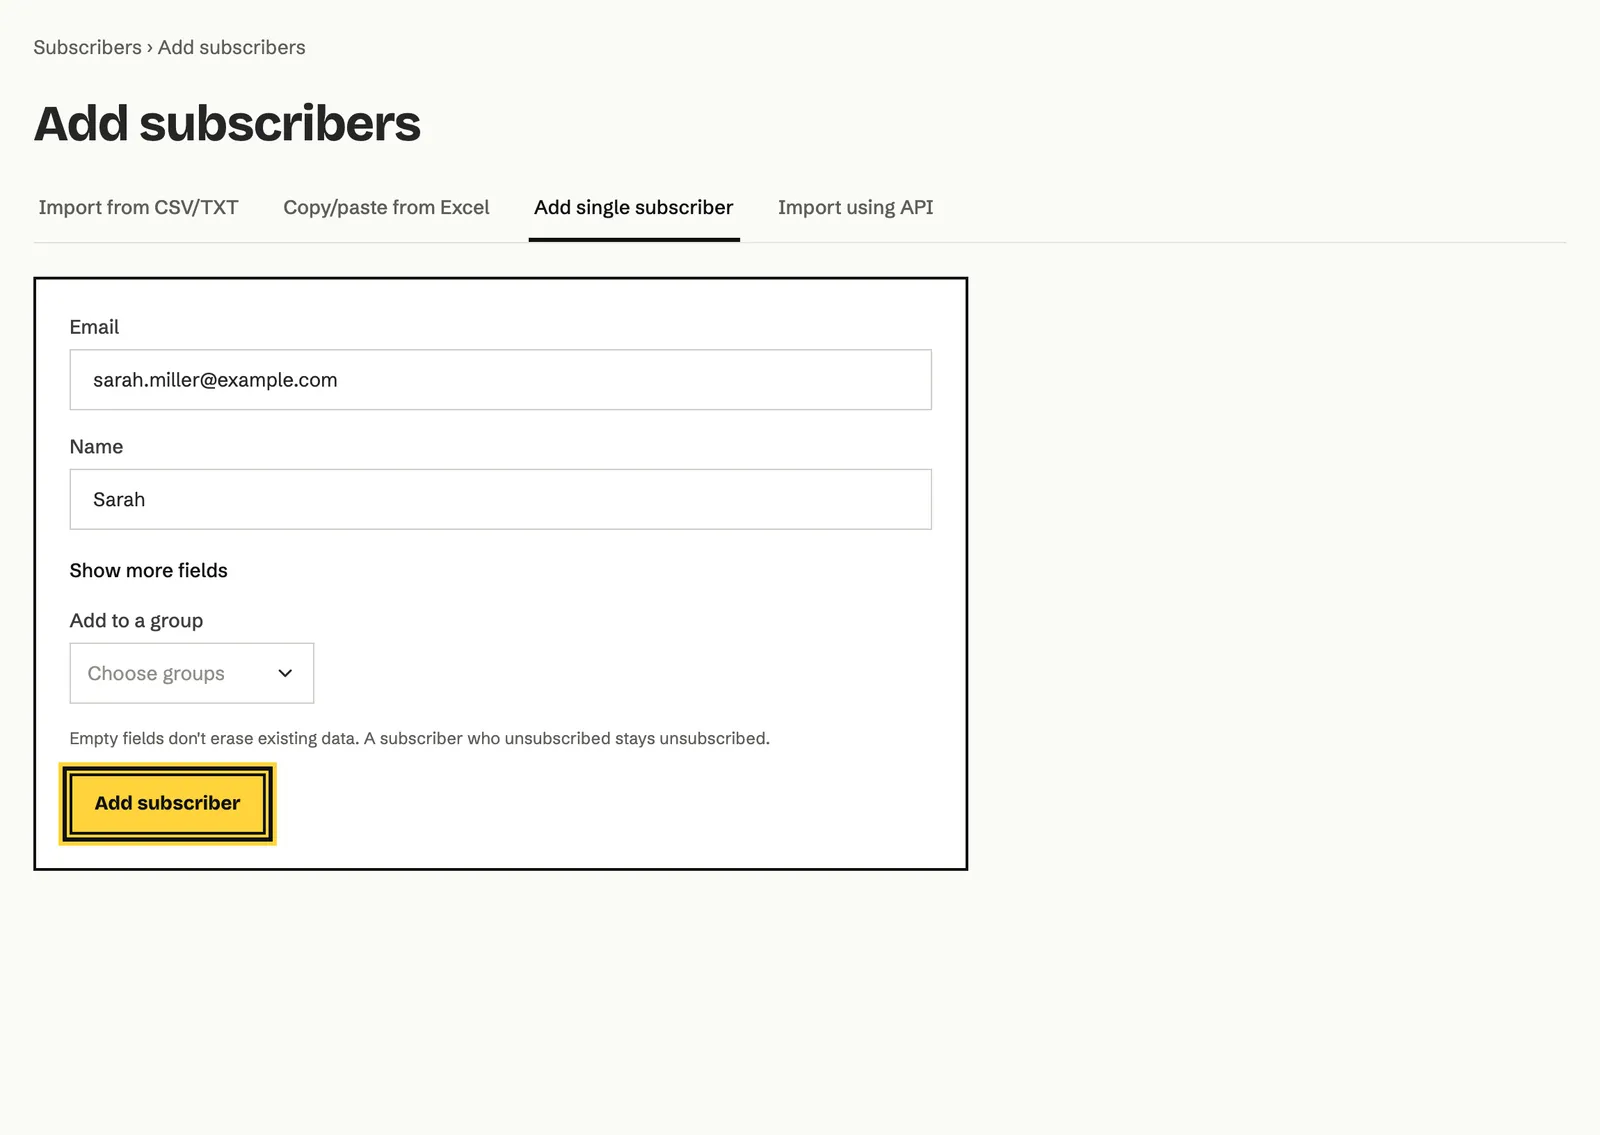
Section titled “How to add a single subscriber”- Click Add subscribers in the top right corner.
- Choose the Add single subscriber tab.
- Enter the Email address and, if you know it, the Name. Click Show more fields to fill in the other fields (last name, city, your custom fields).
- In Add to a group, choose the group the subscriber should join.
- Click Add subscriber.
How to view and edit a subscriber profile
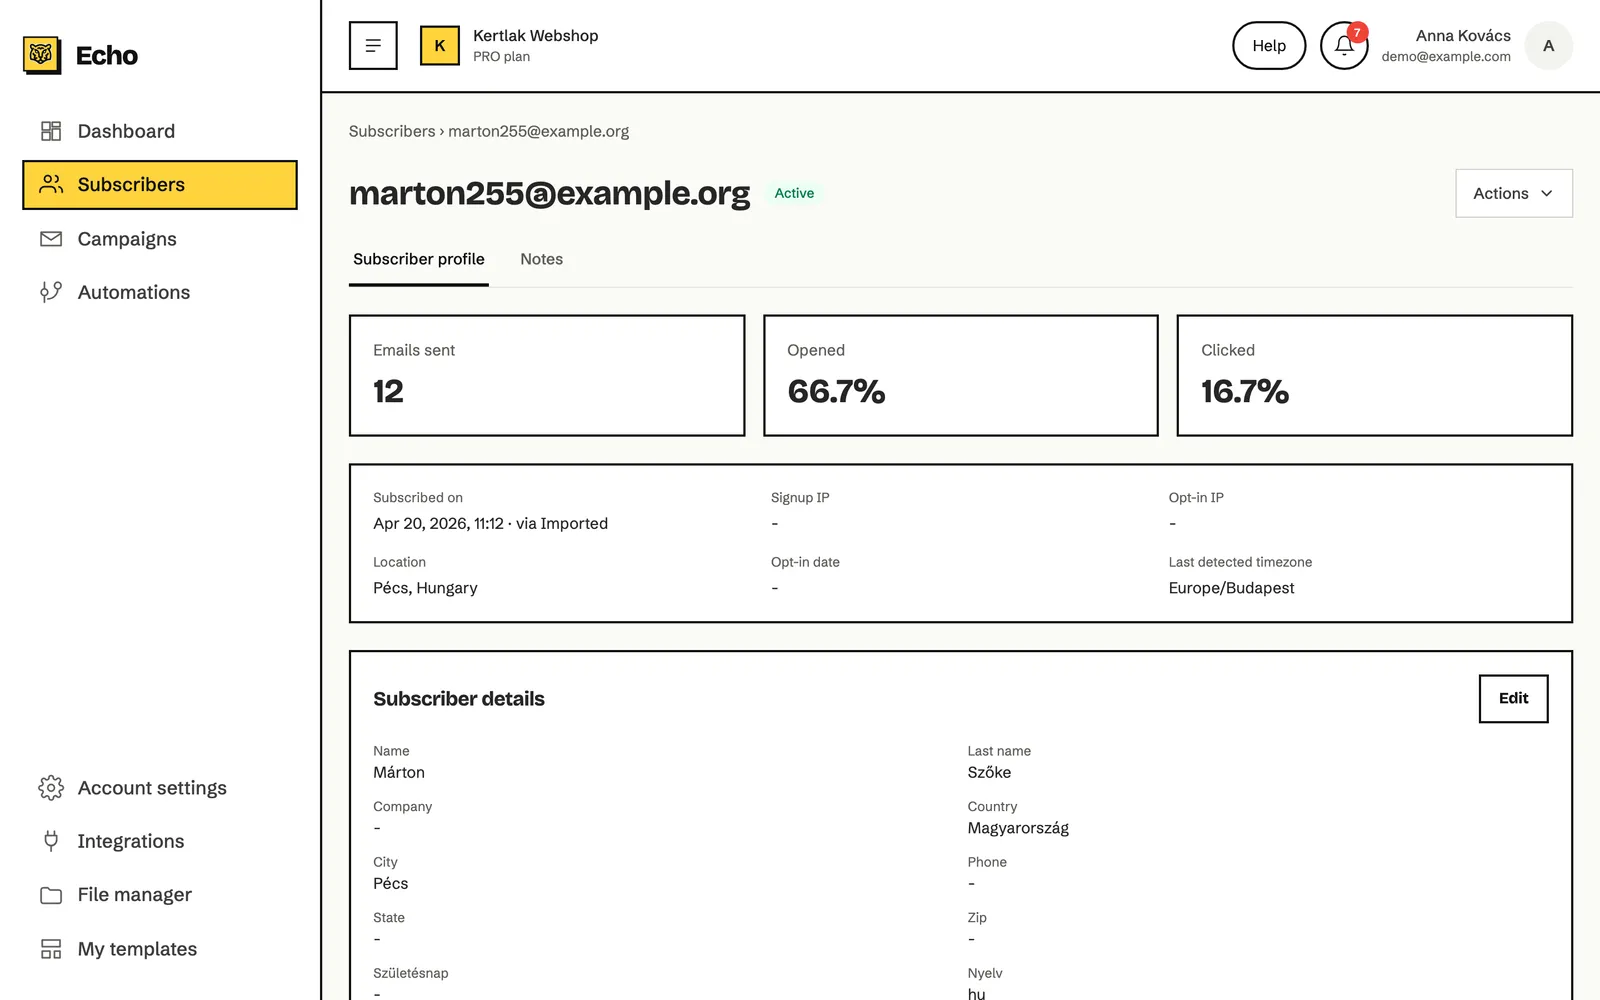
Section titled “How to view and edit a subscriber profile”- In the list, click the subscriber’s email address.
- The top of the Subscriber profile tab shows how many emails they got (Emails sent), what share of them they opened (Opened) and in what share they clicked (Clicked).
- Below that are the signup details: when and how they subscribed, the signup and opt-in IP address, the location, the opt-in date and the last detected timezone.
Editing the details
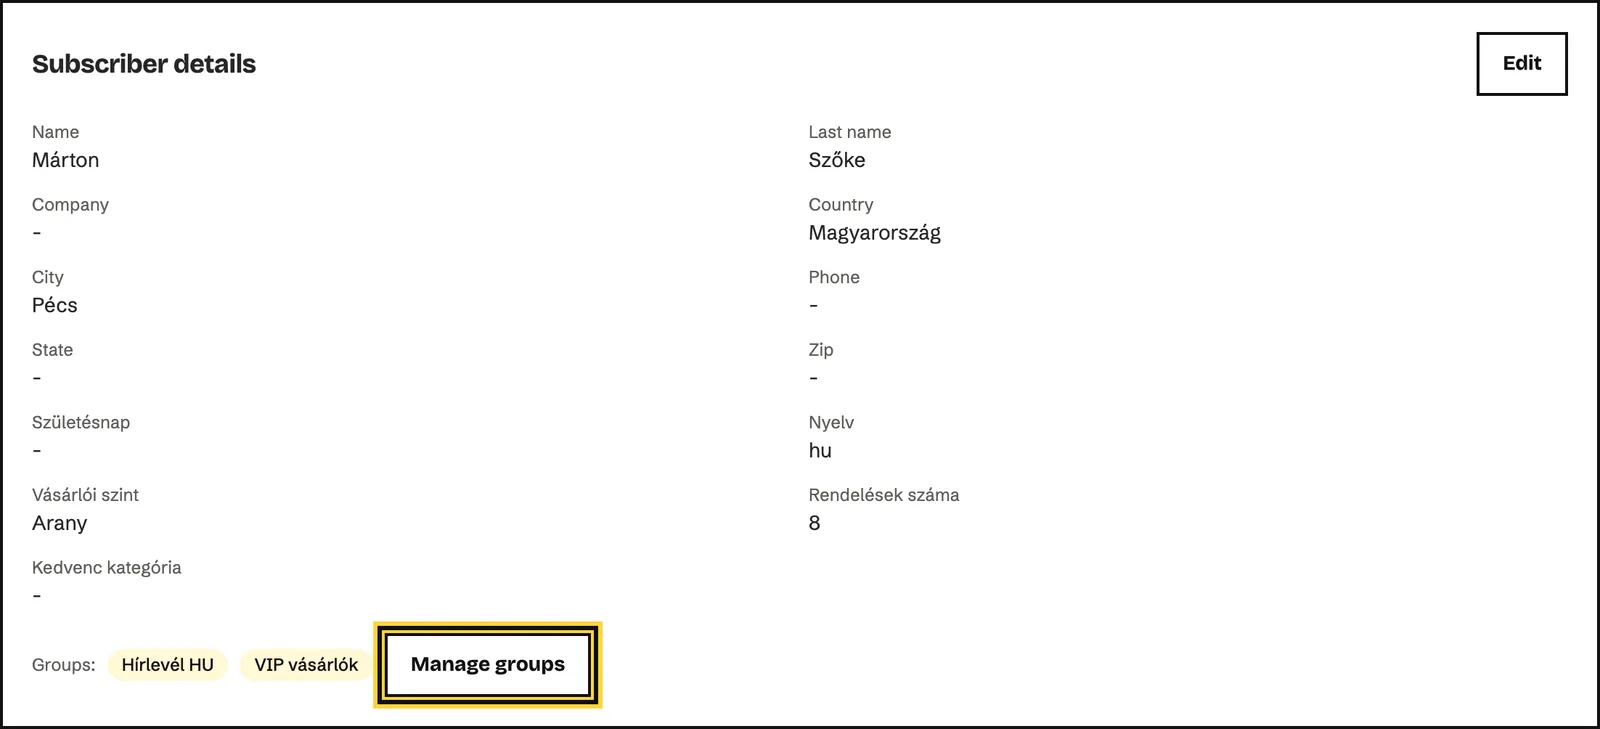
- In the Subscriber details box, click Edit.
- Change the email address, the fields, the timezone or the location.
- Click Save changes.
Managing groups
- At the bottom of the Subscriber details box, click Manage groups.
- Tick or untick groups. Each change applies at once, there’s nothing else to save.
- Click Close.
Activity
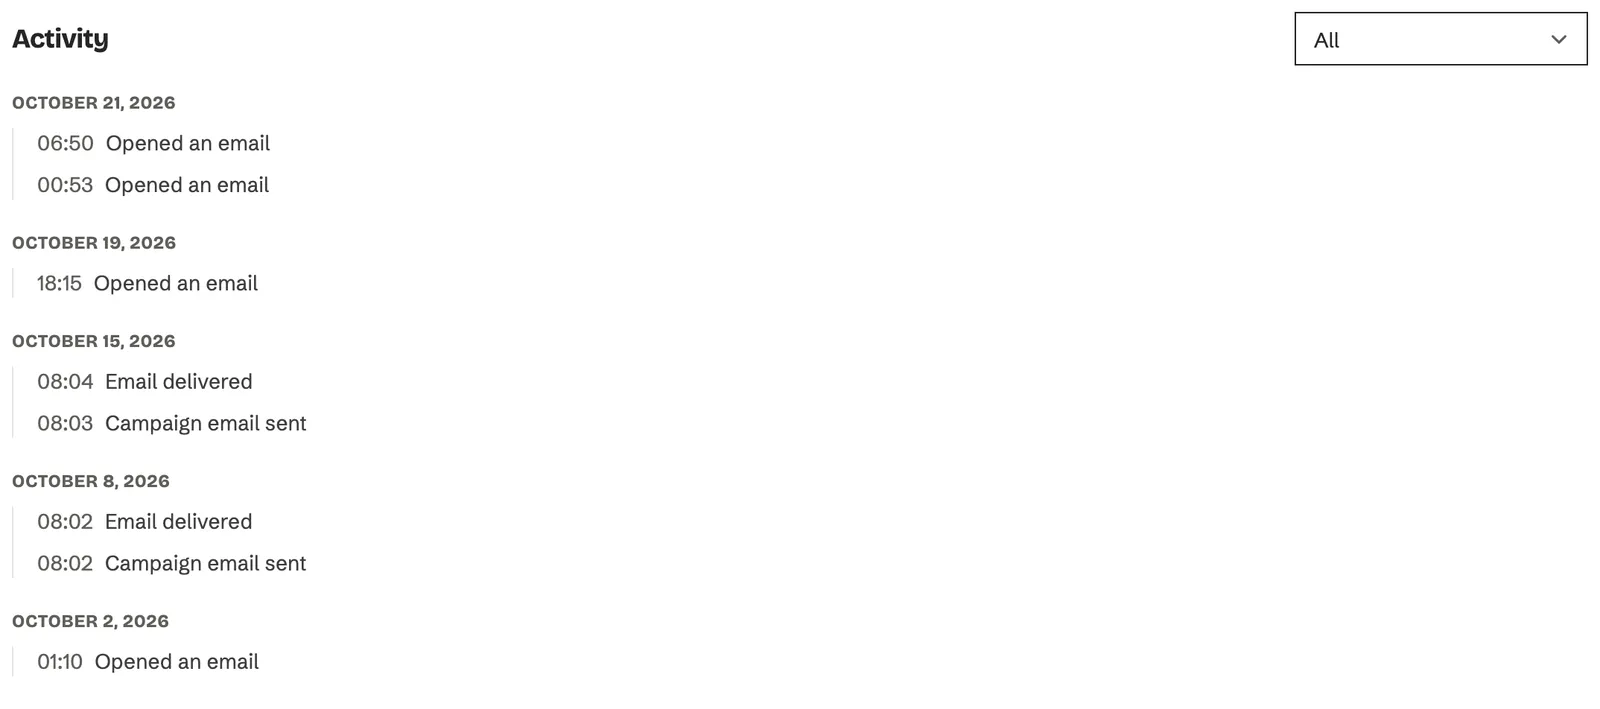
At the bottom of the profile, the Activity section shows day by day what happened with the subscriber: which emails they got, when they opened them, what they clicked, and whether they unsubscribed or an email bounced. Use the list on the right to narrow the view, for example to Clicks or Unsubscribes only. Load more brings in older events.
Notes
On the Notes tab your team can keep internal notes about the subscriber, for example about a phone call or a request. Type into New note and click Add note. The subscriber never sees notes.
Unsubscribe, delete or forget: which one to use
Section titled “Unsubscribe, delete or forget: which one to use”There are three ways to stop dealing with a subscriber, and each does something different. You find all three in the three-dot menu of a list row and in the Actions menu of the profile.
| Unsubscribe | Delete | Forget | |
|---|---|---|---|
| Do they get more emails? | No | No | No |
| Do they stay on your list? | Yes, as unsubscribed | No | No |
| Do their data and activity stay? | Yes | The subscriber is deleted; their past events stay in the campaign statistics | No, all personal data is deleted for good |
| What if you import the address again later? | Stays unsubscribed | Comes back as a new, active subscriber | Comes back as a new, active subscriber |
| Can it be undone? | Not in the app | No | No |
| Available for many at once? | Yes (Move to unsubscribed) | Yes | No, one at a time |
When to use which
- Unsubscribe: when someone doesn’t want more emails but hasn’t asked you to delete their data. This is the safest choice: Echo remembers that the address unsubscribed, so a later import won’t email them again.
- Delete: to remove wrong or test addresses. Don’t delete unsubscribed subscribers, because after deleting, Echo no longer knows they unsubscribed.
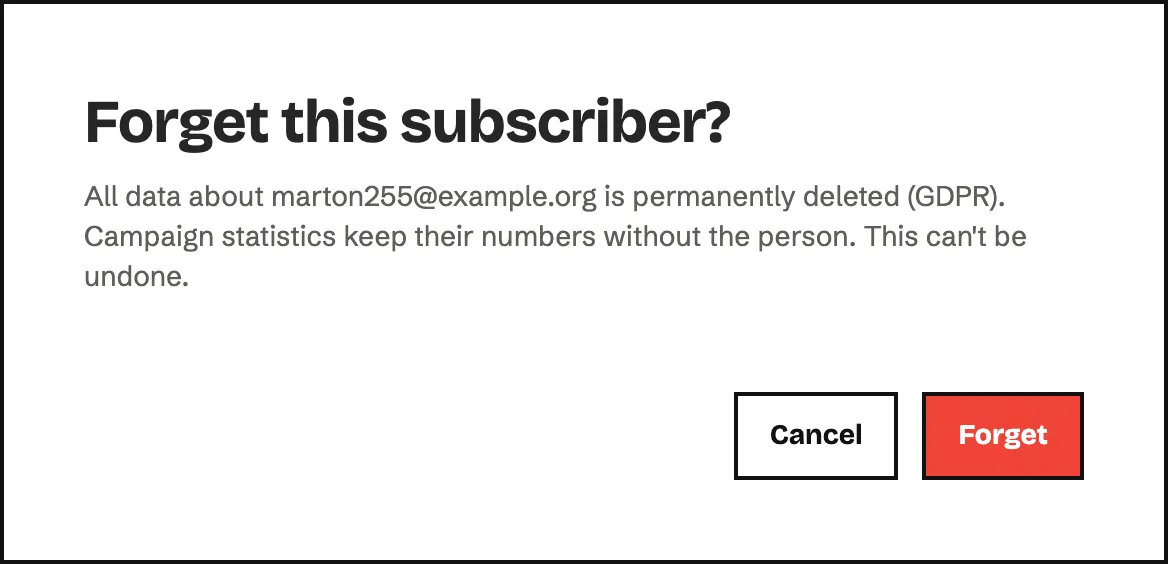
- Forget: when the subscriber asks for their data to be erased under GDPR. The subscriber, their notes, their group memberships and the details of their events are deleted for good. Campaign statistics keep their numbers, but they can no longer be linked to the person.
How to forget a subscriber
- Open the subscriber’s profile.
- Click Actions, then Forget.
- Read the text in the confirmation window and click Forget.
How to create a custom field
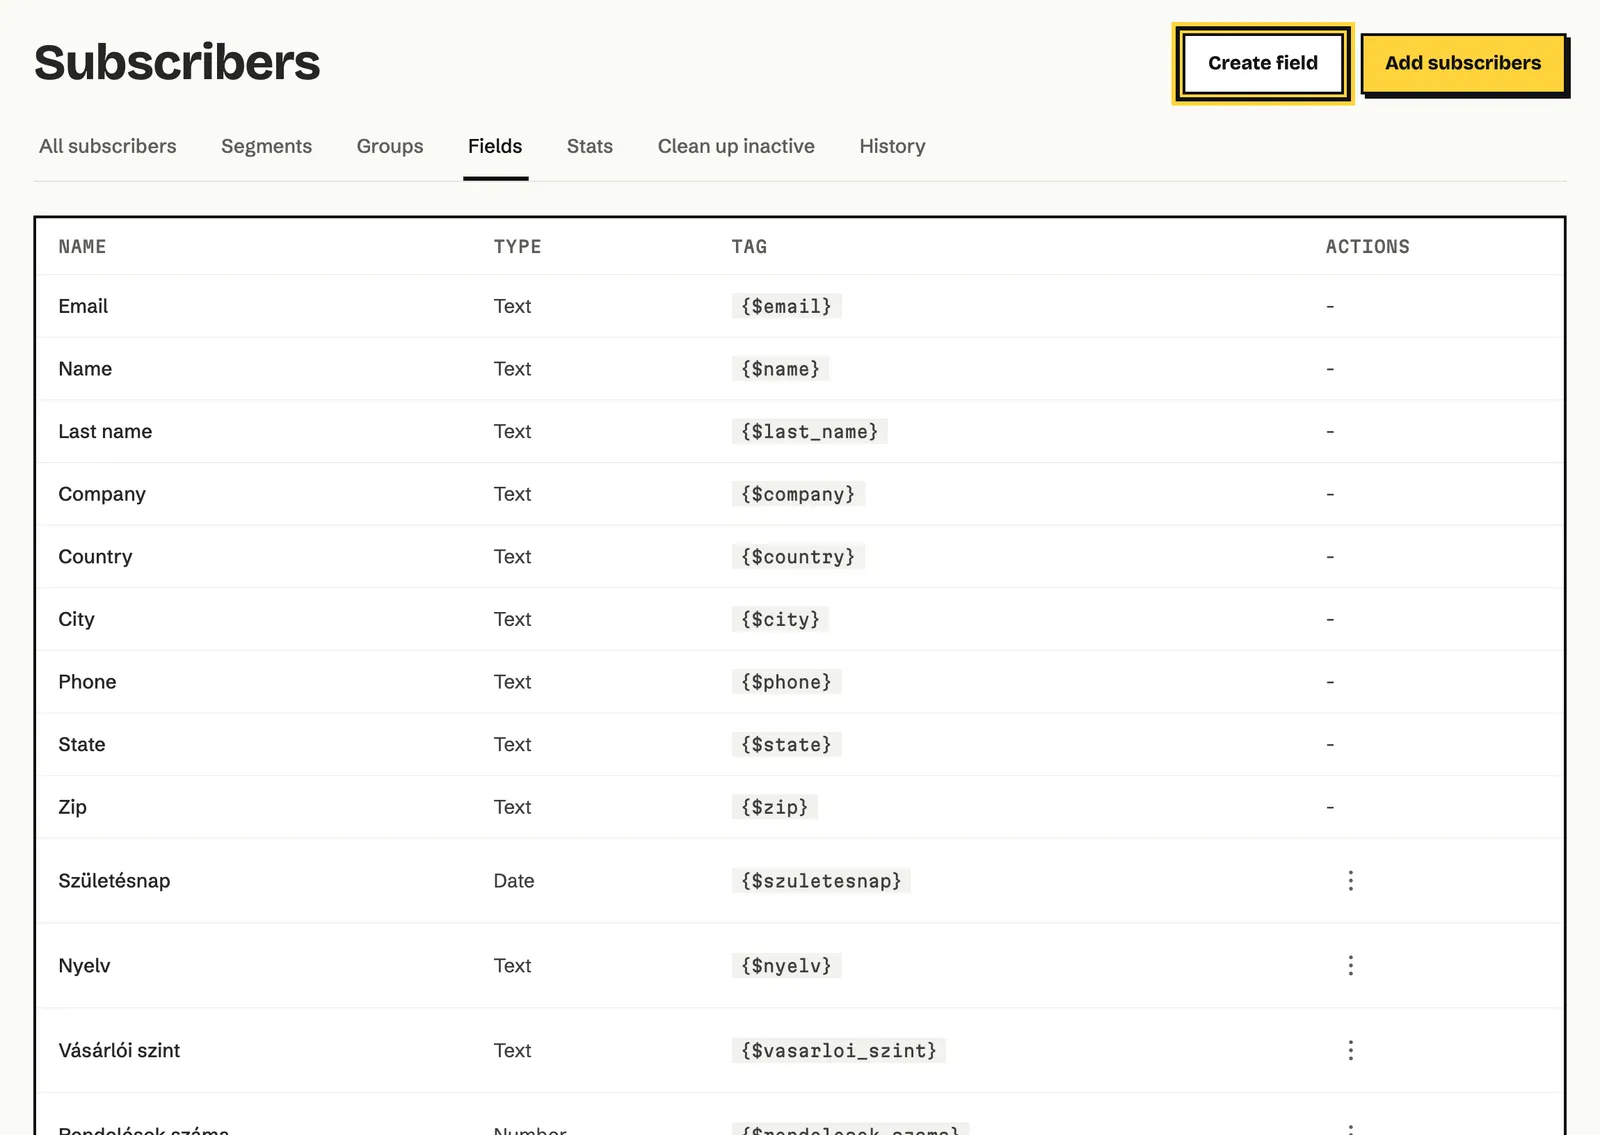
Section titled “How to create a custom field”Fields hold your subscribers’ data. The built-in fields (such as Name, Last name, Company, Country, City, Phone) are always there, and you can add your own, for example a birthday or a customer level.
- Open the Fields tab under Subscribers.
- Click Create field.
- Enter the field name and choose its type: Text, Number or Date.
- Click Create.
How to import subscribers from a file
Section titled “How to import subscribers from a file”If your subscribers are in a spreadsheet, import them all at once from a CSV or TXT file.
-
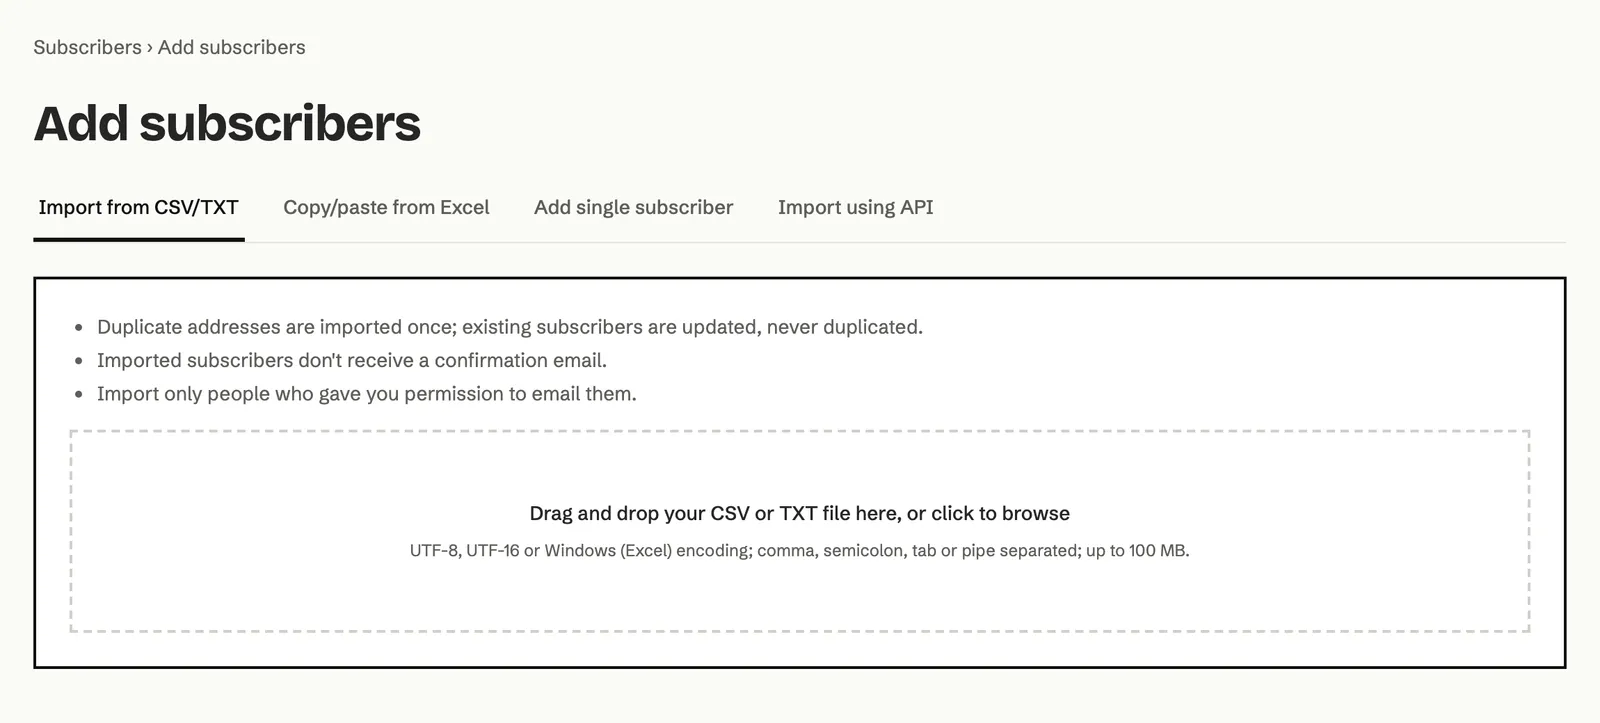
Click Add subscribers. The Import from CSV/TXT tab opens.
-
Drag the file into the dashed box, or click the box and pick the file from your computer. The file uploads and the Import settings page opens.
-
1. Add subscribers to groups: choose the group the imported subscribers should join, or type a new group name into Or add a new group.
-
2. File: if the sample looks wrong (symbols instead of accented letters, all data in one column), change the Encoding or the Separator. If the first row of the file has no column names, untick The first row contains column names.
-
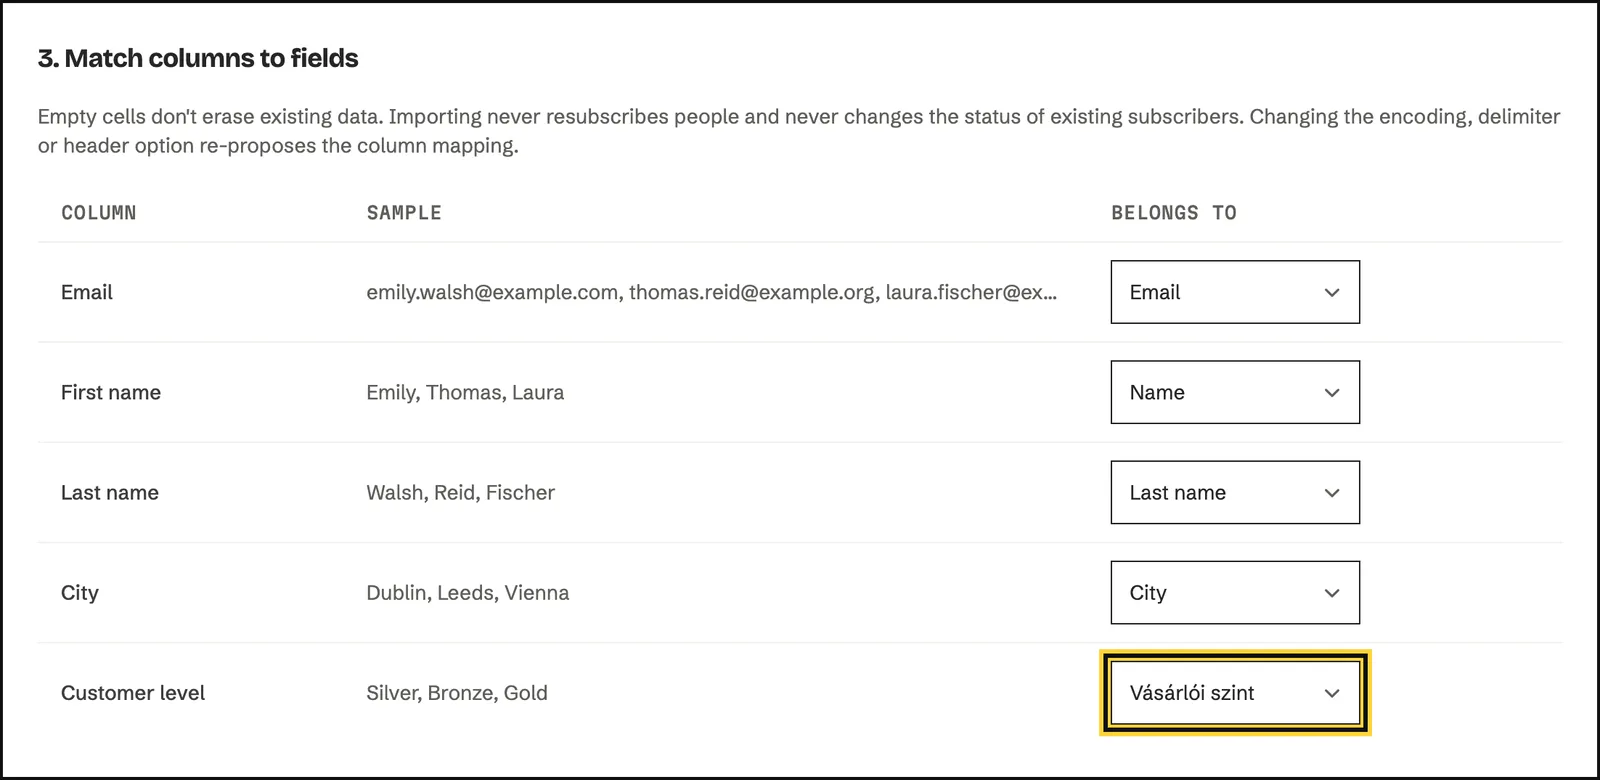
3. Match columns to fields: Echo suggests a field for each column based on the header. Check the Belongs to column and pick another field where needed. For columns you don’t want to import, choose Skip this column.
-
If an automation is linked to the chosen group and you want the imported subscribers to start it too, tick Yes, the imported subscribers should start the automation workflow.
-
Tick I confirm that these subscribers gave me permission to send them emails.
-
Click Import subscribers.

The import runs in the background, so you can leave the page. When it’s done, the page shows the result.
How to paste subscribers from Excel
Section titled “How to paste subscribers from Excel”For a few dozen rows you don’t need to save a file.
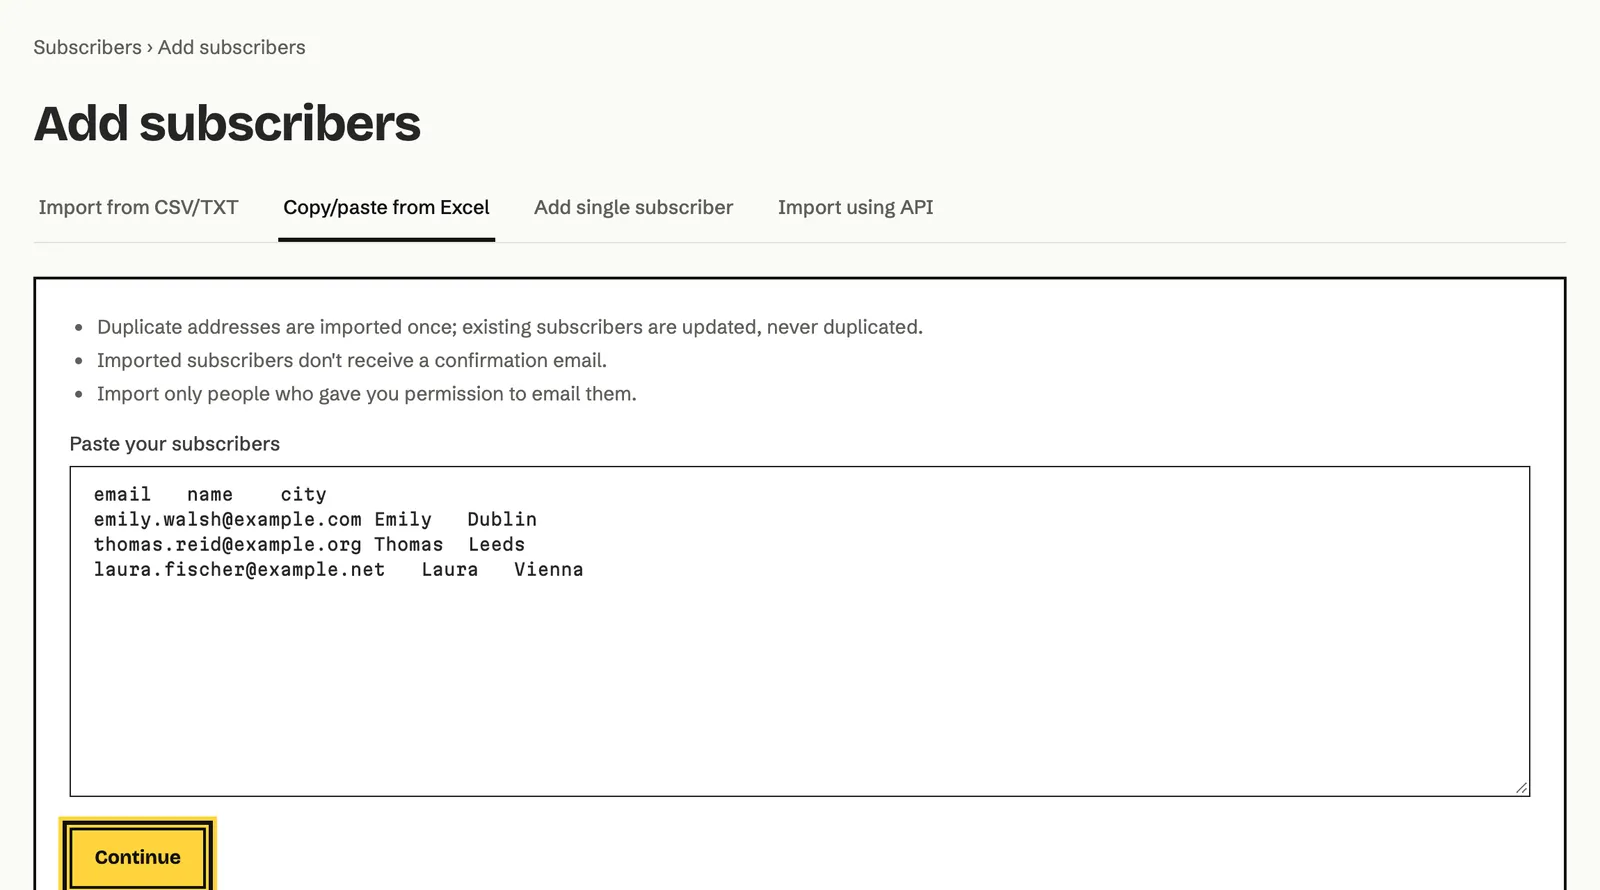
- Click Add subscribers, then the Copy/paste from Excel tab.
- Select the rows in your spreadsheet together with the header row, copy them and paste them into Paste your subscribers.
- Click Continue.
- From here, continue as with a file import: group, columns, confirmation, Import subscribers.
How to check the result of an import
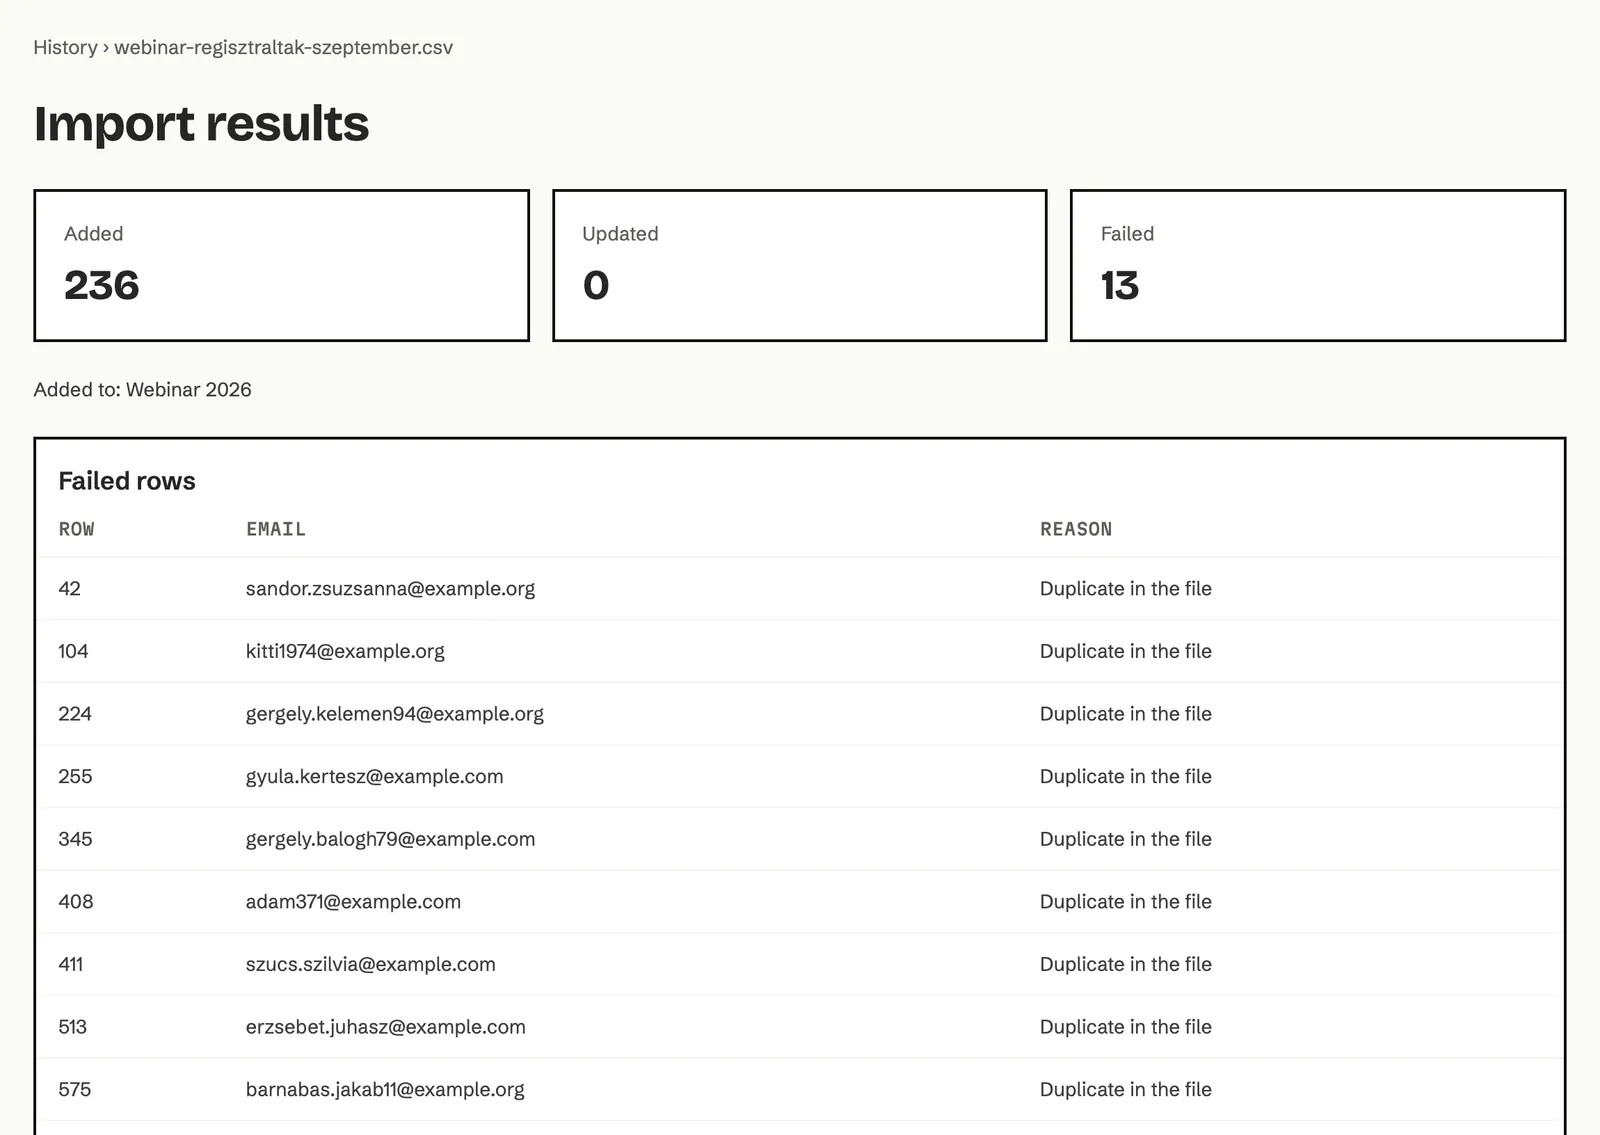
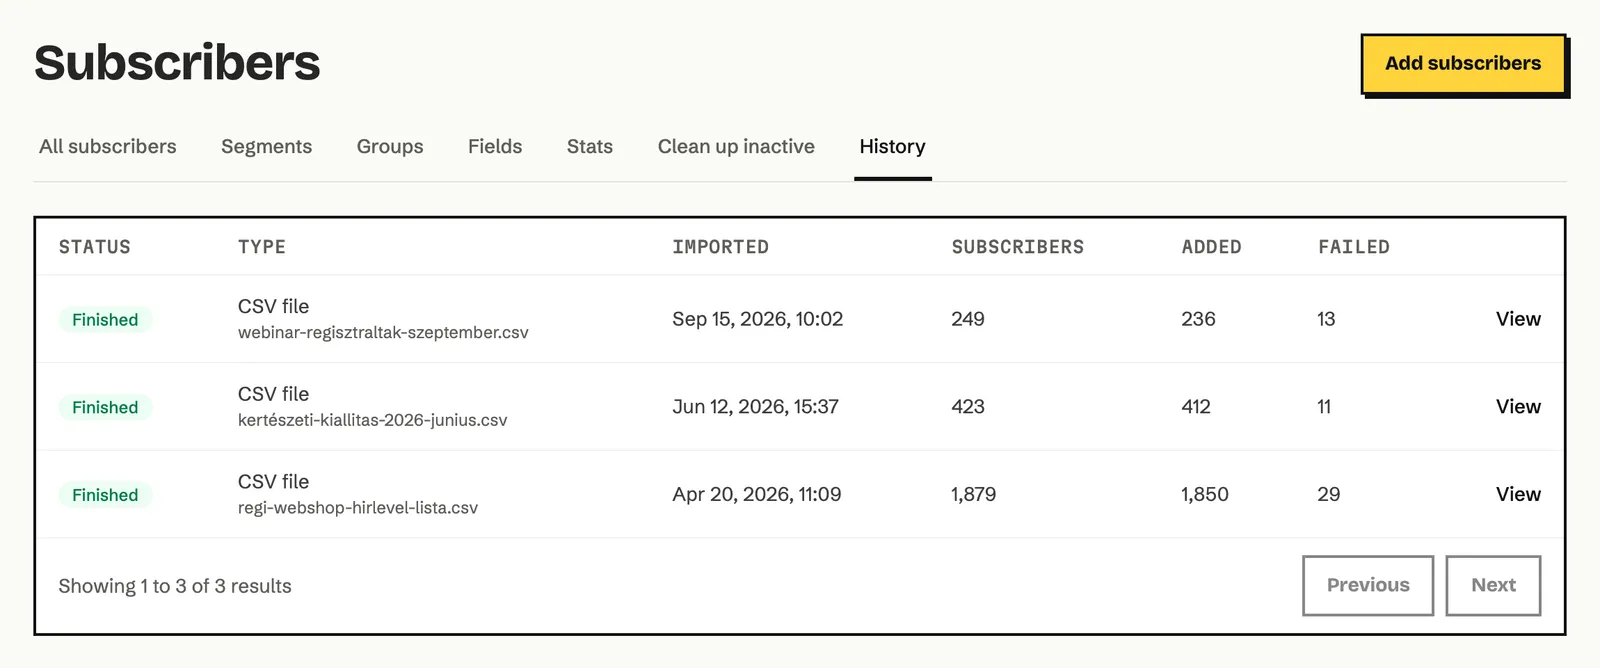
Section titled “How to check the result of an import”When an import finishes, the Import results page shows three numbers: how many new subscribers were added (Added), how many existing ones were updated (Updated) and how many rows didn’t make it (Failed). Below them, the Failed rows table tells you row by row what went wrong.
Earlier imports are on the History tab. Click View to open the result of an import.
The most common reasons a row fails:
| Reason | What to do |
|---|---|
| Duplicate in the file | Nothing: the address was already imported once. |
| Invalid email address / No email address | Fix the address in the file and import the fixed rows again. |
| Role address (e.g. abuse@) | Echo doesn’t add shared, role-based addresses (such as abuse@). Leave them out. |
| On the suppression list | The address bounced or made a spam complaint before, and can’t be added again. |
| Not a number / Not a date (use YYYY-MM-DD) | The value doesn’t fit the field type. Fix the format. |
How to clean up inactive subscribers
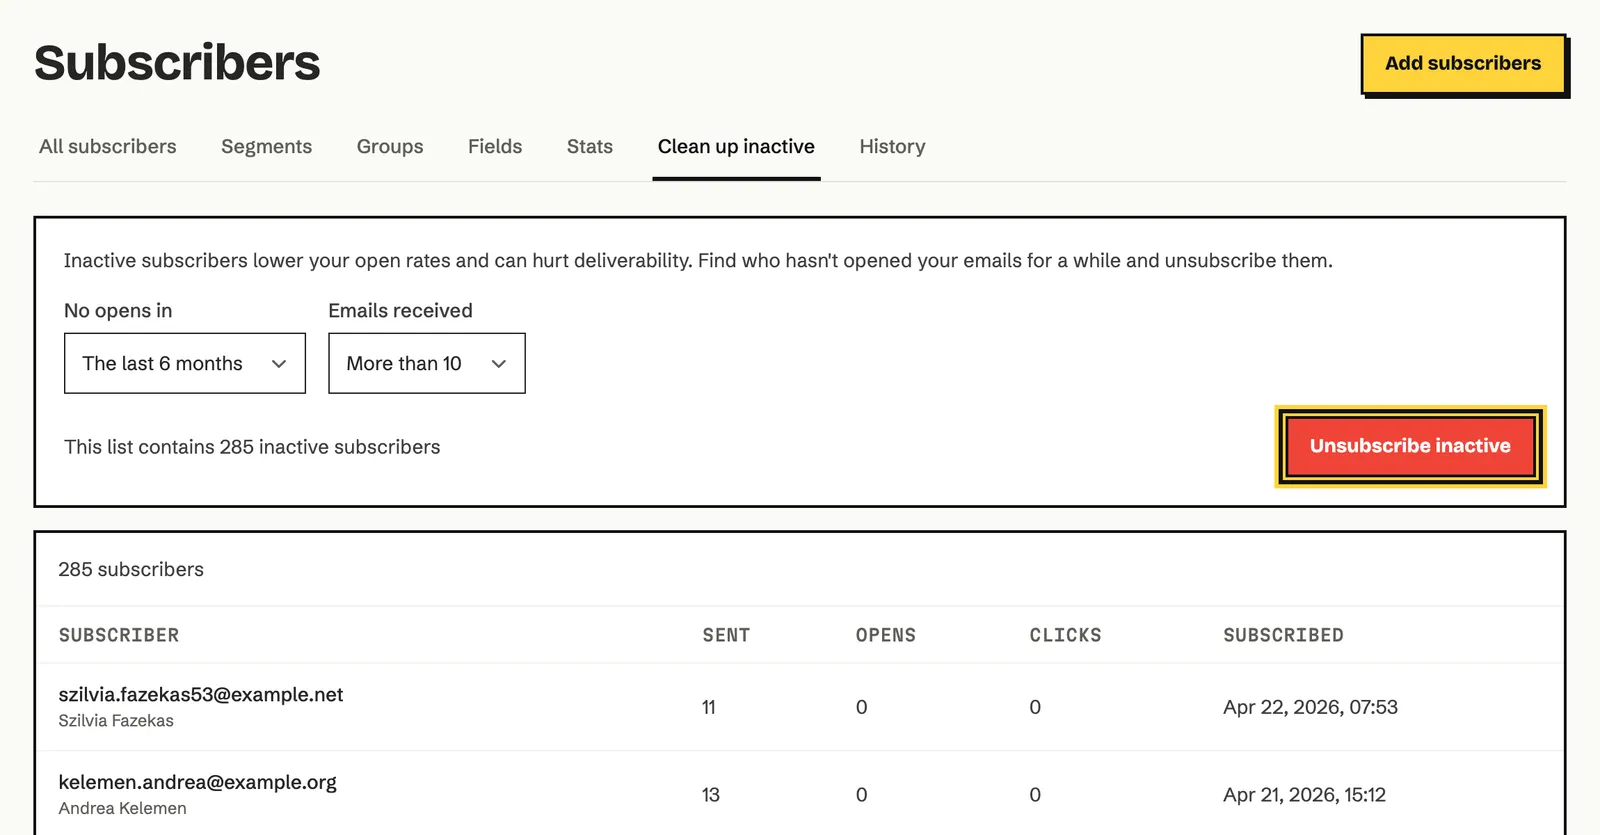
Section titled “How to clean up inactive subscribers”Subscribers who haven’t opened your emails for a long time lower your open rate and can hurt deliverability. On the Clean up inactive tab you can find them and unsubscribe them in one step.
- Open the Clean up inactive tab under Subscribers.
- In No opens in, choose the period (The last 6 months, The last 12 months, The last 24 months or Never opened).
- In Emails received, choose how many emails they have received. More than 10, for example, leaves out people who have only had a few emails from you.
- Check the list below. Above it you see how many subscribers match.
- If it looks right, click Unsubscribe inactive and confirm.
How to read the subscriber stats
Section titled “How to read the subscriber stats”- Open the Stats tab under Subscribers.
- In Showing, choose whose numbers you want: All subscribers, a group or a segment.
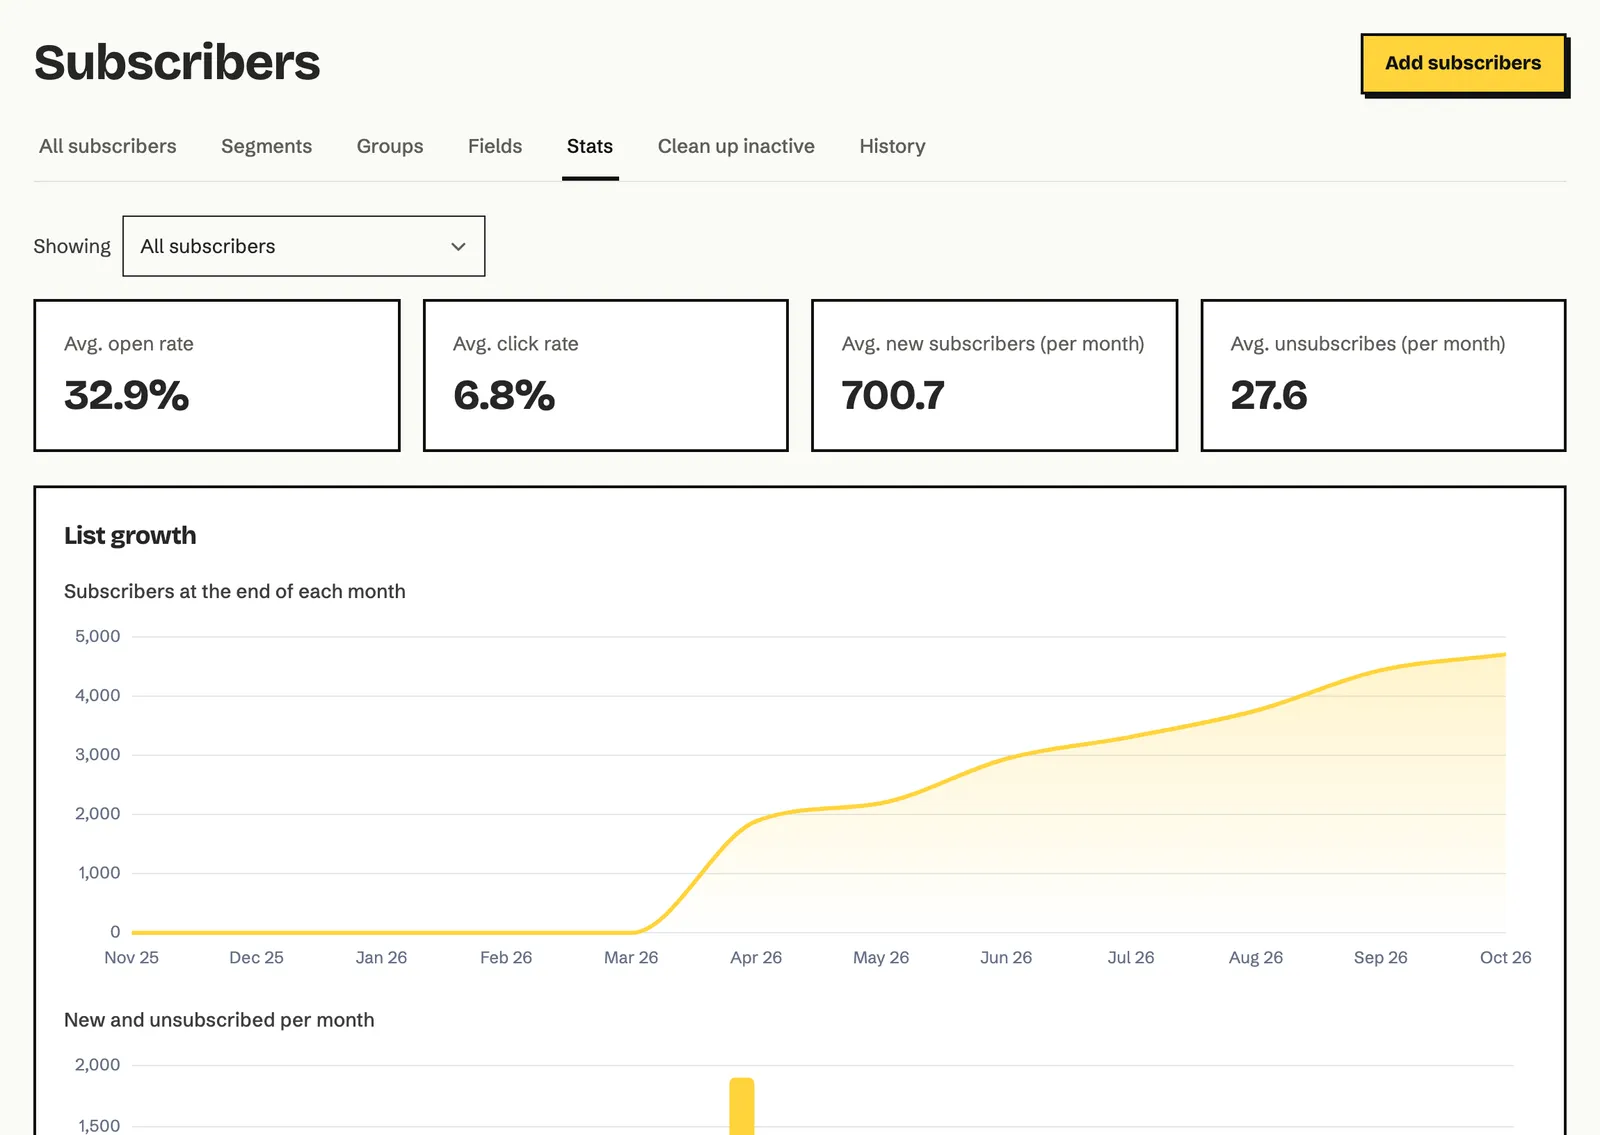
The four cards are Avg. open rate, Avg. click rate, Avg. new subscribers (per month) and Avg. unsubscribes (per month). The List growth chart covers the last 12 months: the top chart shows the number of subscribers at the end of each month, the bottom one the new and unsubscribed subscribers per month.
Someone emailed us asking to delete all their data. What do I do? Open their profile and choose Forget in the Actions menu. This is the GDPR erasure. If you also need to send them their data, download it first with Export JSON.
I unsubscribed someone by mistake. Can I undo it? Not in the app. A new import or adding them by hand doesn’t change the unsubscribed status either, so always check your selection before unsubscribing.
Why are there fewer subscribers than rows in my file? The Failed number and the Failed rows table in the import result show which rows were left out and why. The most common reasons are duplicates within the file and invalid addresses. Addresses already on your list are counted under Updated, not Added.
What’s the difference between a group and a segment? You put subscribers into a group yourself, while a segment is a saved filter that updates on its own. The Groups and segments chapter explains both.
Why can’t I see the export options? Only users with the Administrator role can export. Ask your workspace administrator to export for you or to change your role.