
Getting started
This chapter walks you through signing in, the layout of the app and the numbers on the Dashboard, and shows how to invite your teammates and what each role lets them do.
How to sign in to Echo
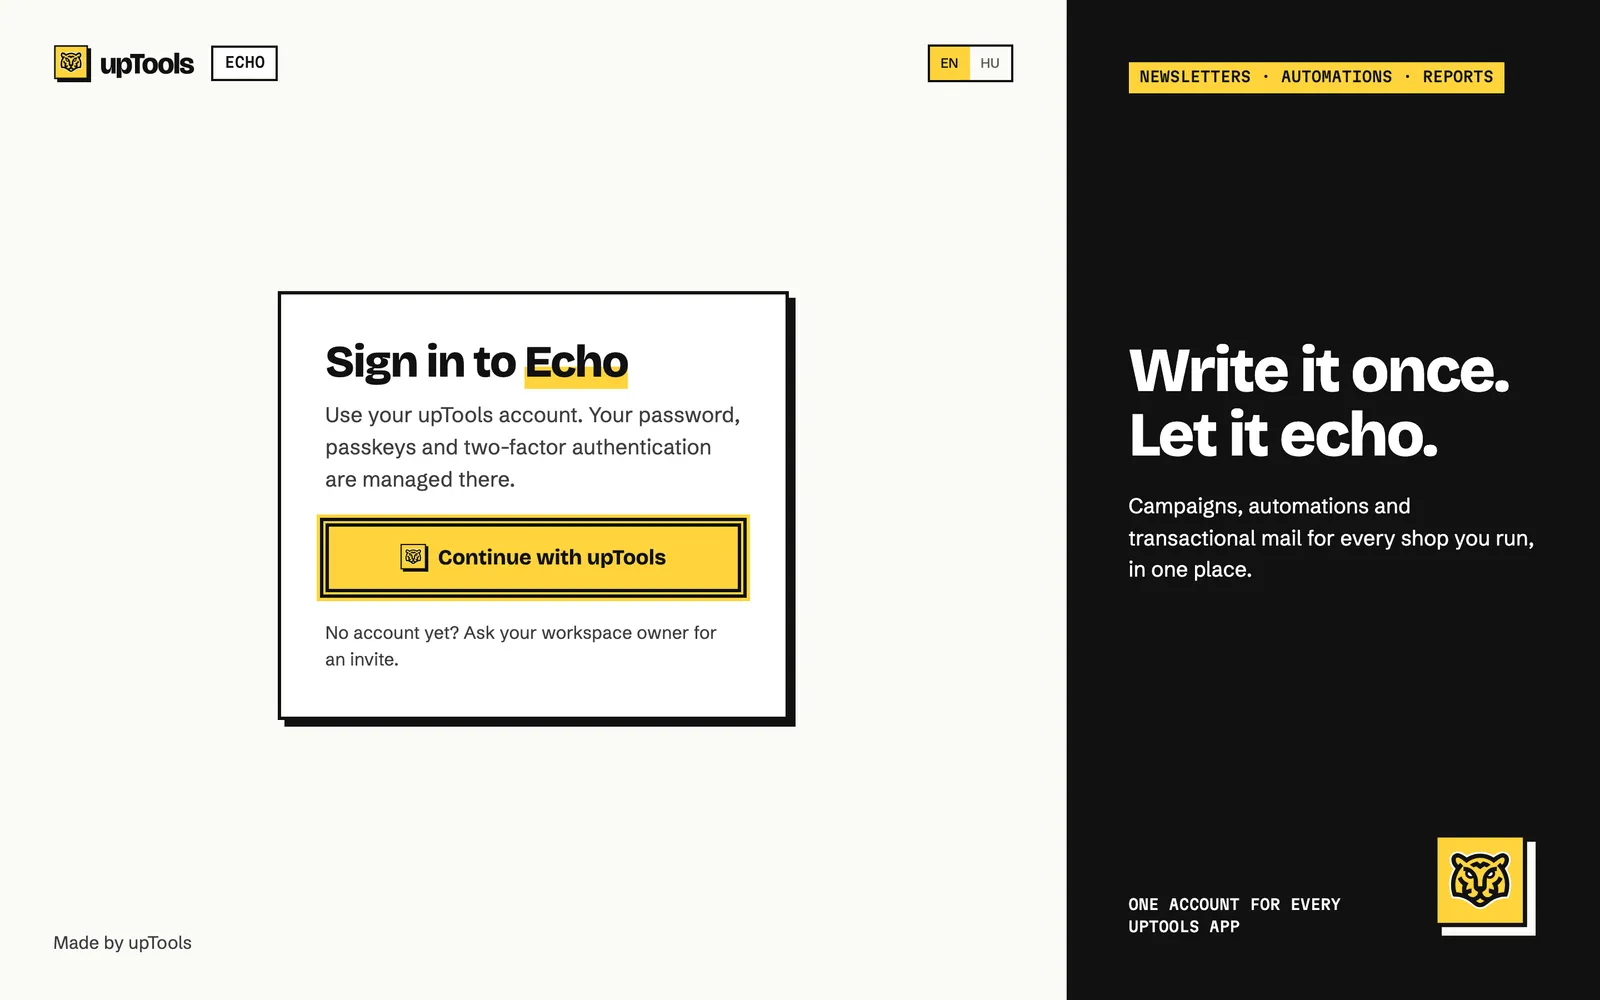
Section titled “How to sign in to Echo”You sign in to Echo with your upTools account. Your password, passkeys and two-factor authentication are managed in your upTools account, not in Echo.
- Open the Echo sign-in page.
- Click Continue with upTools.
- Sign in to your upTools account. You then land back in Echo, on the Dashboard.
How to accept an invitation
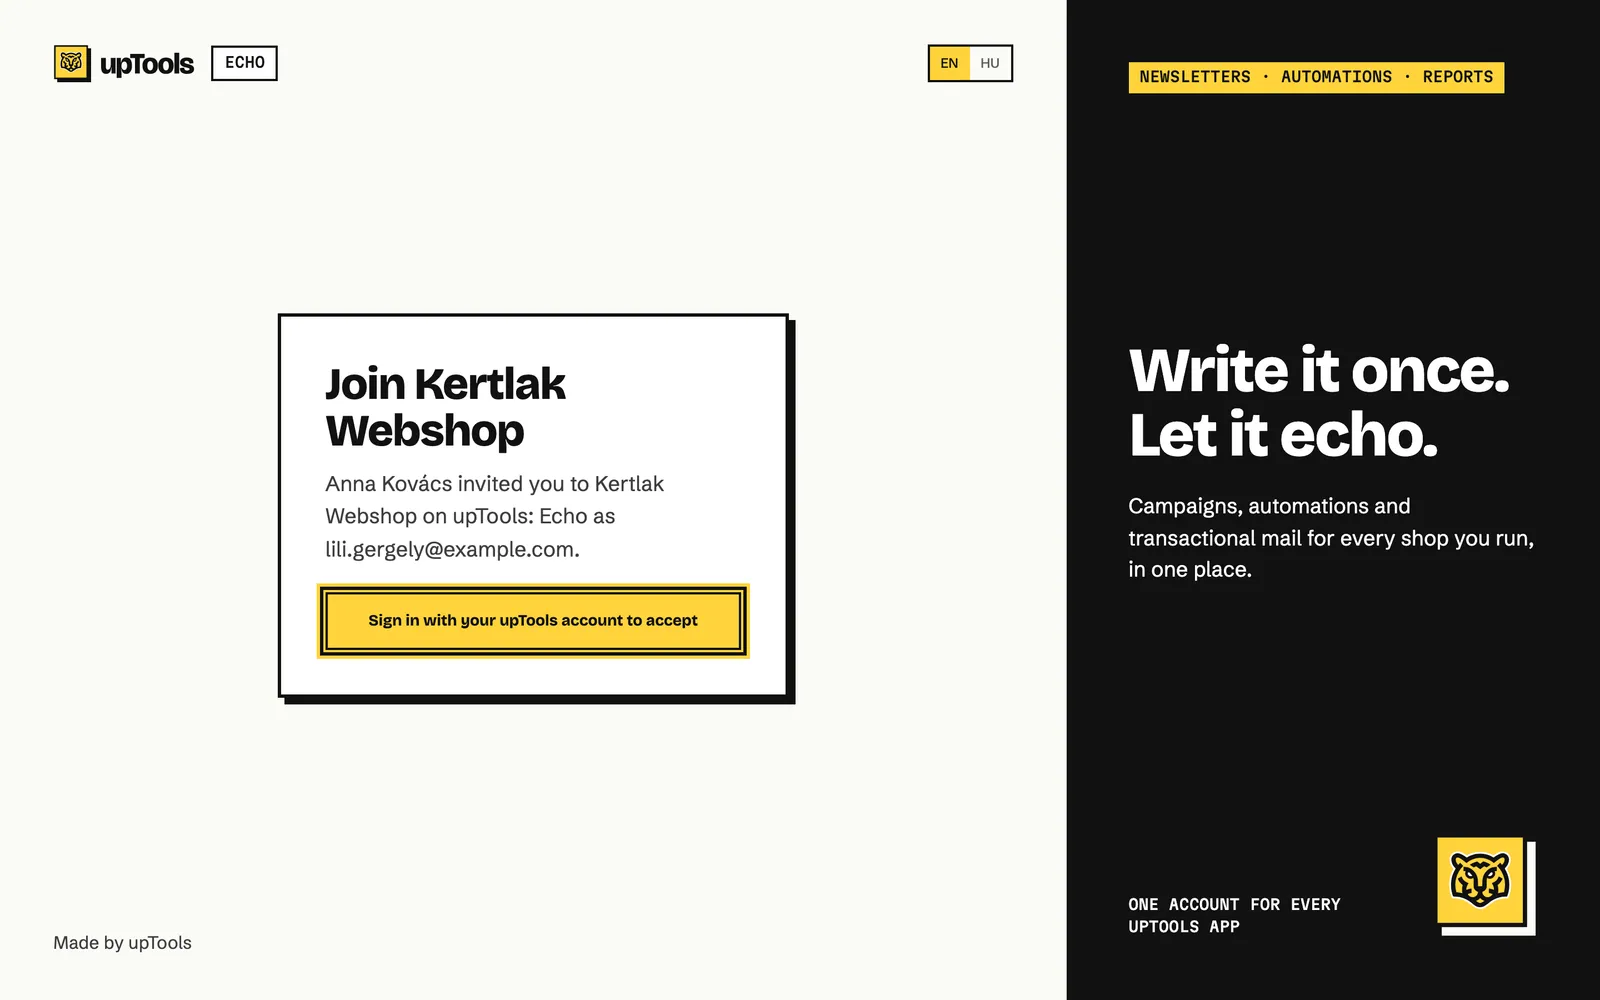
Section titled “How to accept an invitation”When a teammate invites you, you get an email with a link. The link works for 7 days.
- Click the link in the invitation email. The Join … page opens with the workspace name, the name of the person who invited you and the email address the invitation is for.
- If you aren’t signed in, click Sign in with your upTools account to accept and sign in with the upTools account that has this email address. You come back to this page afterwards.
- Click Accept invitation. Echo opens the Dashboard of your new workspace.
The layout of the app
Section titled “The layout of the app”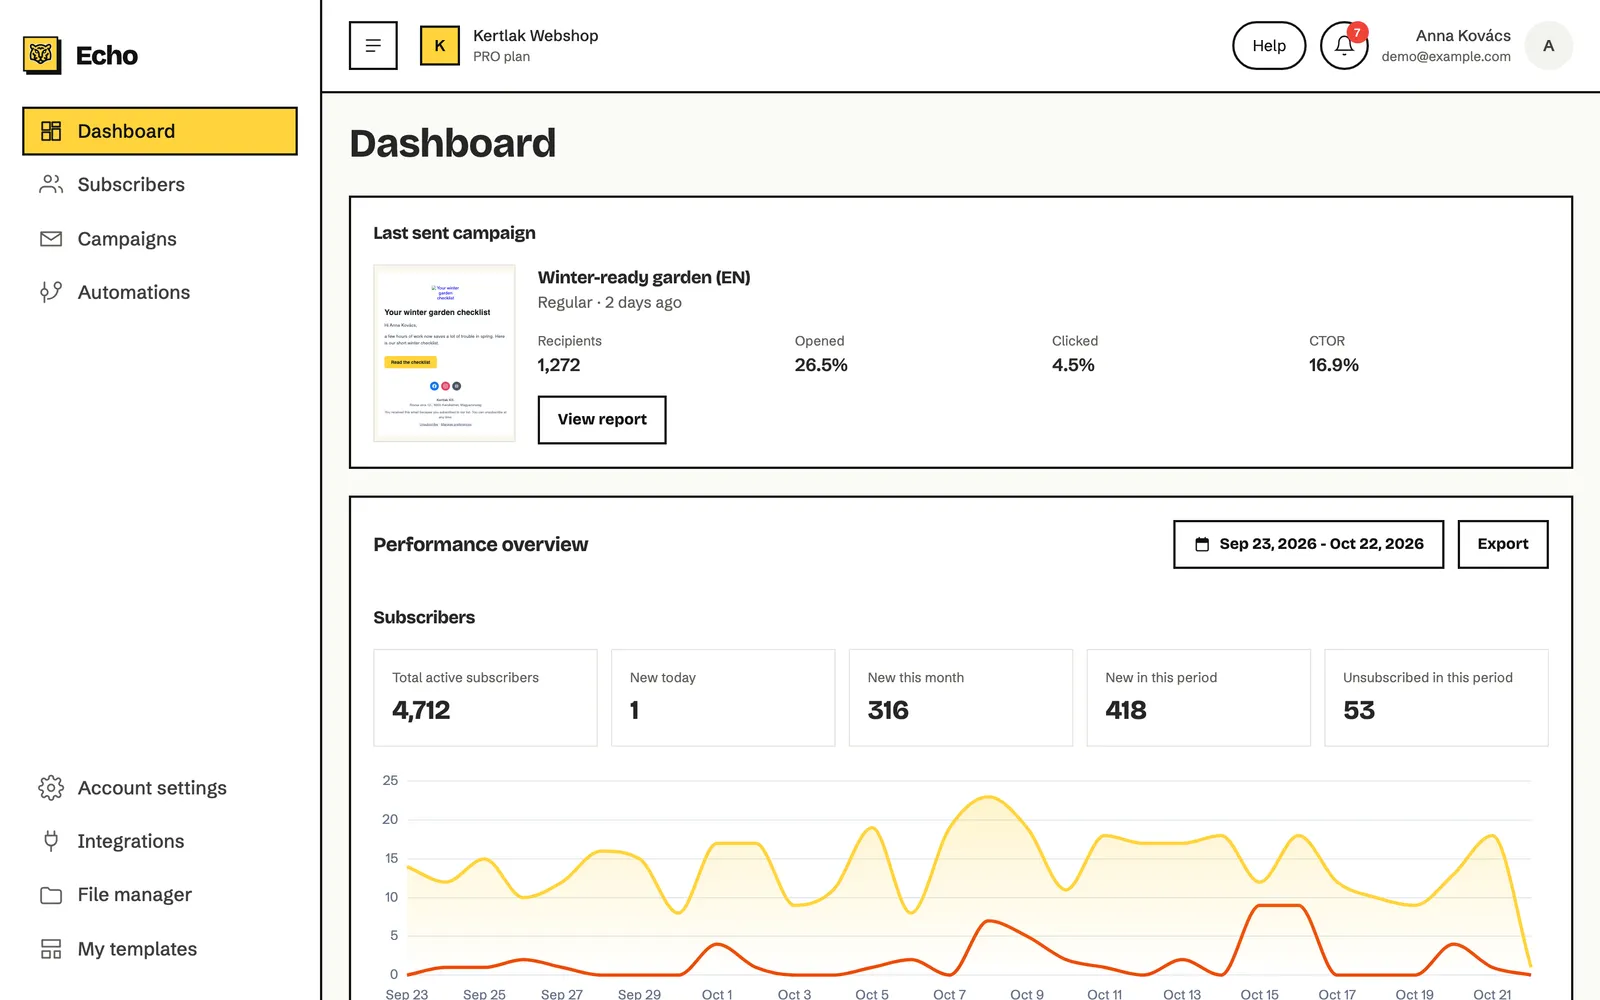
The left menu
At the top are the everyday areas: Dashboard, Subscribers, Campaigns and Automations. At the bottom are settings and tools: Account settings, Integrations, File manager and My templates. You only see the items your role gives you access to.
The top bar
- The leftmost button collapses or expands the left menu. Collapsed, only the icons show. On smaller screens the same button opens the menu.
- Next to it is the name of your workspace with your plan below it. Click it to switch workspaces.
- On the right, Help opens this guide in a new tab.
- Next to it, the bell shows your notifications.
- At the far right are your name and email address. Click them to open the user menu.
The user menu
| Menu item | What it does |
|---|---|
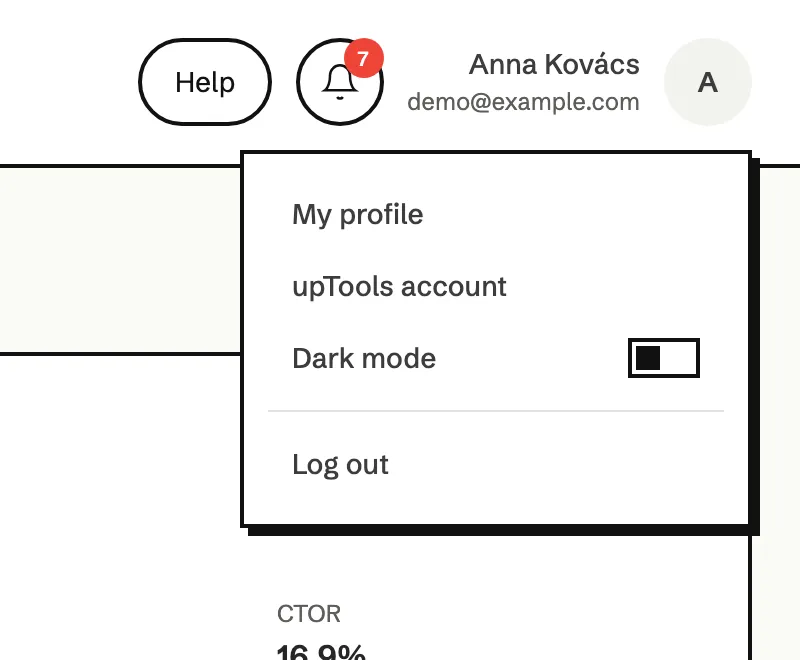
| My profile | Opens your own profile: your details, the language and your security settings. |
| upTools account | Opens your upTools account in a new tab, where you manage your name, password and two-factor authentication. |
| Dark mode | Switches the app to dark colours. Click again to switch back. |
| Log out | Signs you out of Echo on this device. |
How to switch workspaces
Section titled “How to switch workspaces”If you have access to more than one workspace, for example two shops, you switch between them in the top bar. Each workspace has its own subscribers, campaigns and settings.
- Click the workspace name in the top bar.
- In the Workspaces list, click the workspace you want to work in. The tick shows the current one.
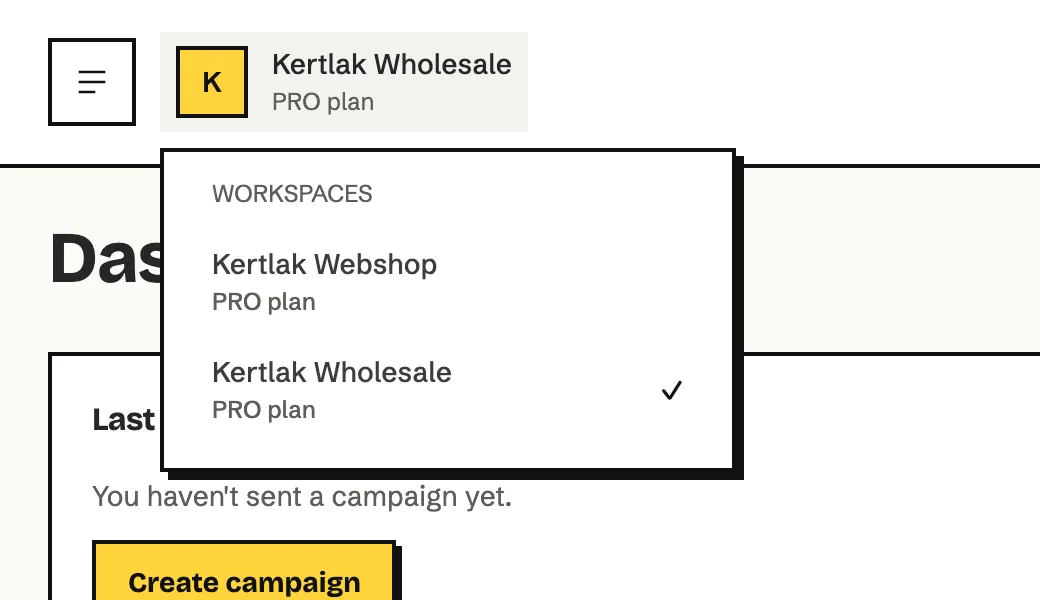
From then on Echo shows the data of the chosen workspace on every page.
How to read your notifications
Section titled “How to read your notifications”The red number on the bell is the number of unread notifications. Echo refreshes it every minute.
- Click the bell in the top bar.
- Click a notification. A campaign notification opens the campaign’s report, a finished import opens the import result.
- When you’ve read them all, click Mark all as read.
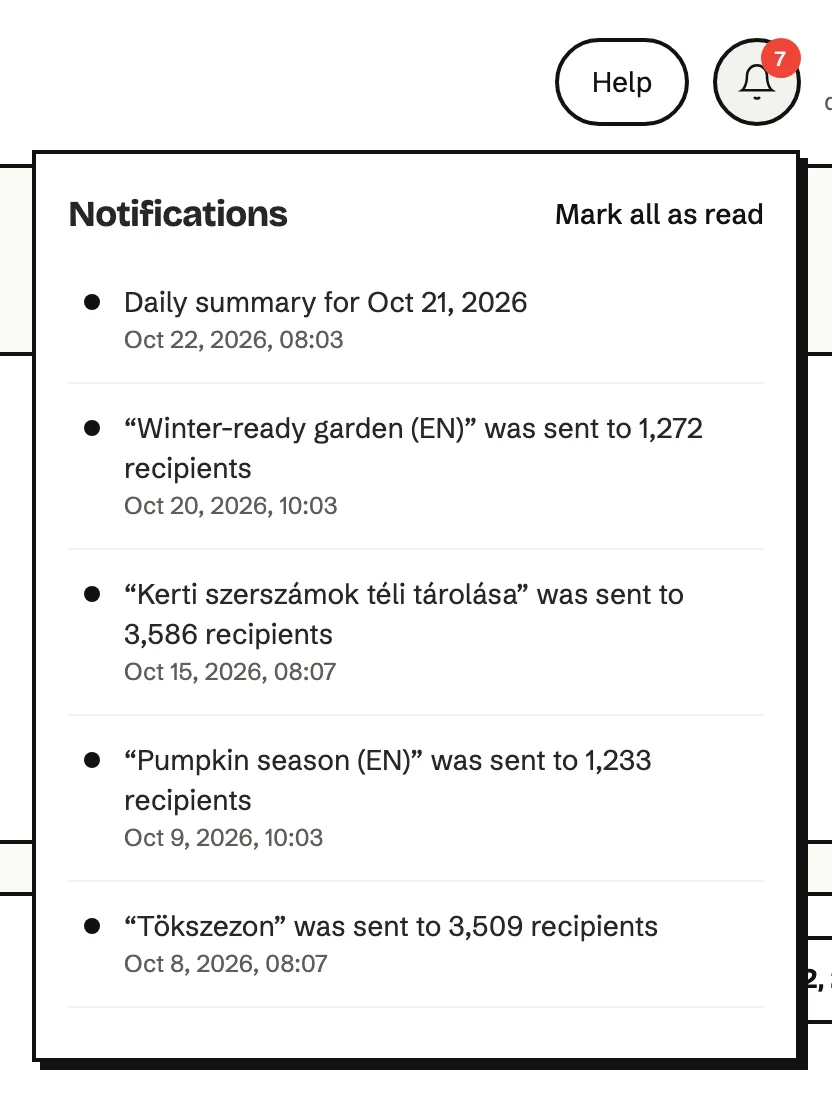
The Dashboard
Section titled “The Dashboard”The Dashboard shows the key numbers in one place: your last campaign, how your subscriber list changes, and how your campaigns and automations perform. You only see the parts your role gives you access to.
Let’s get you started
In a new workspace, the Let’s get you started list at the top shows four steps: your first email, your brand styles, your subscribers and your domain. Click a step’s title to open its page, or tick it off with Mark completed. The list disappears when every step is done, or when you click Dismiss checklist.
Last sent campaign
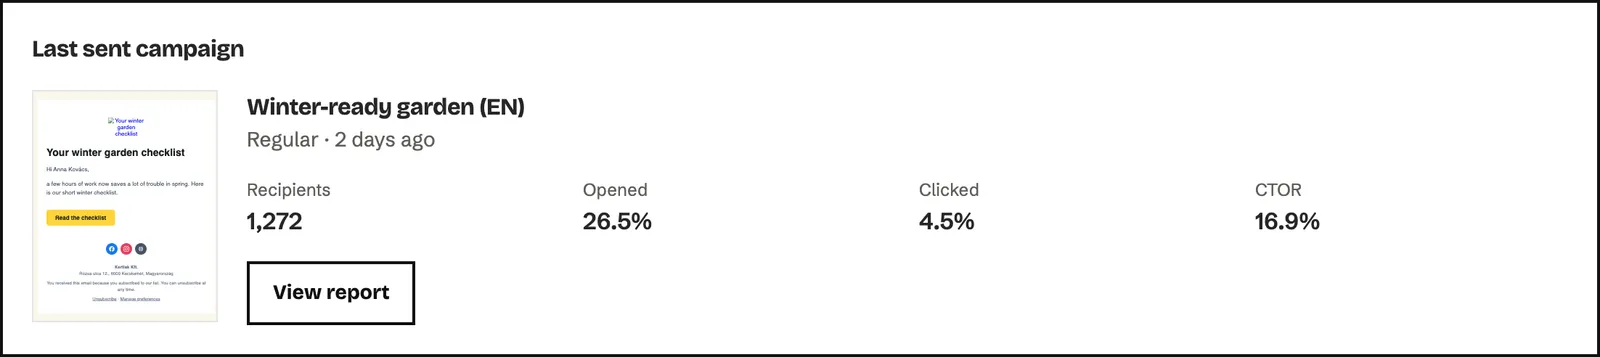
The card shows a thumbnail of your most recent campaign, its name, type and how long ago it went out. Next to it are the Recipients, the Opened and Clicked rates and the CTOR: the share of openers who clicked. View report opens the full campaign report, covered in the Reports chapter.
Performance overview
At the top of the card are the period picker and the Export button. By default you see the last 30 days, in the workspace’s time zone. For another period, click the dates, pick the first and the last day, then click Apply. You can pick up to 366 days.
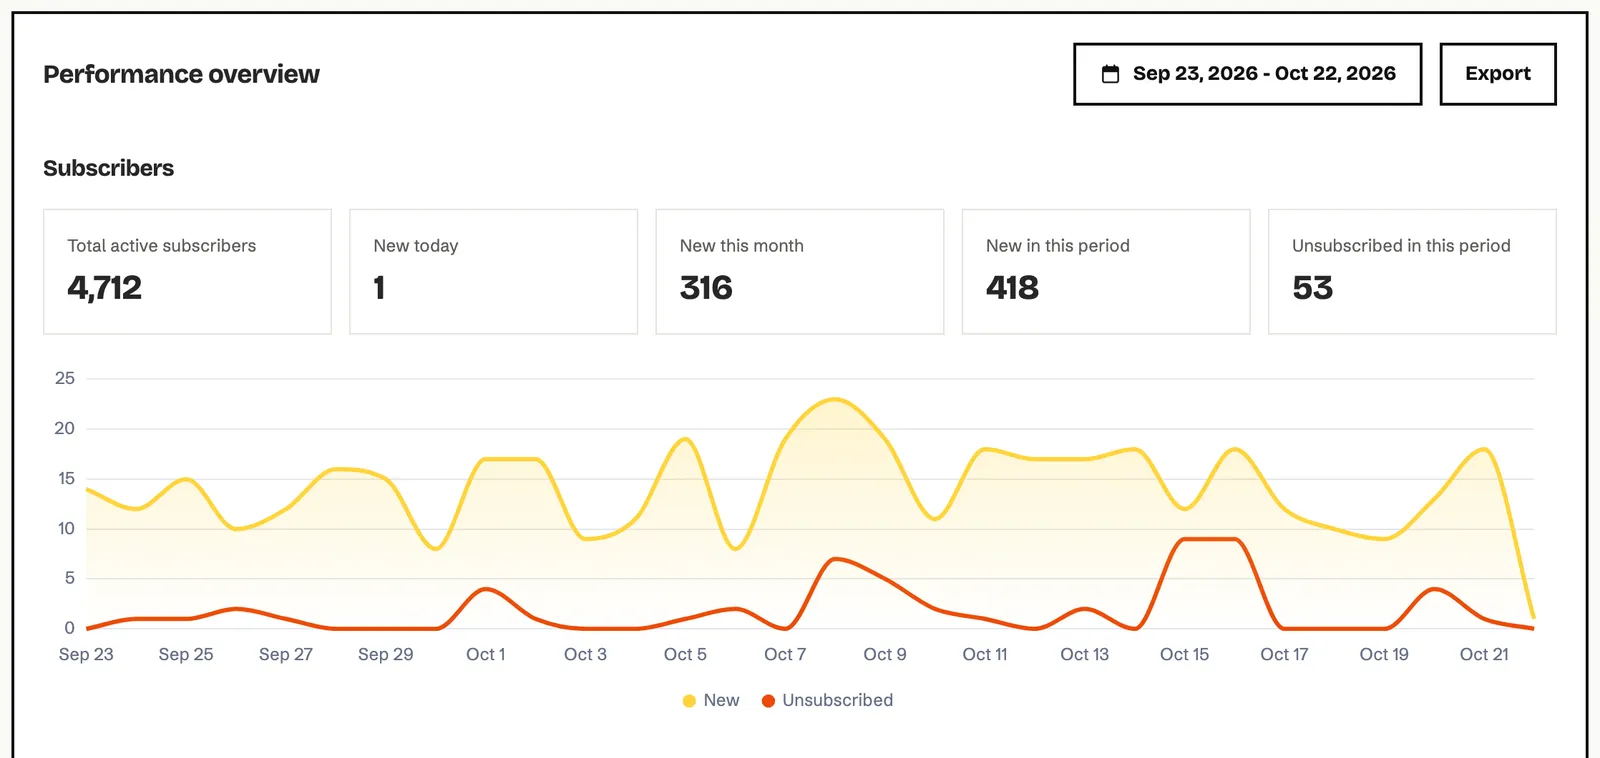
The Subscribers part:
| Metric | What it means |
|---|---|
| Total active subscribers | How many active subscribers you have now. It doesn’t depend on the period. |
| New today | How many people subscribed today. |
| New this month | How many people subscribed since the start of the month. |
| New in this period | How many people subscribed in the chosen period. |
| Unsubscribed in this period | How many people unsubscribed in the chosen period. |
Below them, the chart shows new and unsubscribed subscribers per day.
The Campaigns part:
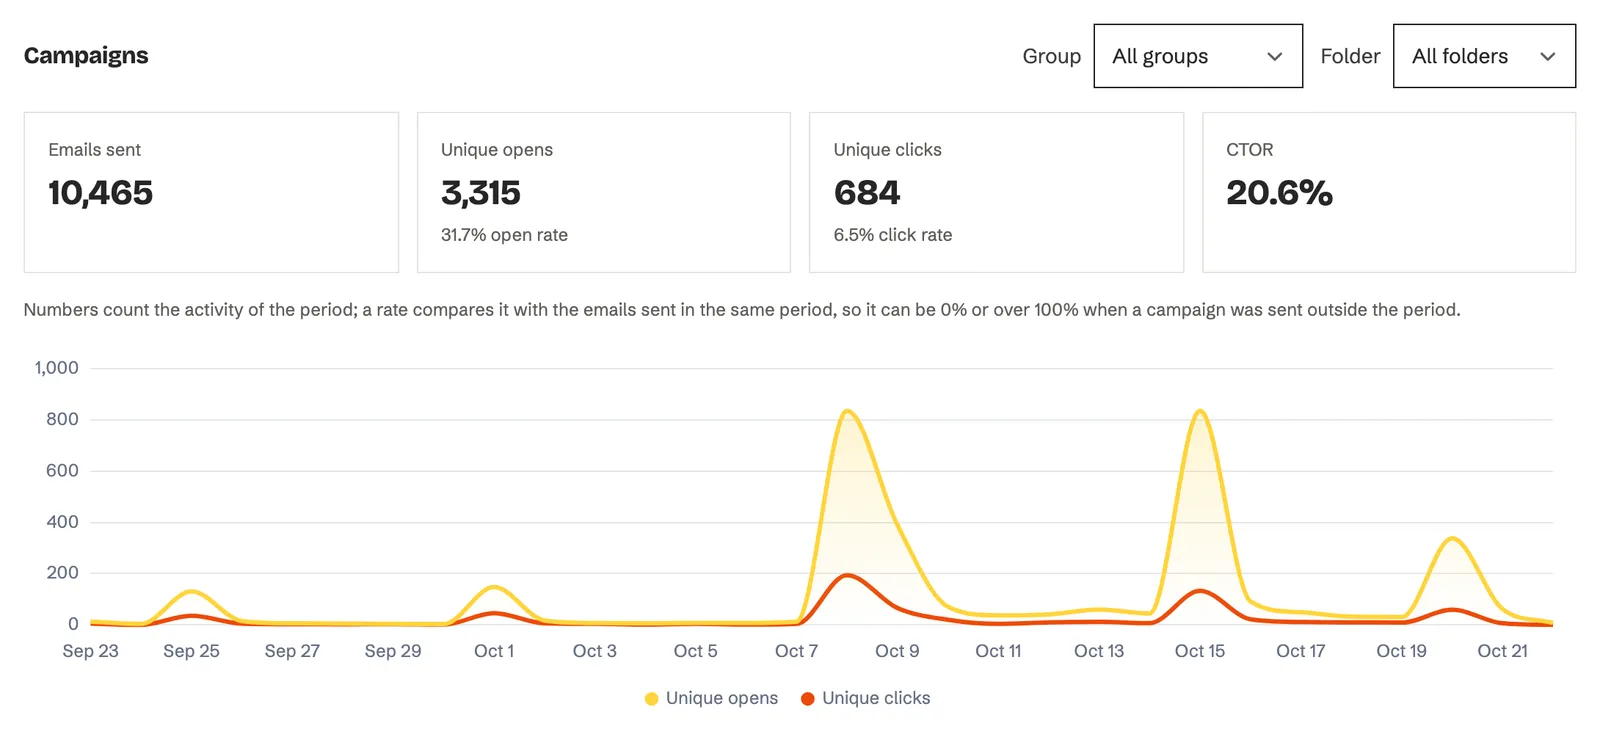
| Metric | What it means |
|---|---|
| Emails sent | How many campaign emails went out in the period. |
| Unique opens | How many recipients opened your emails, with the open rate below. |
| Unique clicks | How many recipients clicked in your emails, with the click rate below. |
| CTOR | The share of openers who clicked. |
Use the Group list to narrow the numbers to the recipients in one group, and the Folder list to the campaigns in one campaign folder. The chart shows unique opens and clicks per day.
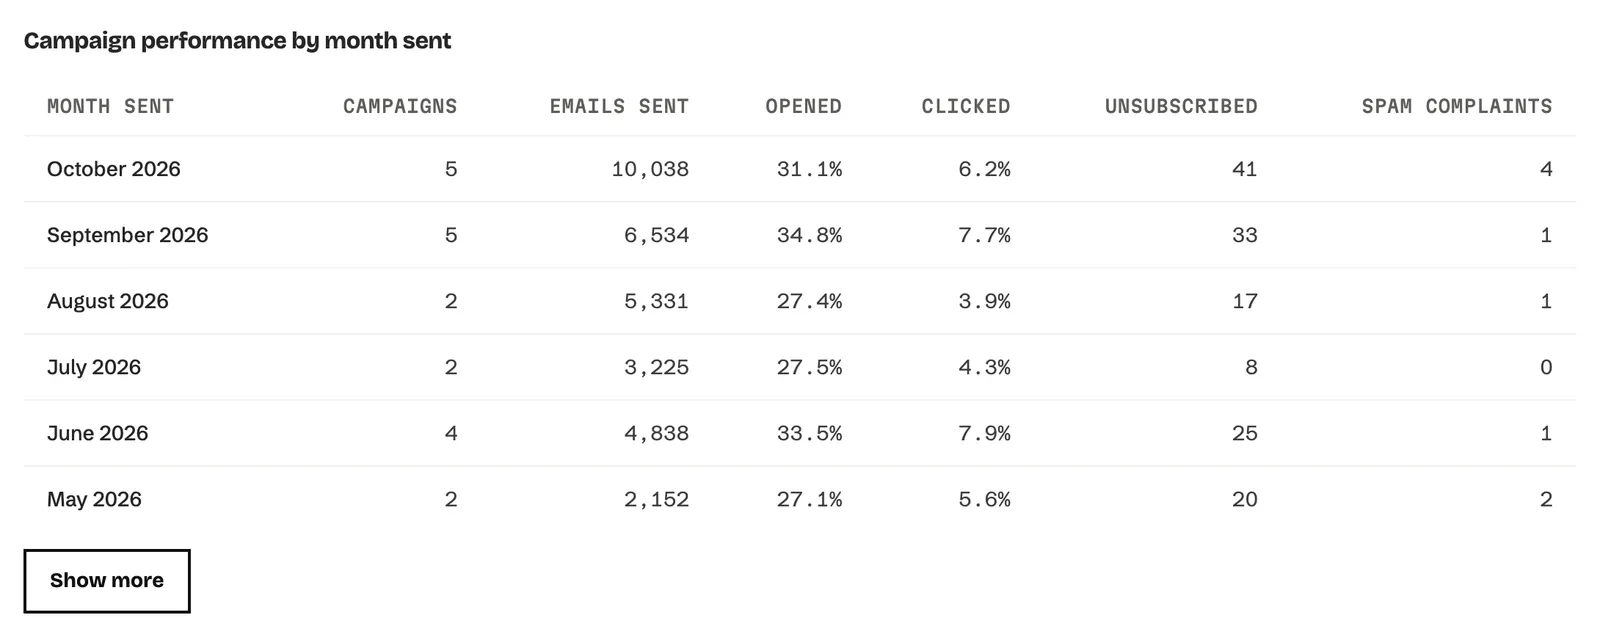
The Campaign performance by month sent table sums up your campaigns per month: how many campaigns and emails went out, the open and click rates, how many people unsubscribed and how many spam complaints came in. You see the last six months by default, and Show more loads six earlier months. The Group and Folder filters apply to the table too.
The Automations part:

| Metric | What it means |
|---|---|
| Active workflows | How many automations are running now. |
| In progress | How many subscribers are going through an automation right now. |
| Completed | How many reached the end of an automation in the period. |
| Emails sent | How many automation emails went out in the period. |
| Unsubscribed | How many people unsubscribed from an automation email in the period. |
Here the Group list narrows the numbers to the automations that start when someone joins that group. Automations are covered in the Automations chapter.
How to export the Dashboard numbers
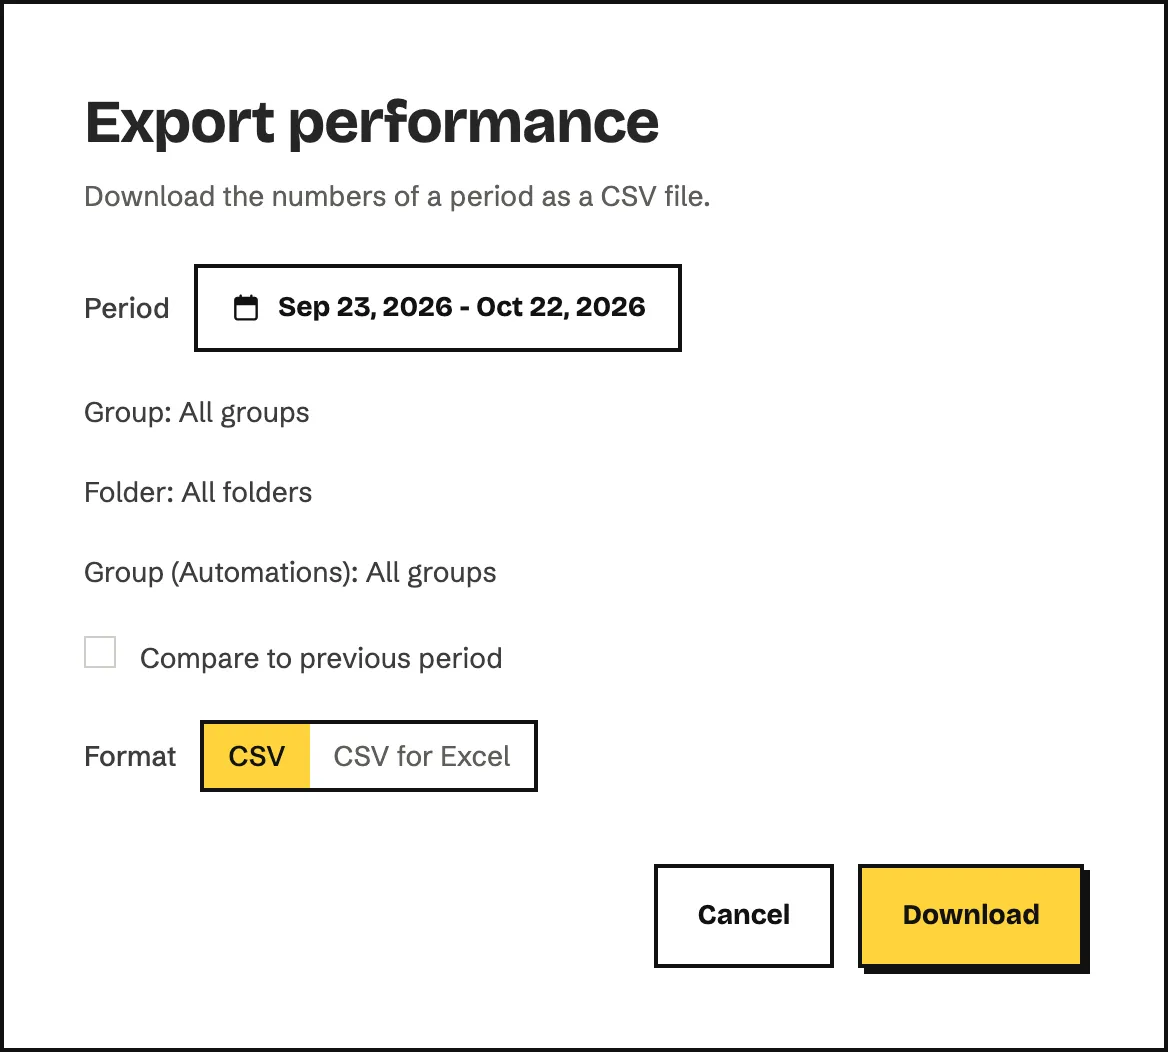
Section titled “How to export the Dashboard numbers”- Click Export on the Performance overview card.
- Next to Period, choose the period you want.
- To see the change as well, tick Compare to previous period. The file then also has the numbers of the previous period of the same length and the change in percent.
- Next to Format, choose CSV or CSV for Excel. Excel opens the Excel version with the right accented characters on a double-click.
- Click Download.
The My profile page
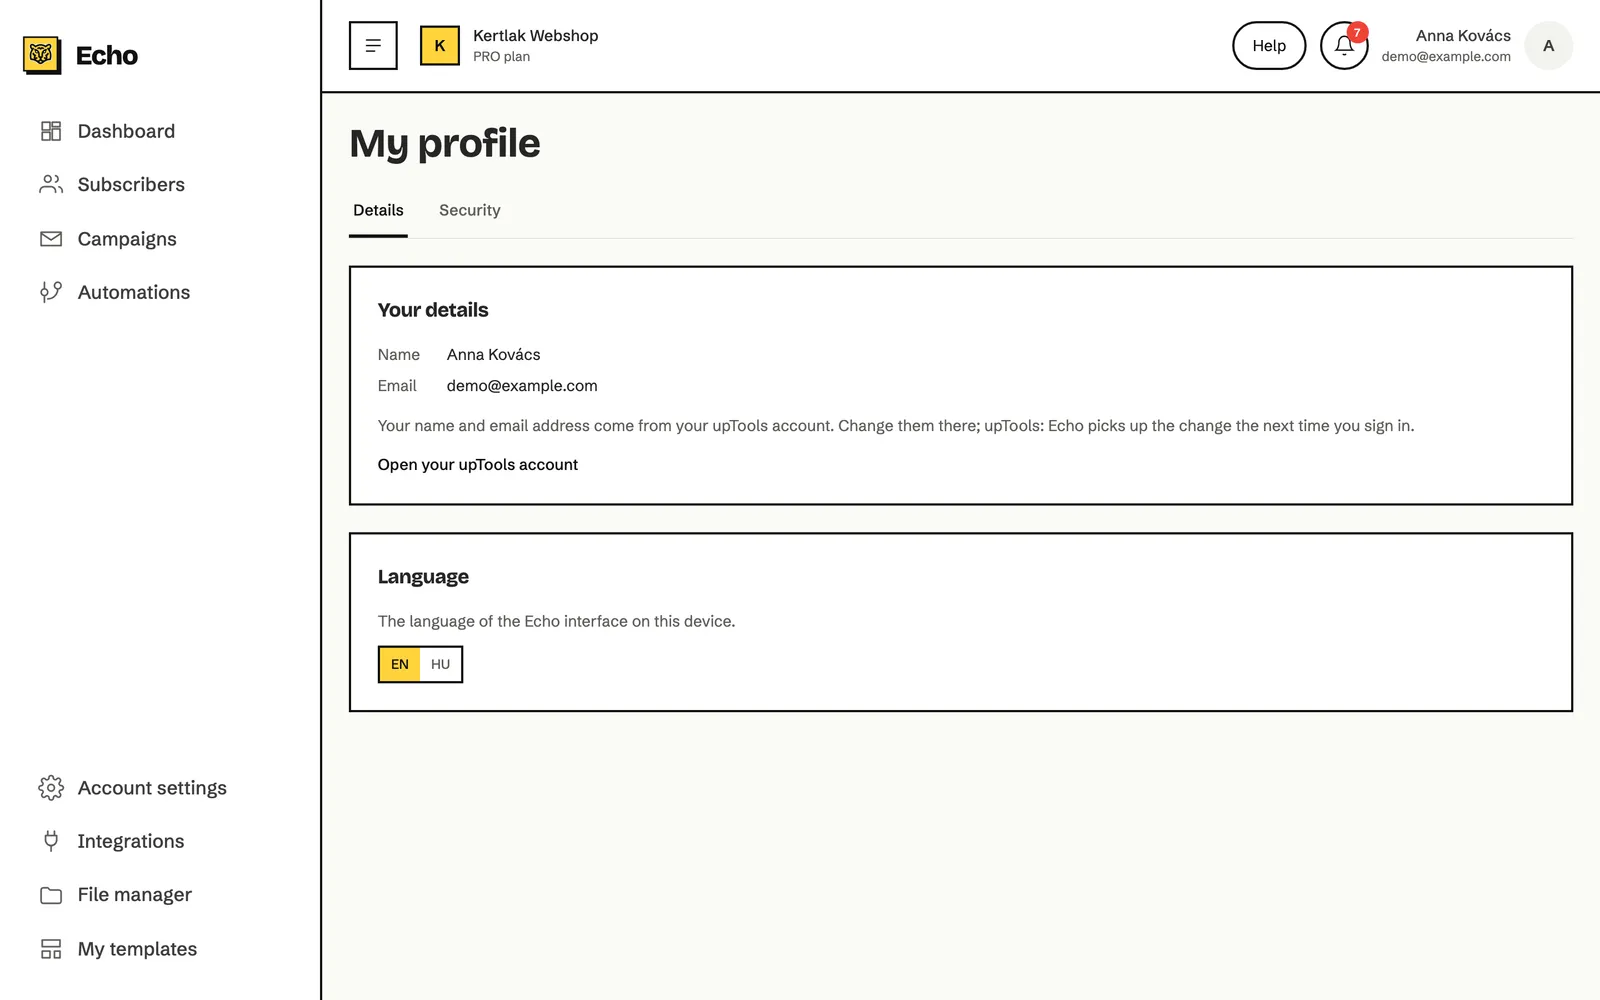
Section titled “The My profile page”You open My profile from the user menu. It has two tabs: Details and Security.
Details
- Your details: your name and email address. They come from your upTools account, so you can’t edit them here. Use the Open your upTools account link to change them, and Echo picks up the change the next time you sign in.
- Language: choose the language of the app with the EN and HU buttons. The setting applies to the device you’re using.
Security
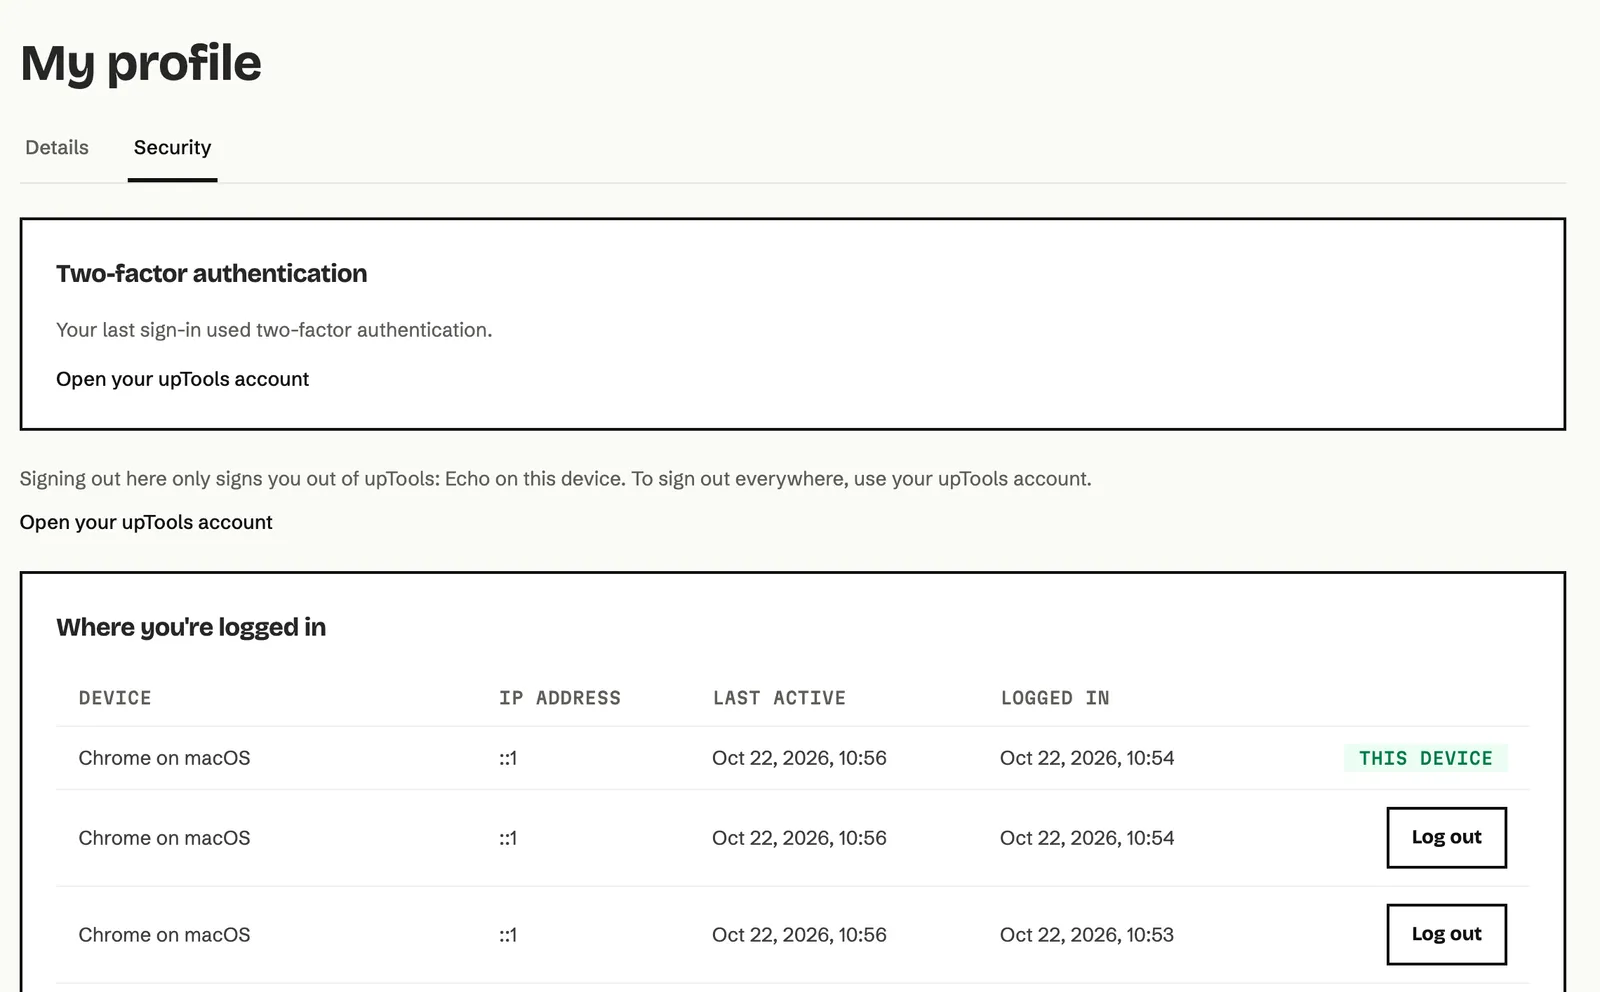
- Two-factor authentication: shows whether your last sign-in used two-factor authentication. You turn it on in your upTools account, then sign in again.
- Where you’re logged in: your Echo sessions with the device, IP address and times. This device marks the current one. Log out another device with Log out at the end of its row, or all the others at once with Log out all other devices.
- Login history: logins to your account in the last 90 days, with the result and the workspace.
How to set up the company profile
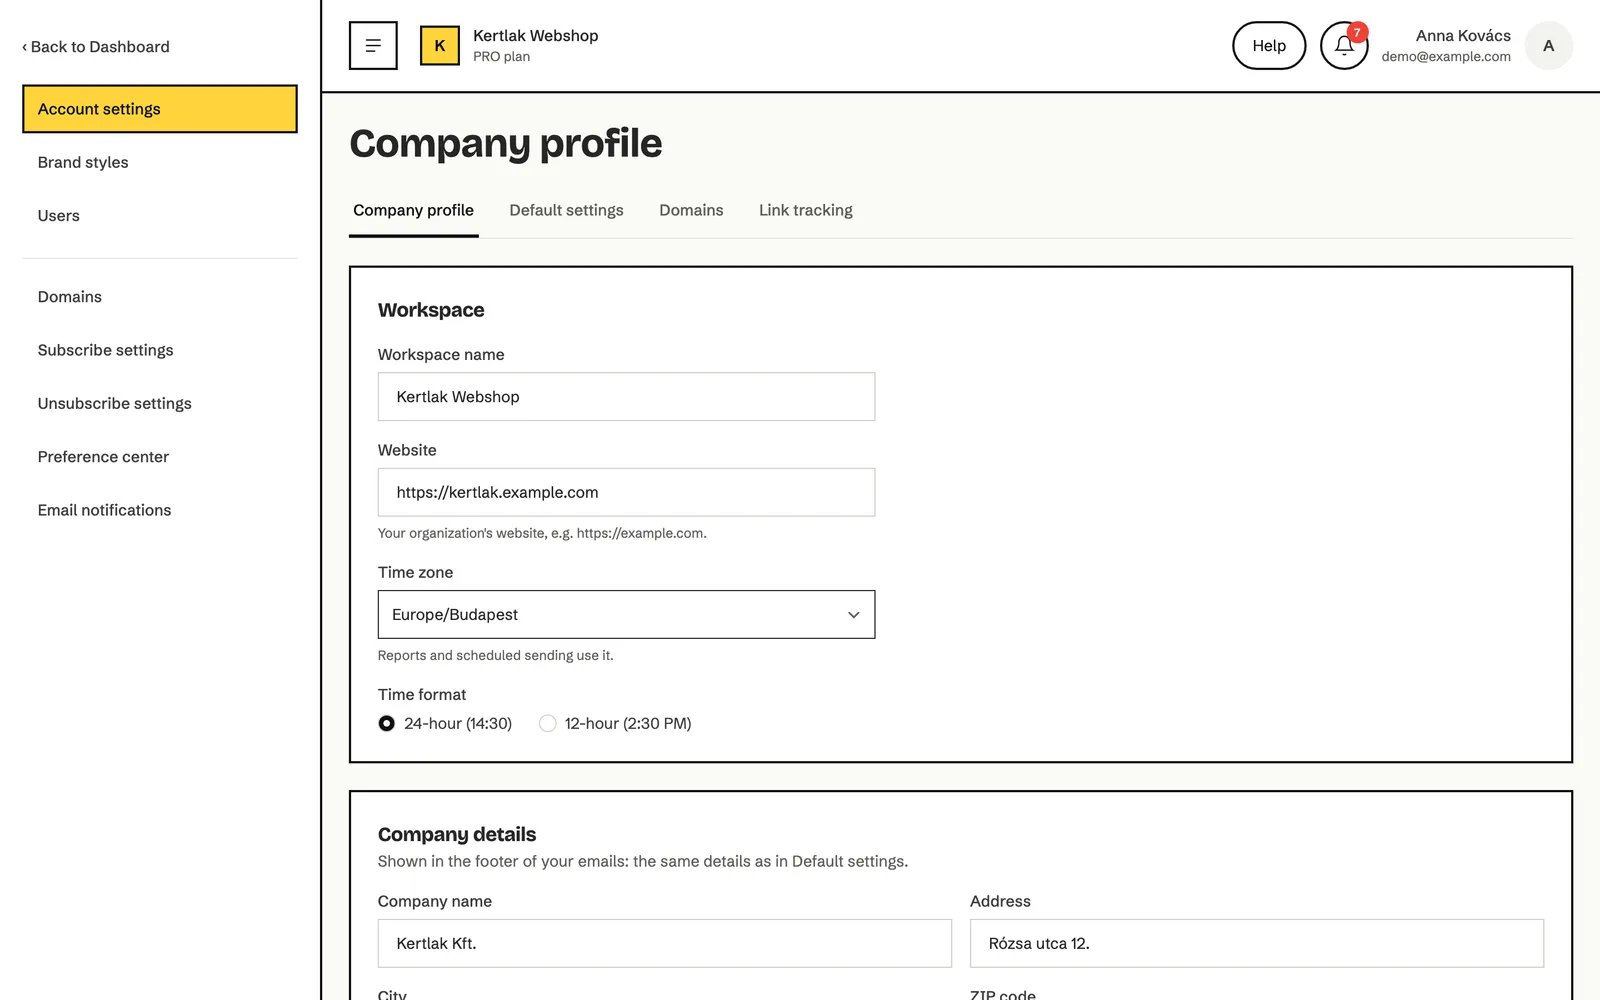
Section titled “How to set up the company profile”The company profile holds the basics of your workspace: its name, website, time zone and your company details.
- Click Account settings in the left menu. The Company profile page opens on the Company profile tab.
- In the Workspace part, fill in Workspace name, Website and Time zone, and choose a Time format.
- In the Company details part, fill in your company name and address.
- Click Save changes.
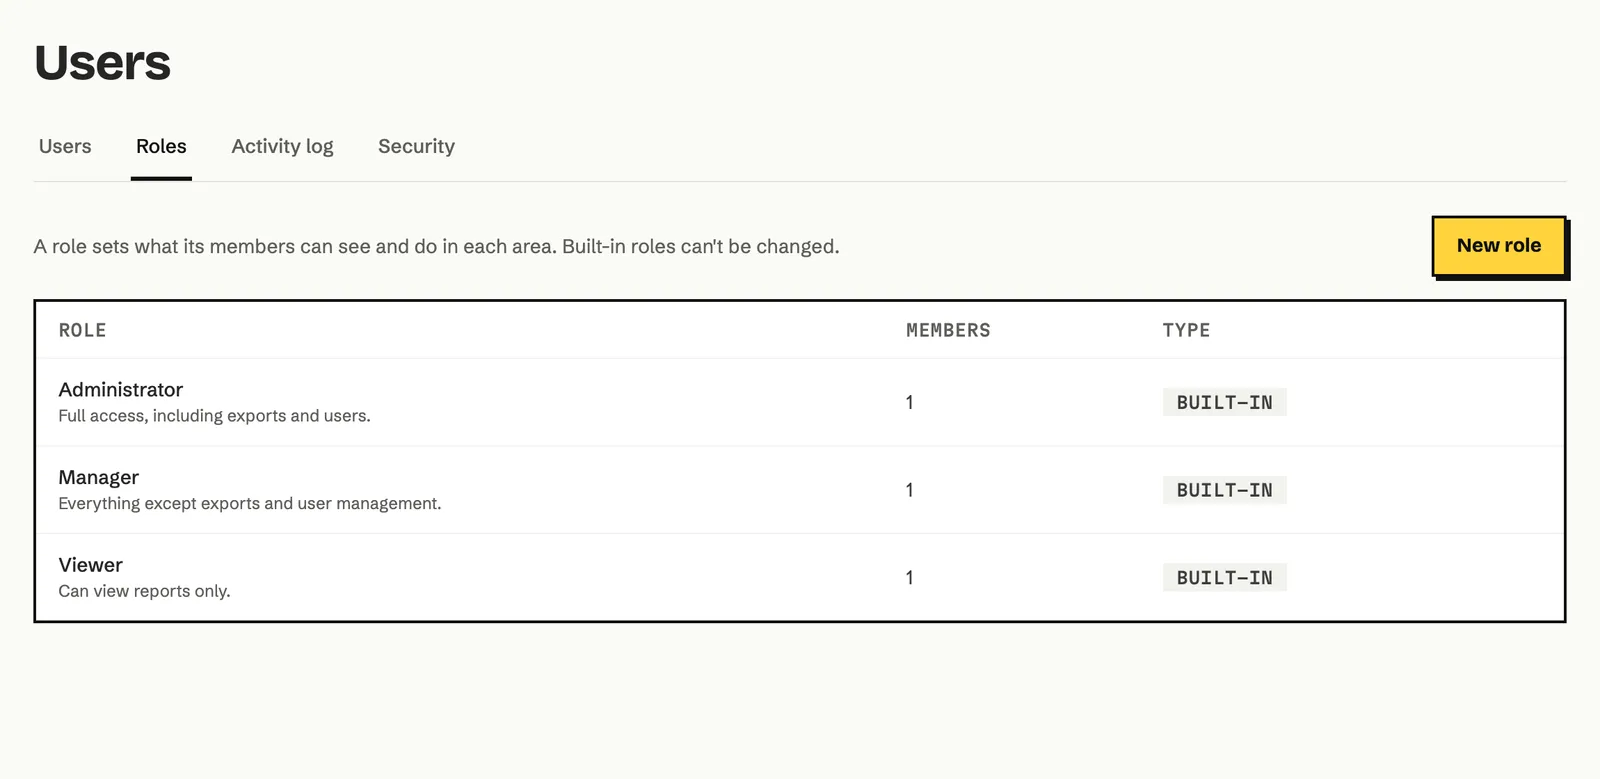
Each team member has one role, and it decides what they see and can do in the workspace. There are three built-in roles, which can’t be changed.
| Role | What it can do |
|---|---|
| Administrator | Everything: campaigns, subscribers, automations, templates, settings, reports, exports and managing users. Only an Administrator can delete the workspace. |
| Manager | Everything except managing users and exports. Can’t open the Users page and can’t download subscriber or report exports. |
| Viewer | Reports only: the campaign and automation numbers on the Dashboard and the campaign reports. Can’t change anything and can’t see subscribers. |
If none of them fits a colleague, you can create a custom role and set the permission per area.
How to invite a teammate
Section titled “How to invite a teammate”- Click Account settings in the left menu, then Users in the settings menu.
- Click Invite user.
- Enter your teammate’s address in the Email field.
- Choose their role in the Role list. A sentence below sums up what they can do with it.
- Click Send invitation.
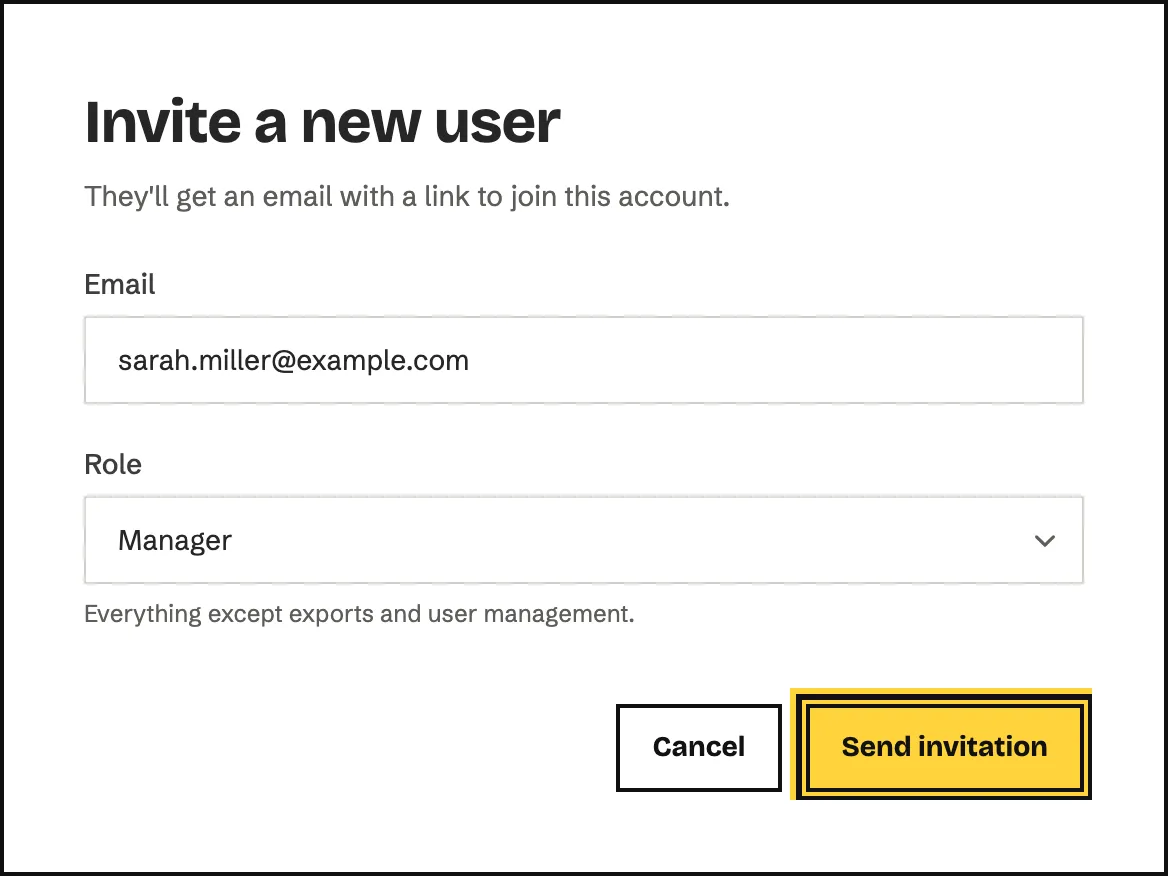
Your teammate gets an email with a link. Until they accept, you see the invitation in the Pending invitations table with its expiry date.
How to manage your team
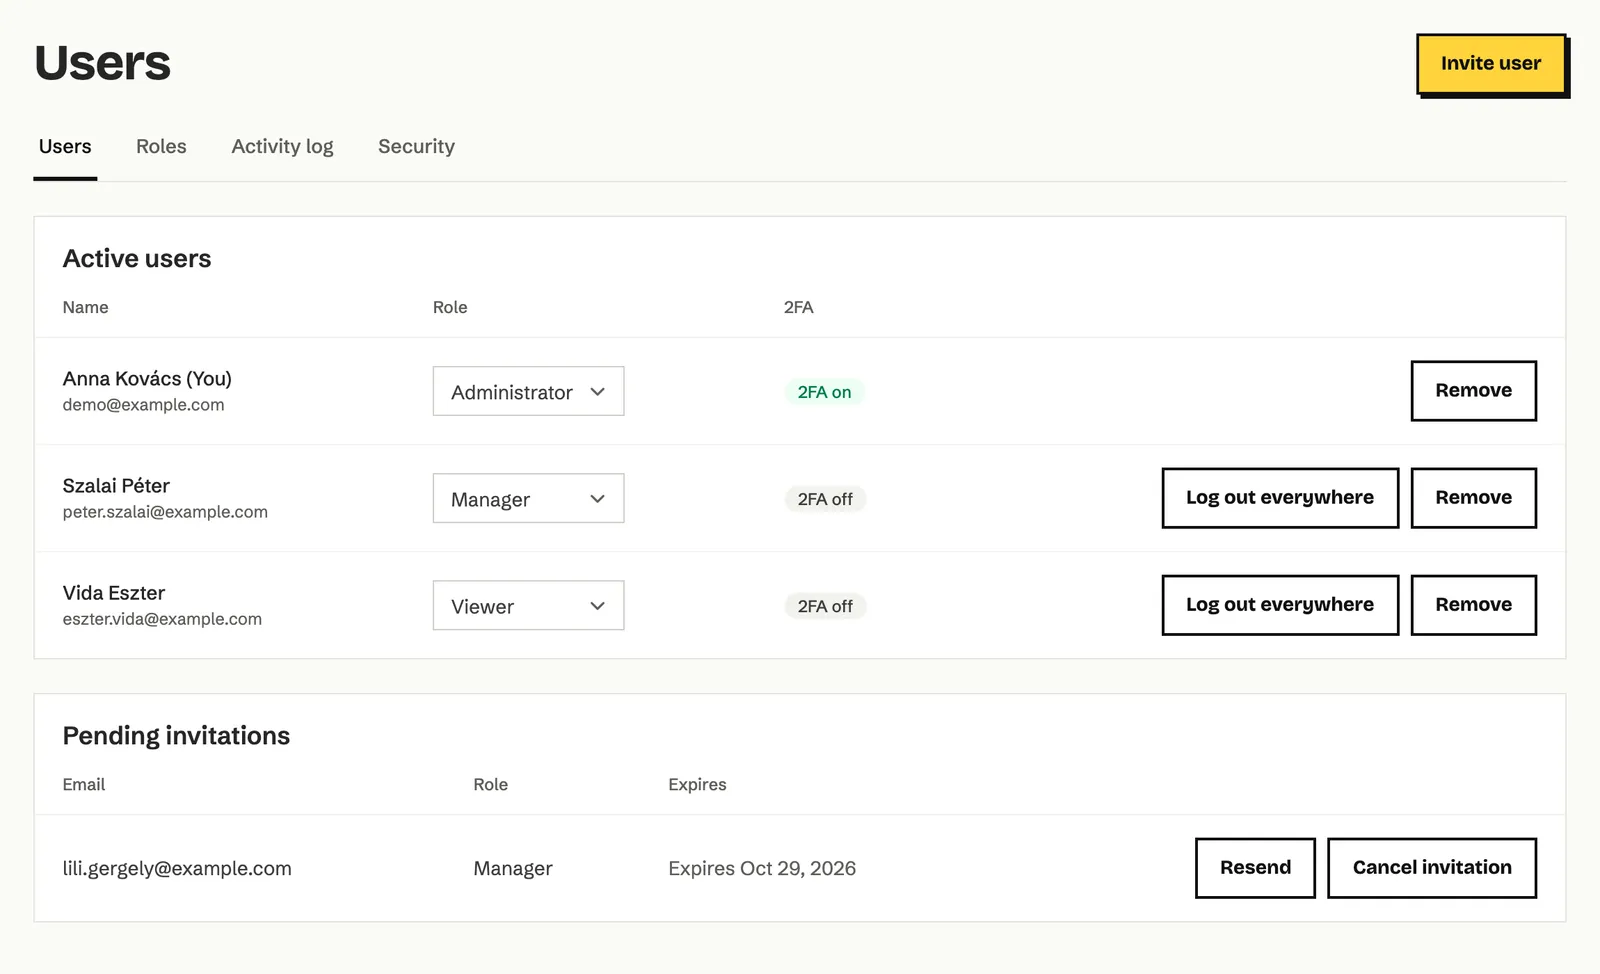
Section titled “How to manage your team”The Users tab of the Users page has two tables.
Active users
| Action | What it does |
|---|---|
| Role list | The role you choose in the row’s Role list applies at once. |
| Log out everywhere | Ends all of the member’s sessions at once, in every workspace. They can sign in again. Useful when a colleague has lost their laptop. |
| Remove | Takes the member out of the workspace, and they lose access at once. Their work, such as the campaigns they made, stays. |
The 2FA column shows whether the member’s last sign-in used two-factor authentication (2FA on) or not (2FA off).
Pending invitations
| Action | What it does |
|---|---|
| Resend | Sends a new link. The old link stops working, and the new one works for 7 days. |
| Cancel invitation | The invitation stops working and the link can’t be used anymore. |
How to create a custom role
Section titled “How to create a custom role”- Open the Roles tab on the Users page.
- Click New role.
- Enter a name in Role name, for example “Content editor”.
- In the table, choose a level for each area: None, View all or Manage. The areas are Campaigns, Subscribers, Automations, Templates, Settings, Reports, Users and Export.
- Click Create role.
How to require two-factor authentication
Section titled “How to require two-factor authentication”When you turn this on, only people who signed in with two-factor authentication can use the workspace.
- Open the Security tab on the Users page.
- Turn on the Require two-factor authentication switch.
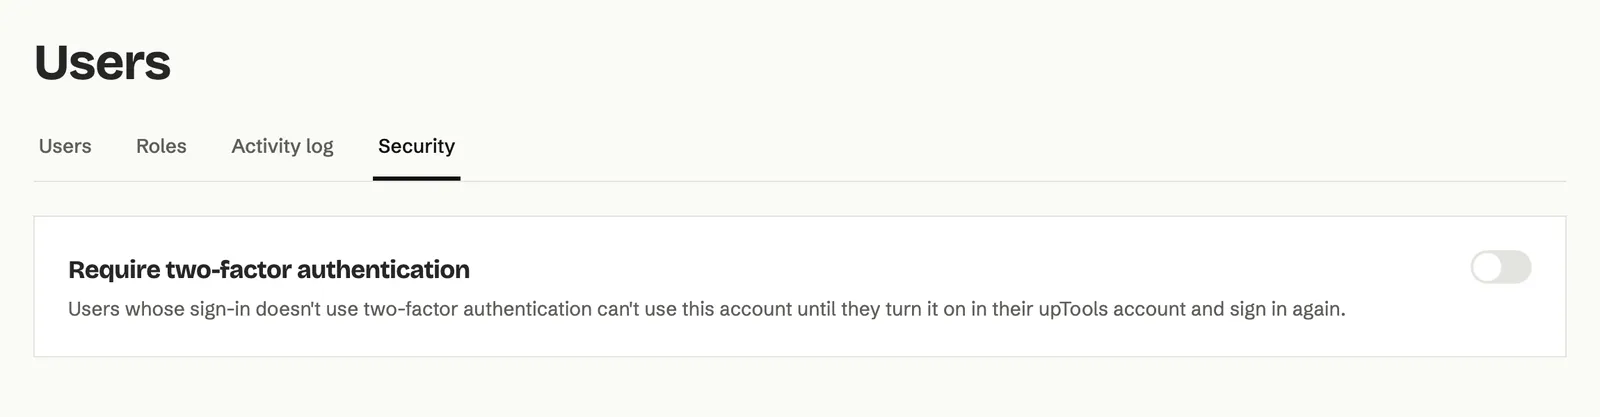
From then on, anyone who signs in without two-factor authentication sees Two-factor authentication required. With Open your upTools account they can turn it on in their upTools account, then come back with Sign in again.
The Activity log
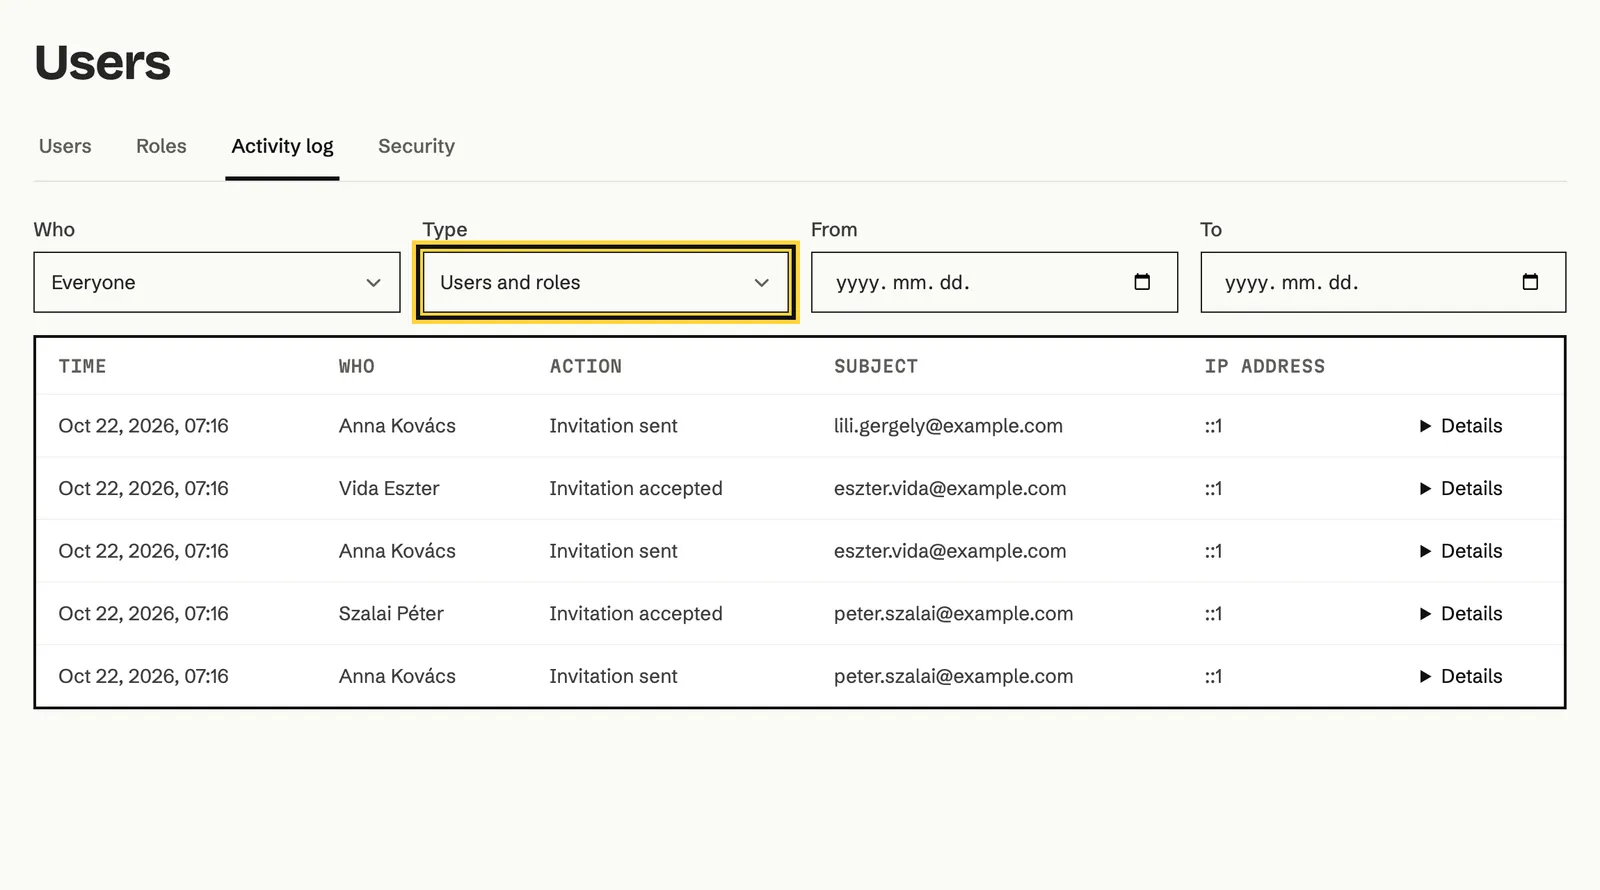
Section titled “The Activity log”The Activity log tab of the Users page shows who did what in the workspace: logins, invitations, role changes, scheduling and deleting campaigns, settings changes and actions made through the API.
- Open the Activity log tab on the Users page.
- In the Who list, narrow it to one teammate, to API tokens or to System.
- In the Type list, choose an area, for example Users and roles or Campaigns.
- Set a period in the From and To fields.
- Click Details at the end of a row to see the data of the action.
Where do I change my password or my name? In your upTools account. In the user menu, click upTools account. Echo picks up your new name the next time you sign in.
After signing in I see “You don’t have a workspace”. What should I do? Your account doesn’t belong to a workspace yet. Ask the workspace’s Administrator to invite you, and join with the link in the invitation email.
I didn’t get the invitation, or it expired. What now? Ask the person who invited you to click Resend in the Pending invitations table on the Users page. The new link works for 7 days. Check your spam folder too.
A colleague left the company. How do I take away their access? Open Users under Account settings and click Remove in their row. Their access ends at once, and the campaigns and automations they made stay.
Why can’t I see the Subscribers menu? Your role gives you no access to subscribers, for example because you’re a Viewer. Ask the workspace’s Administrator to change your role.