
Groups and segments
Groups and segments split your subscribers into parts, so everyone gets the emails meant for them. You put people into a group yourself; a segment is a saved filter that updates itself.
Group or segment: which one to use
Section titled “Group or segment: which one to use”| Group | Segment | |
|---|---|---|
| How does someone get in? | You put them in: by hand, by import, with a bulk action, or a form or the API adds them. | Automatically: whoever matches the filters is in, whoever stops matching is out. |
| When does it change? | Only when someone adds or removes a member. | All the time, following the subscribers’ data and activity. |
| What is it good for? | Lists and interests the subscriber chose (for example Hírlevél HU, Kerti klub). | Targeting by behaviour and data (for example people who opened an email in the last 30 days, or who live in Budapest). |
| Can it have a filter? | No, but you can filter its members while viewing them. | Yes, the segment is the filter. |
When to use which
- Group: when membership comes from a decision or an event and must stay even if the subscriber’s data changes. The people who registered for a webinar are a group.
- Segment: when membership follows from a rule. “VIP customers who are still reading” is a segment, because its members change on their own.
- The two work together: a segment can filter on group membership, so you can pick only the Budapest members of the VIP vásárlók group, for example.
The group list
Section titled “The group list”Open Subscribers in the left menu, then the Groups tab.
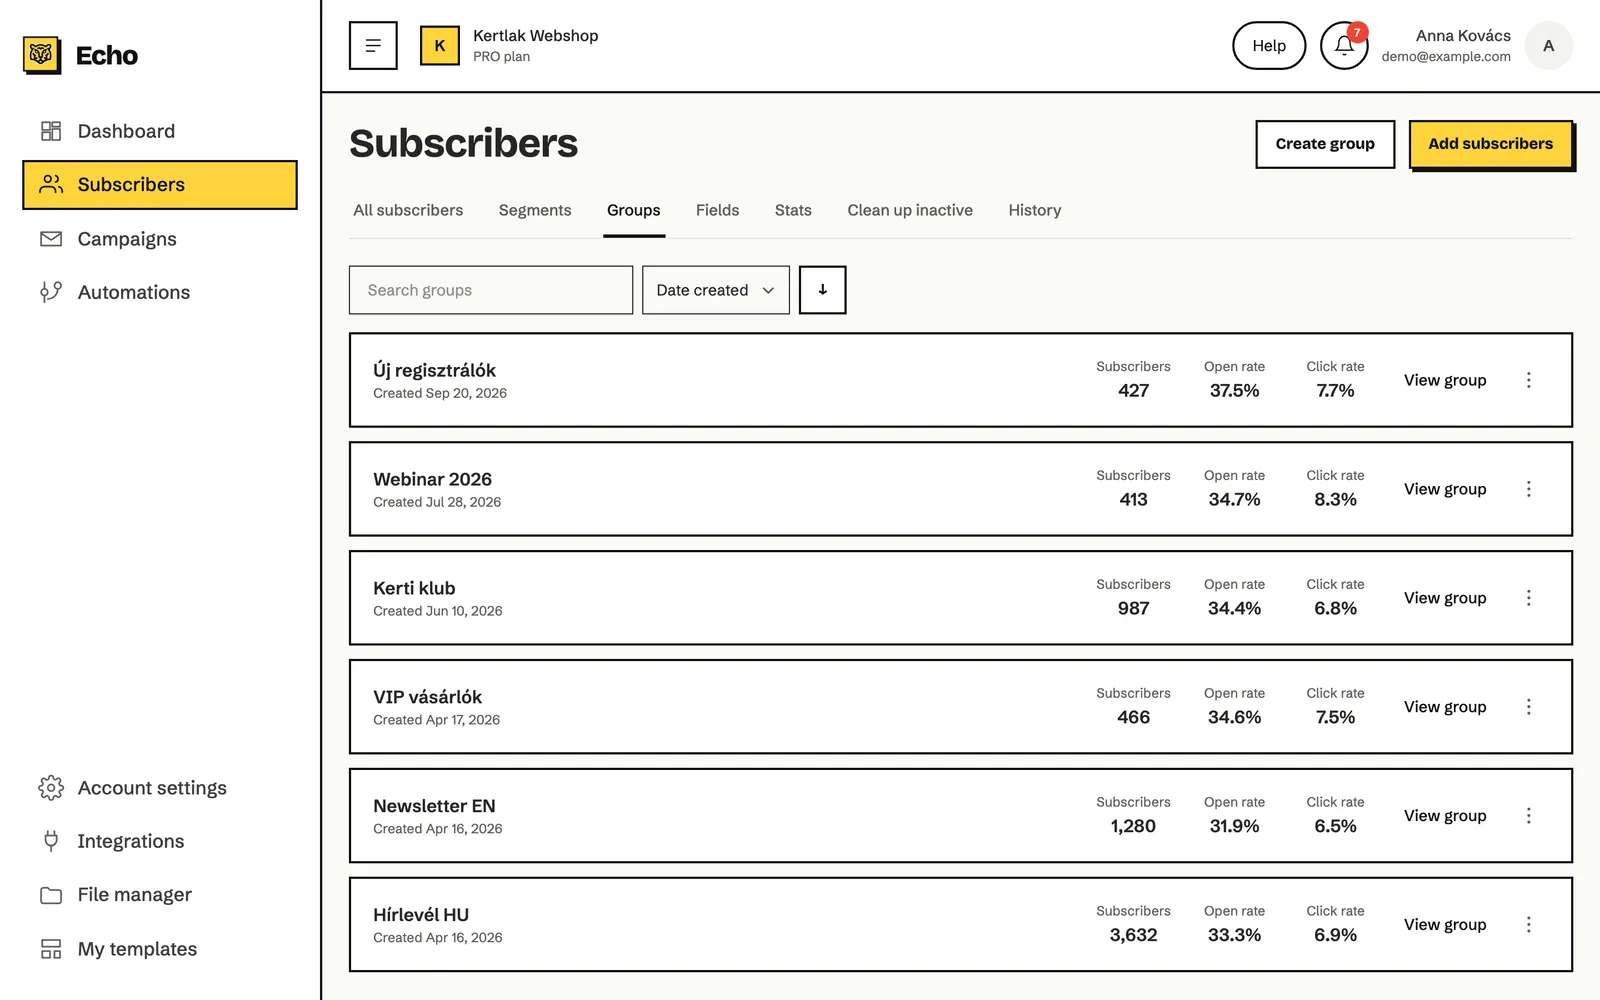
Each group is a card. It shows the group’s name and creation date, and three numbers:
- Subscribers: the number of active members.
- Open rate and Click rate: how many of all the emails ever sent to the active members were opened, and how many were clicked.
Above the list you can search group names (Search groups) and sort by Date created, Group name, Subscribers, Open rate or Click rate. The arrow next to it reverses the order.
How to create a group
Section titled “How to create a group”-
Open the Groups tab under Subscribers.
-
Click Create group in the top right corner.
-
Type the name in the Group name field.
-
Click Create.
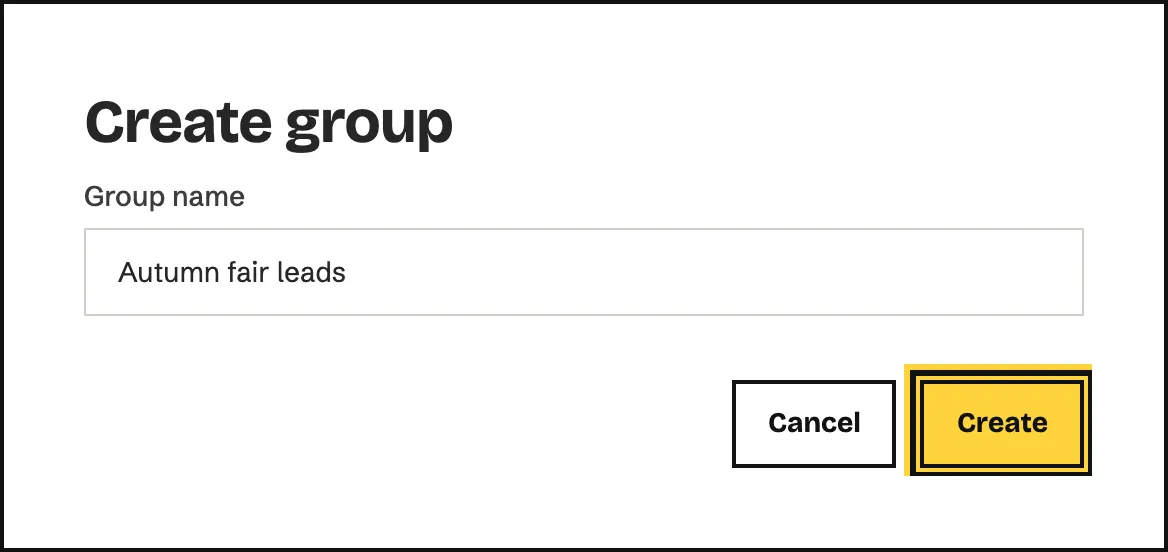
Echo creates the group and opens its page straight away. The group is empty at this point.
How to add subscribers to a group
Section titled “How to add subscribers to a group”There are several ways into a group. Pick the one that suits the situation.
| From | How |
|---|---|
| The group’s page | Click Add subscribers above the member list. The import page opens with this group already selected in the settings. |
| The subscriber list | Select the subscribers, then choose Add to group in the Actions menu. |
| A subscriber profile | At the bottom of the Subscriber details box, click Manage groups and tick the group. |
| An import | On the Import settings page, choose the group in step 1. Add subscribers to groups. |
| Adding one subscriber | On the Add single subscriber tab, choose it in the Add to a group list. |
The Subscribers chapter covers these steps in detail. Signup forms and your own systems can also add subscribers to a group; see the Integrations chapter.
How to remove subscribers from a group
Section titled “How to remove subscribers from a group”- Open the All subscribers tab under Subscribers.
- Click Choose a filter, pick the Groups condition and choose the group. Now only the group’s members are listed.
- Select the subscribers you want to take out.
- Click Actions and choose Remove from group.
- Choose the group and click Remove.
For a single subscriber the profile is quicker: untick the group in the Manage groups window.
How to view the members of a group
Section titled “How to view the members of a group”- Open the Groups tab.
- Click the group’s name or View group.
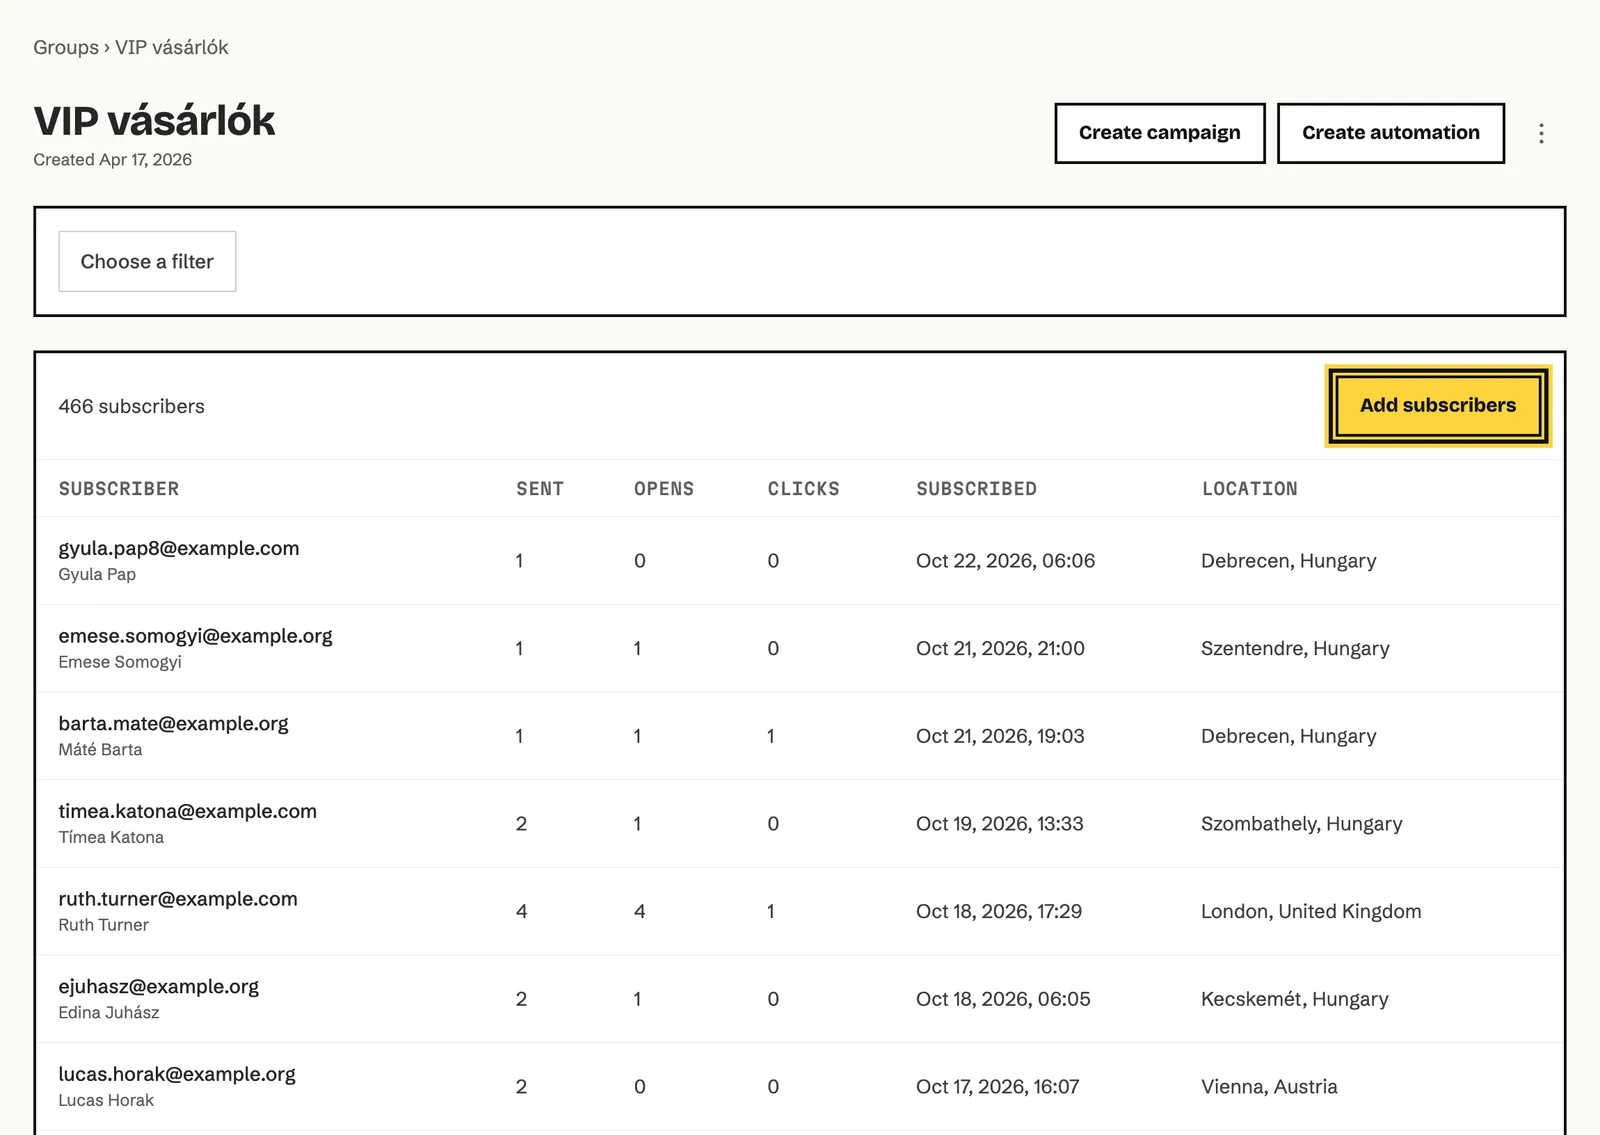
The group page shows the member list with the number of members above it. The list shows the group’s active members. Click an email address to open that subscriber’s profile.
You can filter the member list too: click Choose a filter and set conditions as you would for a segment (see How to build the filters). This filter only affects what you see. It doesn’t change the group and isn’t saved.
How to rename, split or delete a group
Section titled “How to rename, split or delete a group”All three actions are in the three-dot menu at the end of the group’s card and in the top right corner of the group page.

Rename
- Click the three dots, then Rename.
- Type the new name in the Group name field.
- Click Save changes.
Members, automations and campaign settings stay linked to the group after renaming.
Split
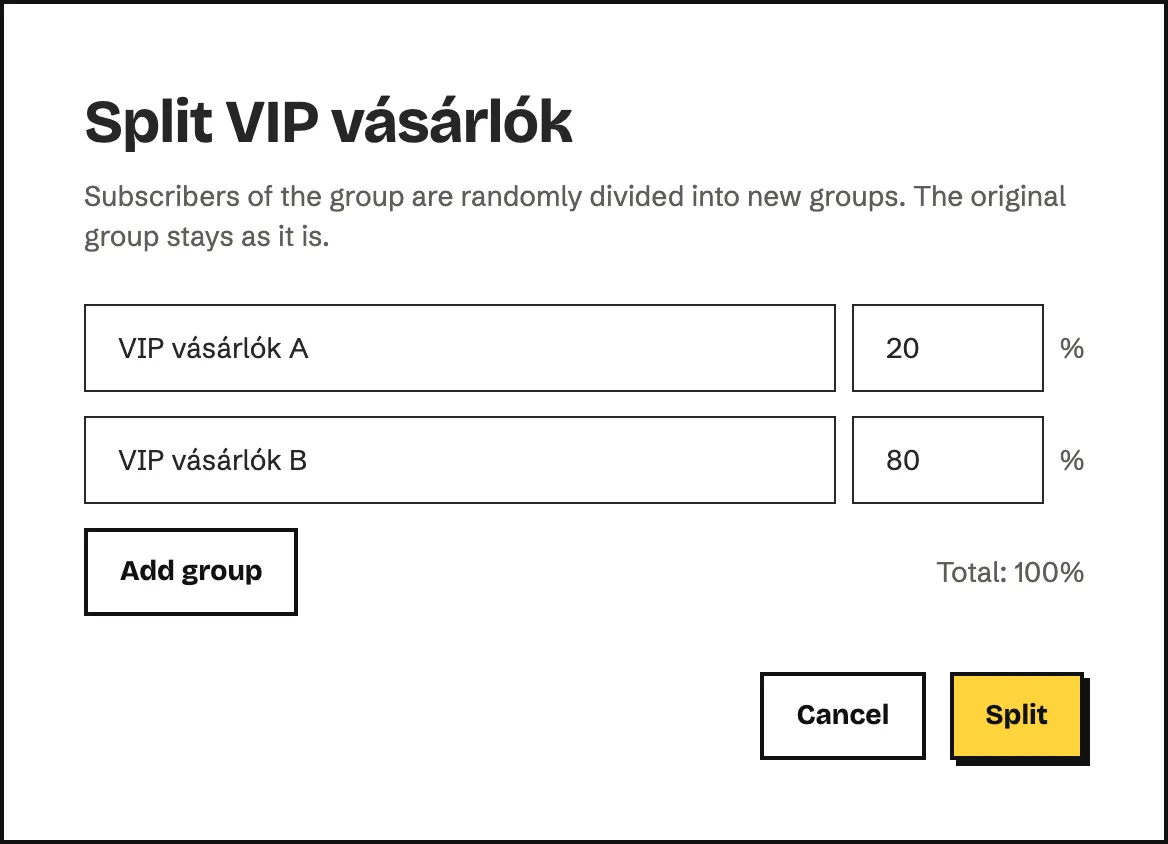
Splitting places the group’s members into new groups at random, for example to try an offer on a smaller part of the list first.
- Click the three dots, then Split.
- Enter the names and shares (in percent) of the new groups. By default you get two groups of 50% each, ending in A and B.
- To split into more parts, click Add group.
- Check that the Total: line says 100%.
- Click Split.
Delete
- Click the three dots, then Delete.
- Click Delete in the confirmation window.
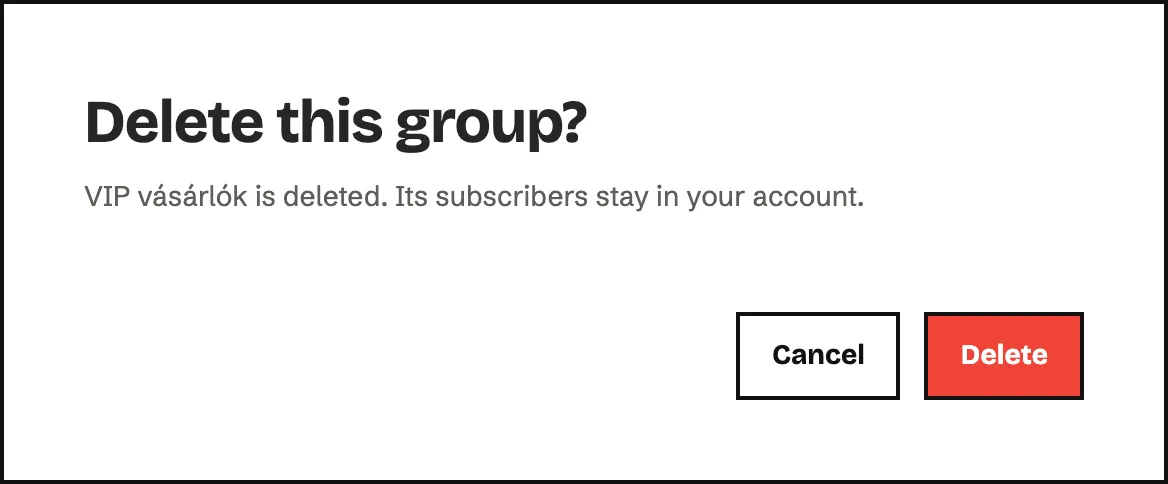
Deleting removes the group and its memberships. The subscribers stay in your account, and their other groups don’t change. Deleting can’t be undone.
The segment list
Section titled “The segment list”Open the Segments tab under Subscribers.
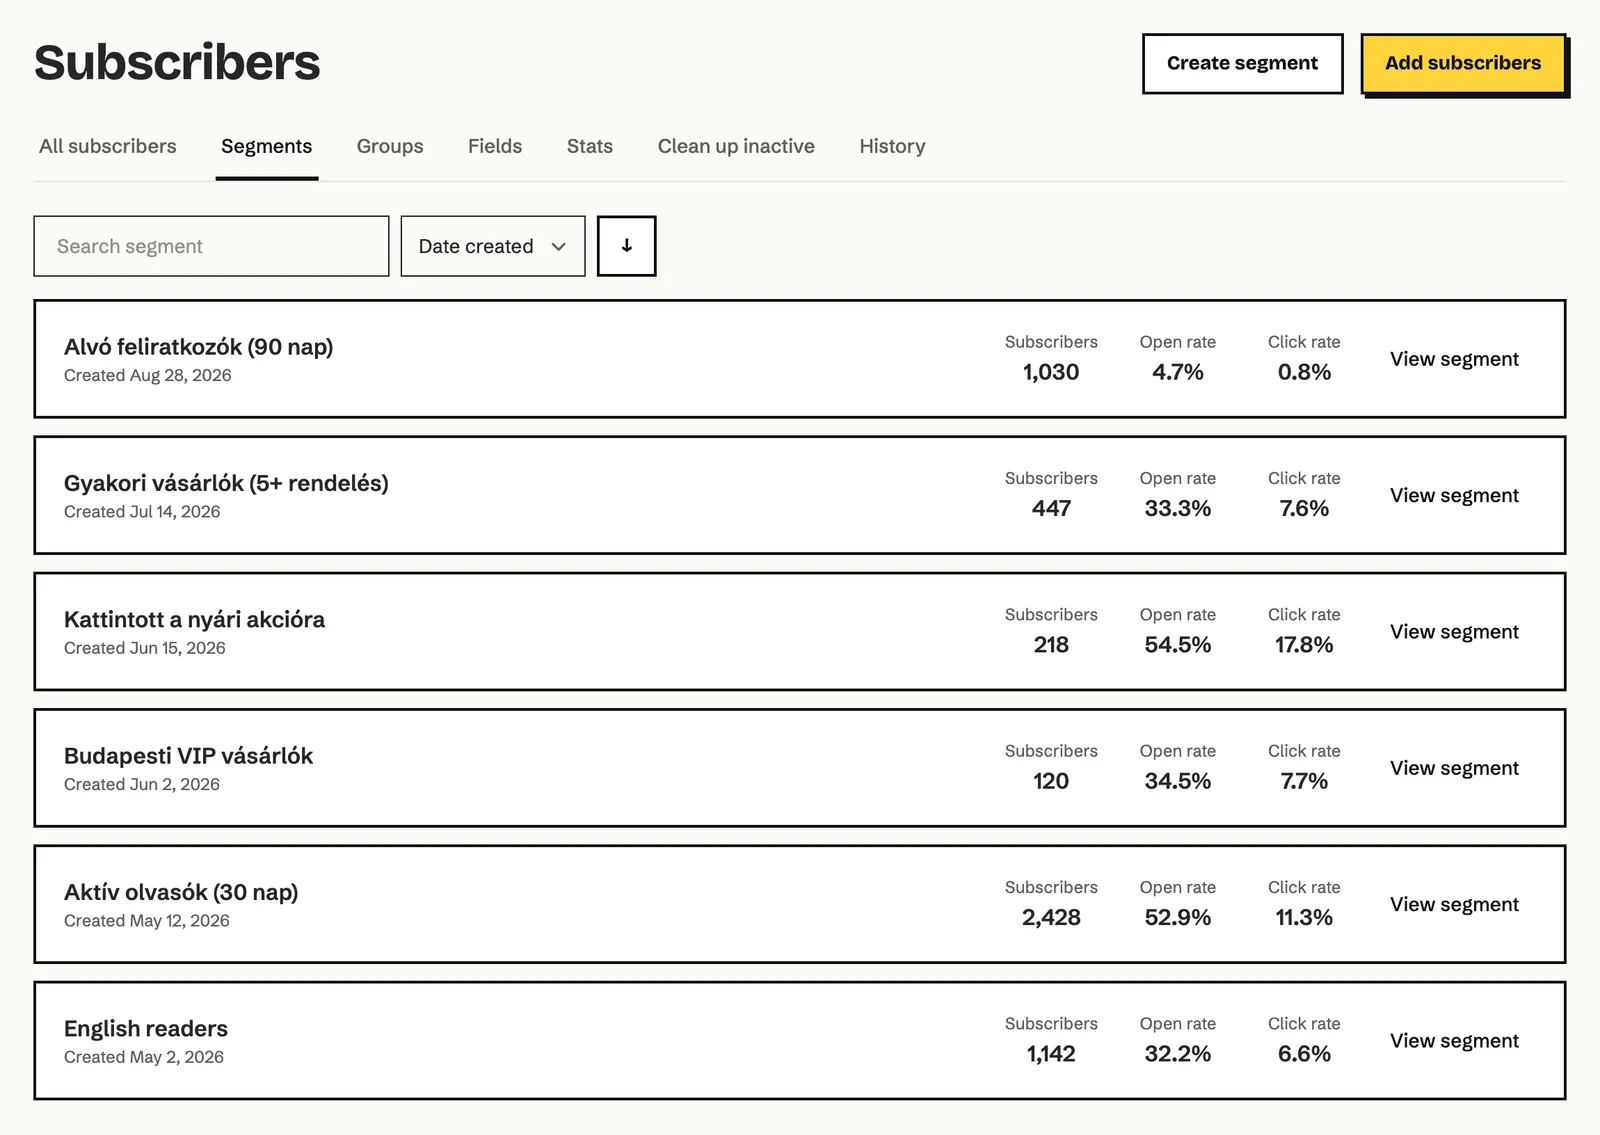
Each card shows the segment’s name, creation date, the number of matching active subscribers (Subscribers), and the Open rate and Click rate. Use Search segment to search, and sort by Date created, Name or Subscribers.
How to create a segment
Section titled “How to create a segment”- Open the Segments tab and click Create segment. The Segment library opens.
- Choose:
- Start from scratch: click Create, enter a name in the Segment name field and click Create again. The segment page opens with an empty filter. The segment is only created when you click Save segment after setting up the filters.
- A ready-made segment from the library: use Create on its card. Echo suggests the card’s name, which you can change. When you click Create, the segment is created at once with the ready-made filters, and its page opens.
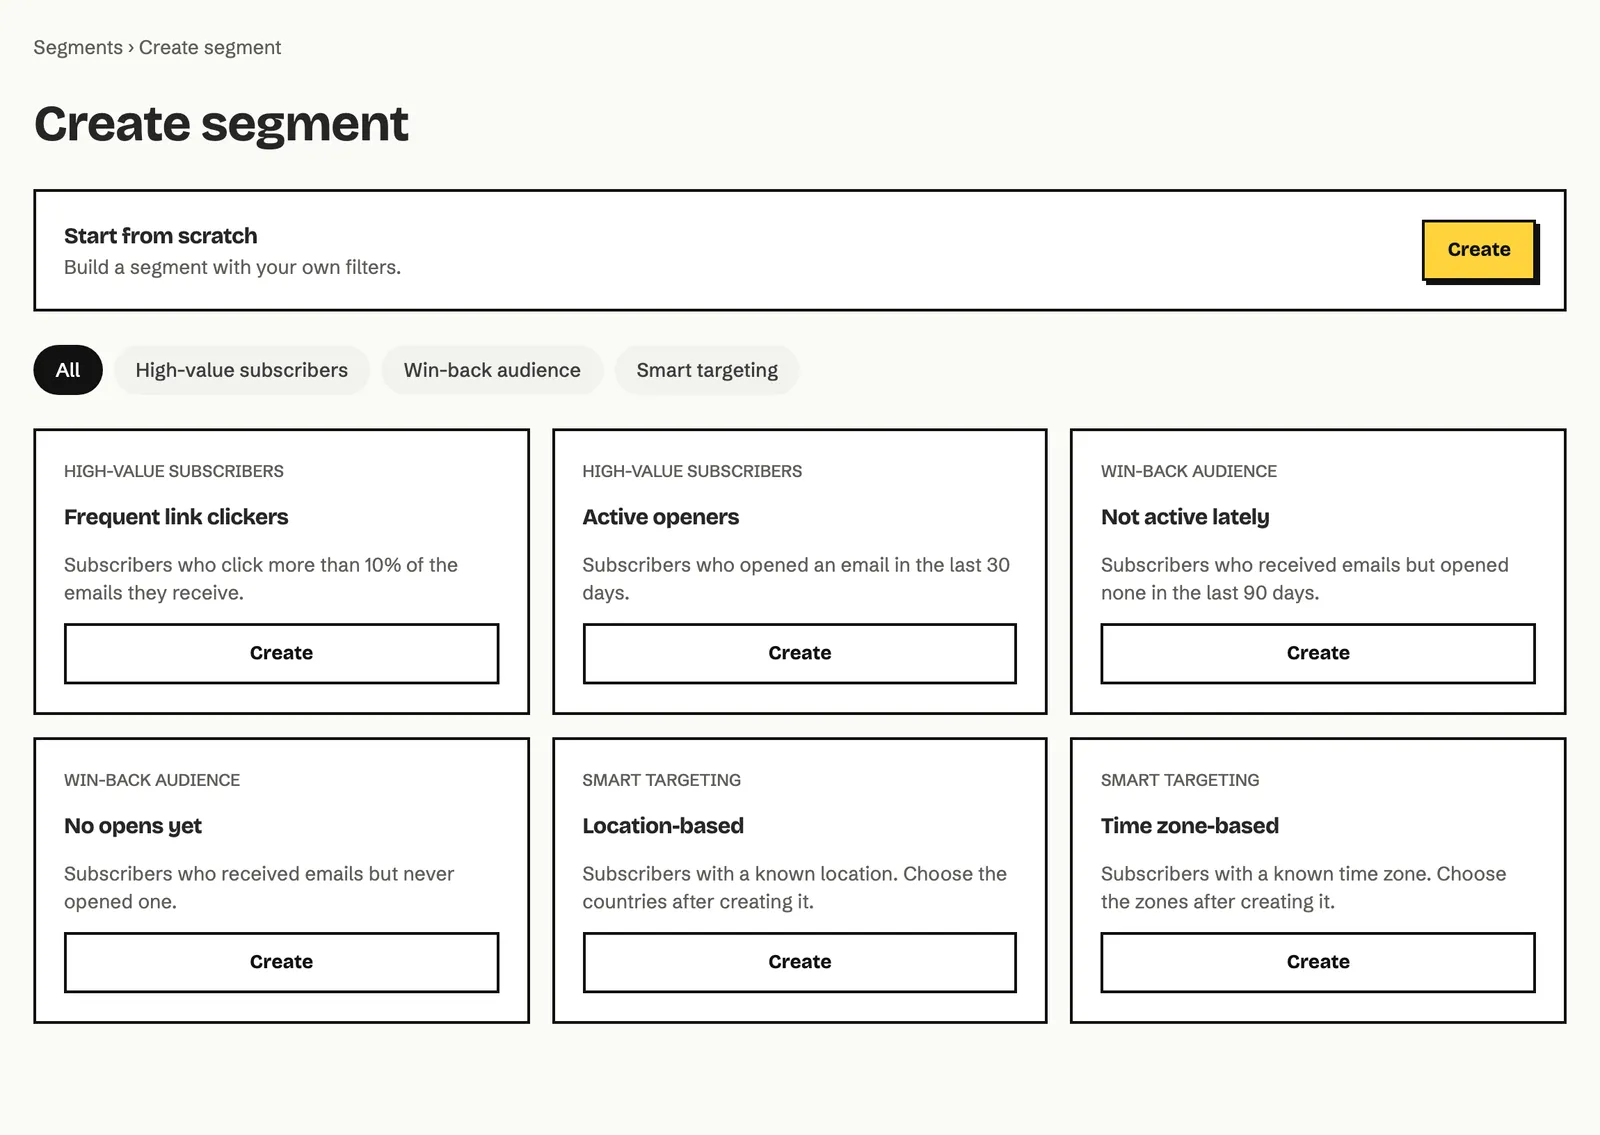
The ready-made segments in the library. The buttons above them (All, High-value subscribers, Win-back audience, Smart targeting) narrow the list.
| Ready-made segment | Who is in it | Filters |
|---|---|---|
| Frequent link clickers | Subscribers who click more than 10% of the emails they receive. | Stats: Click rate (%) Is greater than 10 |
| Active openers | Subscribers who opened an email in the last 30 days. | Email actions: Opened, 30 days |
| Not active lately | Subscribers who received emails but opened none in the last 90 days. | Email actions: Not opened, 90 days, and Stats: Emails sent Is greater than 0 |
| No opens yet | Subscribers who received emails but never opened one. | Stats: Emails sent Is greater than 0, and Emails opened Equals 0 |
| Location-based | Subscribers with a known location. | Location: Is set |
| Time zone-based | Subscribers with a known time zone. | Time zone: Is set |
Location-based and Time zone-based are starting points: after creating them, change the rule to In any or Is, for example, choose the countries or the time zone, and save.
A segment from the subscriber list
If you’ve already set up a filter on the All subscribers tab, you can save it as a segment: click Save segment, enter a name and click Save segment in the window.
How to build the filters
Section titled “How to build the filters”A filter is made of one or more conditions. You use the same filter builder on segment pages, in the subscriber list, on group pages and in the Advanced recipient choice of a campaign.
-
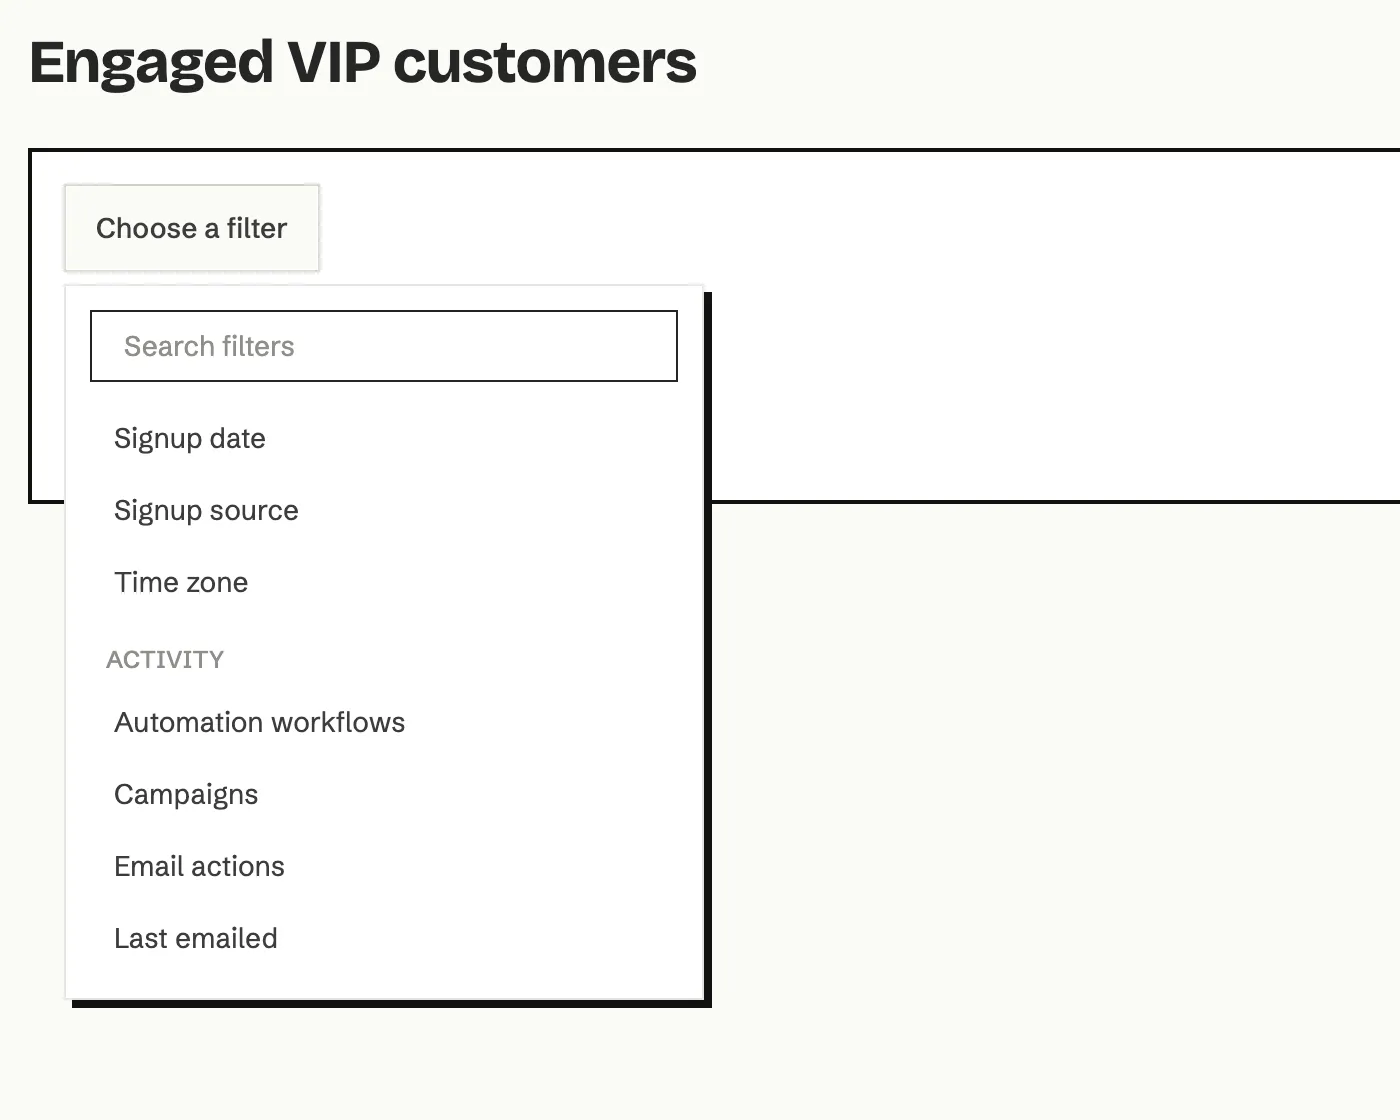
Click Choose a filter. The list of conditions opens in three parts: Subscriber data, Activity and Other. Type in Search filters to narrow the list.
-
Click a condition. A row with the condition’s name appears.
-
In the row’s first list choose the rule (for example Belongs to, Opened, Is greater than), then enter the value: a group, campaigns, a number of days, a date or text. For Stats, choose the statistic first.
-
If another condition must also be true, click + And at the bottom of the box and choose it.
-
If another set of conditions is also enough, click + Or below the boxes. This opens a new box.
-
Remove a condition with the X at the end of its row. Clear removes all conditions.
-
Look at the list below. As soon as every condition is filled in, the list and the count above it show how many active subscribers match.
-
Click Save segment.
How to read And and Or
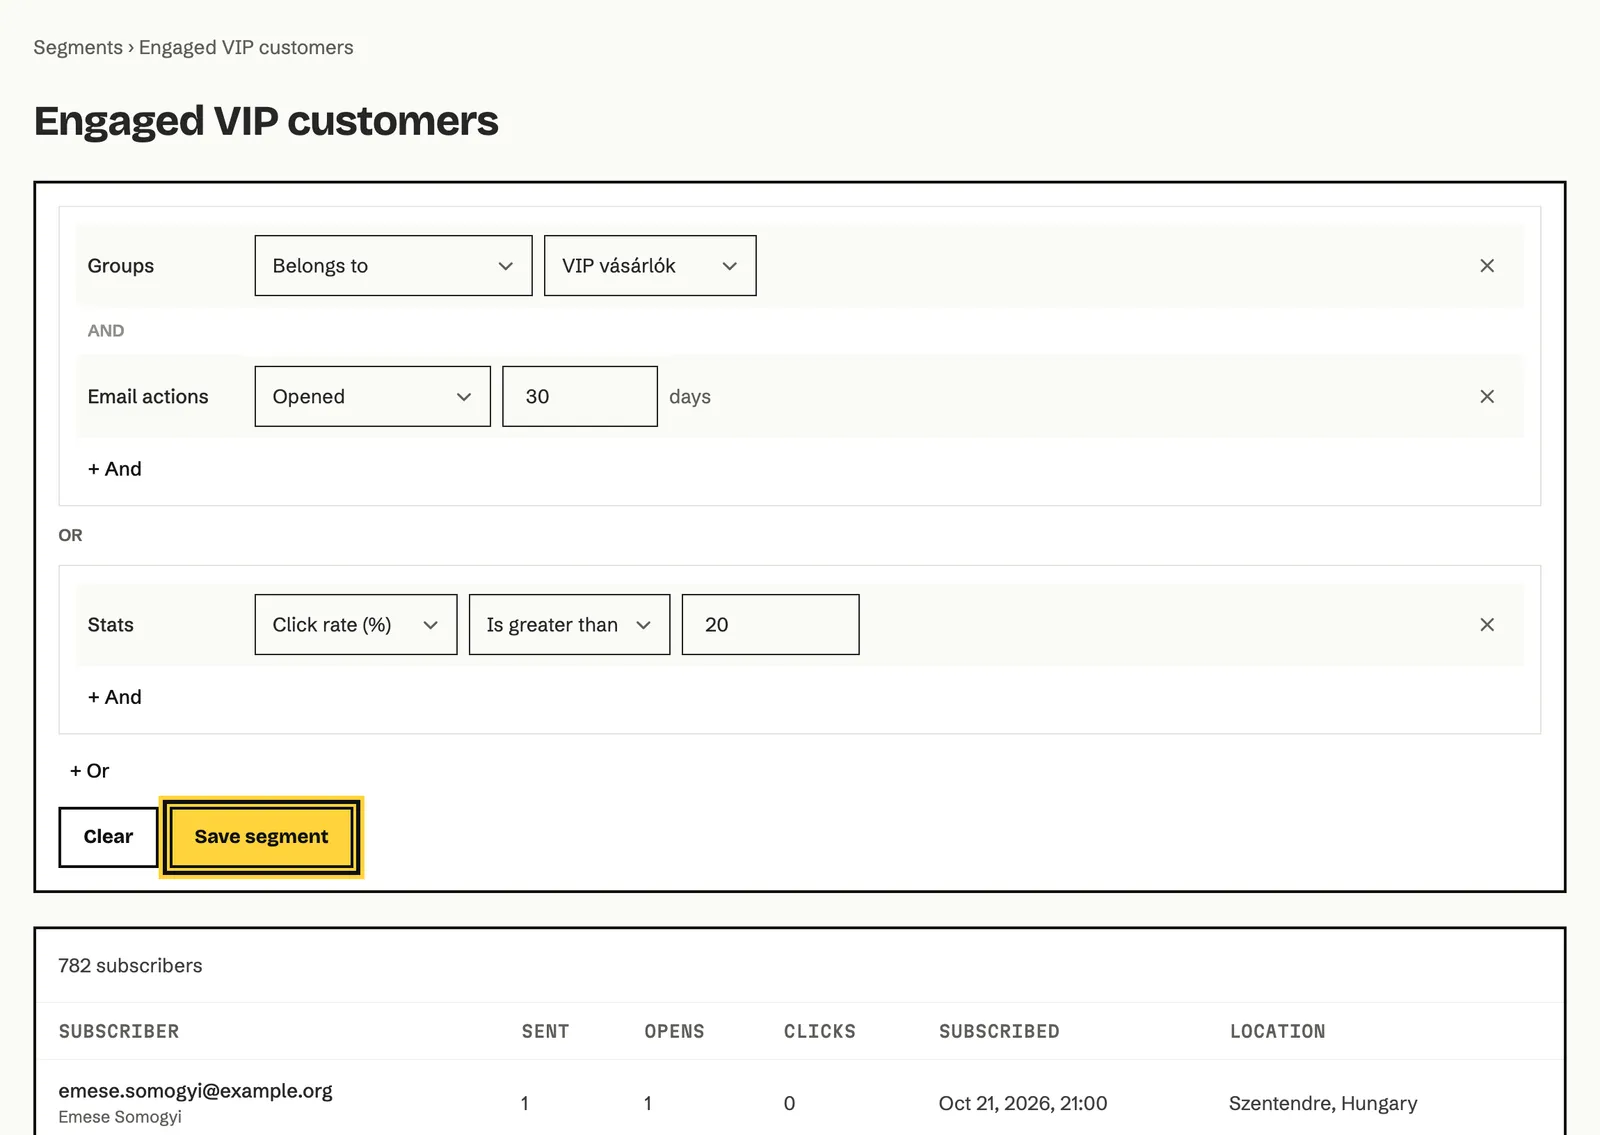
- Inside a box the conditions are joined by and: all of them must be true.
- Boxes are joined by or: it’s enough if all conditions in one box are true.
The example above reads: subscribers who belong to the VIP vásárlók group and opened an email in the last 30 days, or whose click rate is greater than 20%.
Filter conditions
Section titled “Filter conditions”Conditions under Subscriber data:
| Condition | What it checks | Rules |
|---|---|---|
| The email address. | Equals, Does not equal, Contains, Does not contain | |
| Fields: … | The value of a field. Every built-in and custom field has its own entry (for example Fields: City, Fields: Rendelések száma). The rules depend on the field type, see below. | |
| Groups | Group membership. | Belongs to, Does not belong to (one group); Belongs to any, Does not belong to any (several groups); No groups |
| Location | The country of the subscriber’s location. | Is, Is not (one country); In any, Not in any (several countries); Is set, Is not set |
| Signup date | When they subscribed. | Is before, Is after (a date); Is in the last, Is not in the last (a number of days) |
| Signup source | Where they came from. | Is, Is not, with the value Added manually, Imported, API, Form, Landing page, Integration or Preference center |
| Time zone | The subscriber’s time zone. | Is, Is not, Is set, Is not set |
Field rules by type:
| Field type | Rules |
|---|---|
| Text | Equals, Does not equal, Contains, Does not contain, Is set, Is not set |
| Number | Equals, Does not equal, Is less than, Is less than or equal, Is greater than, Is greater than or equal, Is set, Is not set |
| Date | Is after, Is on or after, Is before, Is on or before, Is on, Is not on (compared to a date); Is in last interval, Is in the next interval, Is after interval (compared to today, in days, weeks, months or years); Is set, Is not set |
Conditions under Activity:
| Condition | What it checks | Rules |
|---|---|---|
| Automation workflows | Taking part in the chosen workflows. | Is active in (moving through it now), Is not active in, Has completed, Has not completed, Was never active in |
| Campaigns | Any of the chosen campaigns. | Was sent, Was not sent, Was opened, Was not opened, Was clicked, Was not clicked |
| Email actions | Emails from any campaign or automation in the last given number of days. | Sent, Not sent, Opened, Not opened, Clicked, Not clicked, Opened or clicked |
| Last emailed | When they last received an email. | Exclude subscribers emailed in the last … days. Subscribers who were never emailed stay in. |
| Stats | The subscriber’s totals: Emails sent, Emails opened, Emails clicked, Open rate (%), Click rate (%). | Equals, Is less than, Is greater than |
The condition under Other:
| Condition | What it checks | Rules |
|---|---|---|
| Created date | When the subscriber was added to your account. | Is before, Is after (a date); Is in the last, Is not in the last (a number of days) |
How to edit, duplicate or delete a segment
Section titled “How to edit, duplicate or delete a segment”- On the Segments tab, click the segment’s name or View segment.
- Change the conditions.
- Click Save changes. If you don’t want the changes after all, click Undo changes.
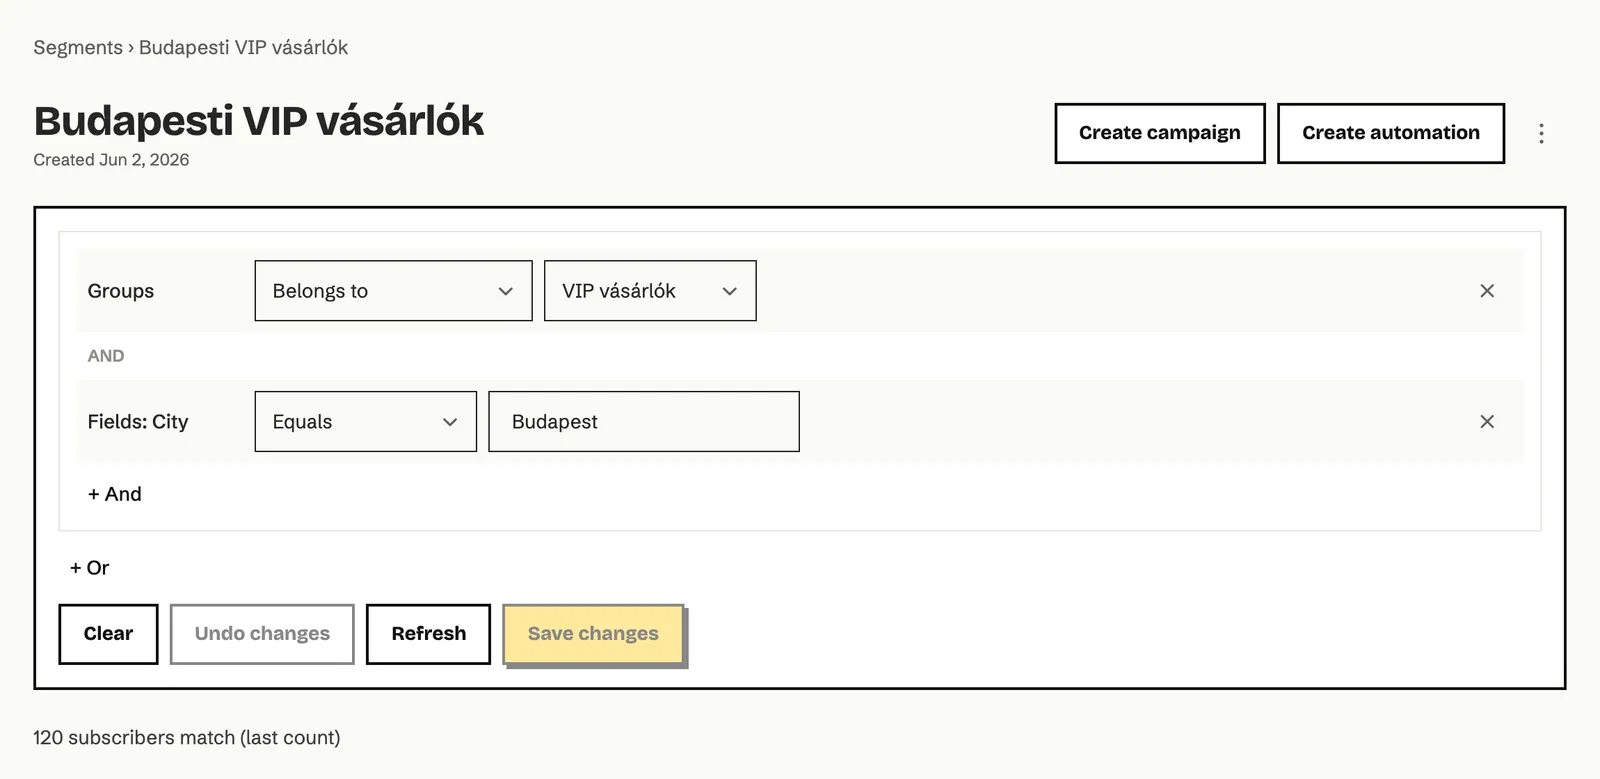
Below the buttons you see how many subscribers matched at the last count, and under it the current list of members. Click Refresh at any time to count again.
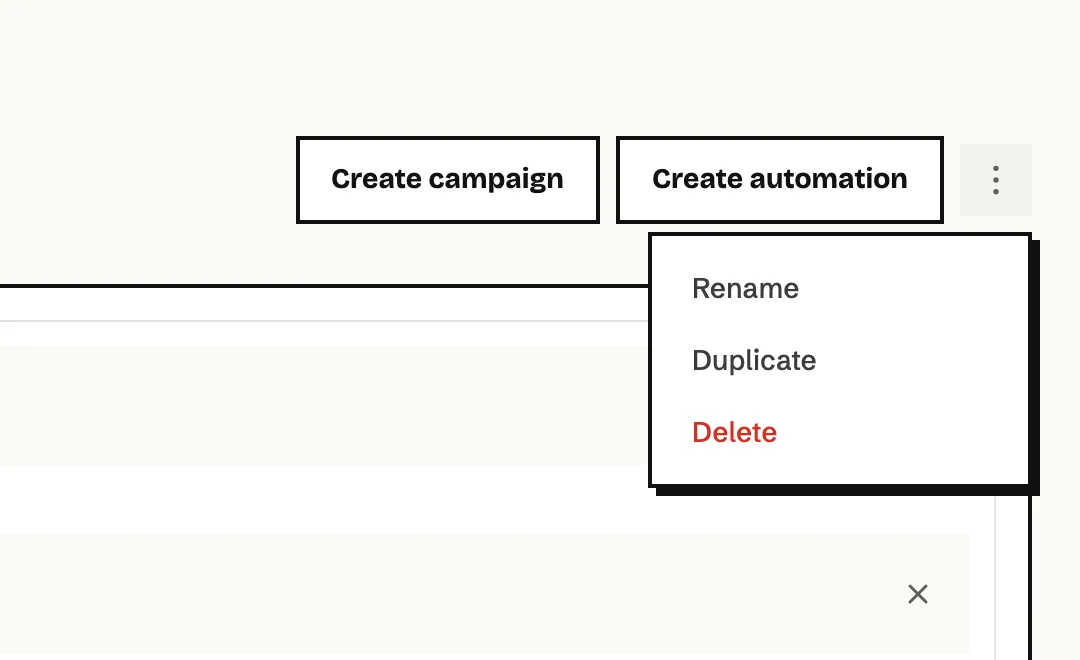
The three-dot menu in the top right corner has three actions:
- Rename: give the segment a new name.
- Duplicate: creates a new segment with the same conditions. Echo suggests the name “… copy”, which you can change. Useful when you want a variant of an existing segment.
- Delete: deletes the segment. Subscribers aren’t affected.
How to email a group or a segment
Section titled “How to email a group or a segment”The quickest way is the group’s or segment’s own page:
- Open the group or segment page.
- Click Create campaign.
- Pick the campaign type and click Create campaign on its card.
Echo creates the draft with this group or segment already among its recipients, and opens the wizard.
Choosing recipients in the campaign’s settings
For an existing campaign, or to combine several groups and segments, choose the recipients on the campaign’s Details step.
- In the campaign’s Recipients section, click Select recipients.
- On the Basic tab, tick the segments and groups you want. To leave out the members of a group or segment, click Exclude at the end of its row.
- If you need your own conditions, open the Advanced tab and build the filter as you would for a segment.
- Check the Recipients selected: number at the bottom of the window and click Select.
The Campaigns chapter describes the campaign steps.
If I delete a group, are its members deleted too? No. Only the group and the memberships go. The subscribers stay in your account, and their other groups don’t change.
Why is the number on the segment card different from the member list? The card shows the result of the last count, while the member list always shows the current state. Open the segment and click Refresh: the numbers will match.
How do I reach people who haven’t opened my emails for a long time? Create a segment from the Not active lately card in the library, or build an Email actions Not opened filter with the number of days you want. To unsubscribe them, use the Clean up inactive tab under Subscribers, described in the Subscribers chapter.
Can I filter on another segment inside a segment? Not in the filter builder, but you can reuse any segment’s conditions: make a copy with Duplicate and add to it. Automation conditions do have a Segment membership condition; see the Automations chapter.
Can a colleague look at the groups without being able to change them? If their role only allows viewing subscribers, they see the groups and segments, but the create, change and delete buttons don’t appear for them.