
Campaigns
The Campaigns menu is where you design and send your newsletters. It shows your sent, unfinished and scheduled campaigns, it’s where you start a new one, and it leads to your templates and images too.
The campaign list
Section titled “The campaign list”Open Campaigns in the left menu. The list has three tabs, each with its count:
| Tab | What it shows |
|---|---|
| Sent | Campaigns that went out, newest first, with the number of recipients, the open and click rates and the CTOR (how many of the openers clicked). A campaign whose sending you stopped halfway also lands here, labelled Canceled. |
| Drafts | Campaigns not sent yet. Each card shows which step you’re at (Design email, Details, Schedule). |
| Outbox | Scheduled campaigns and campaigns being sent right now, with their send time. |
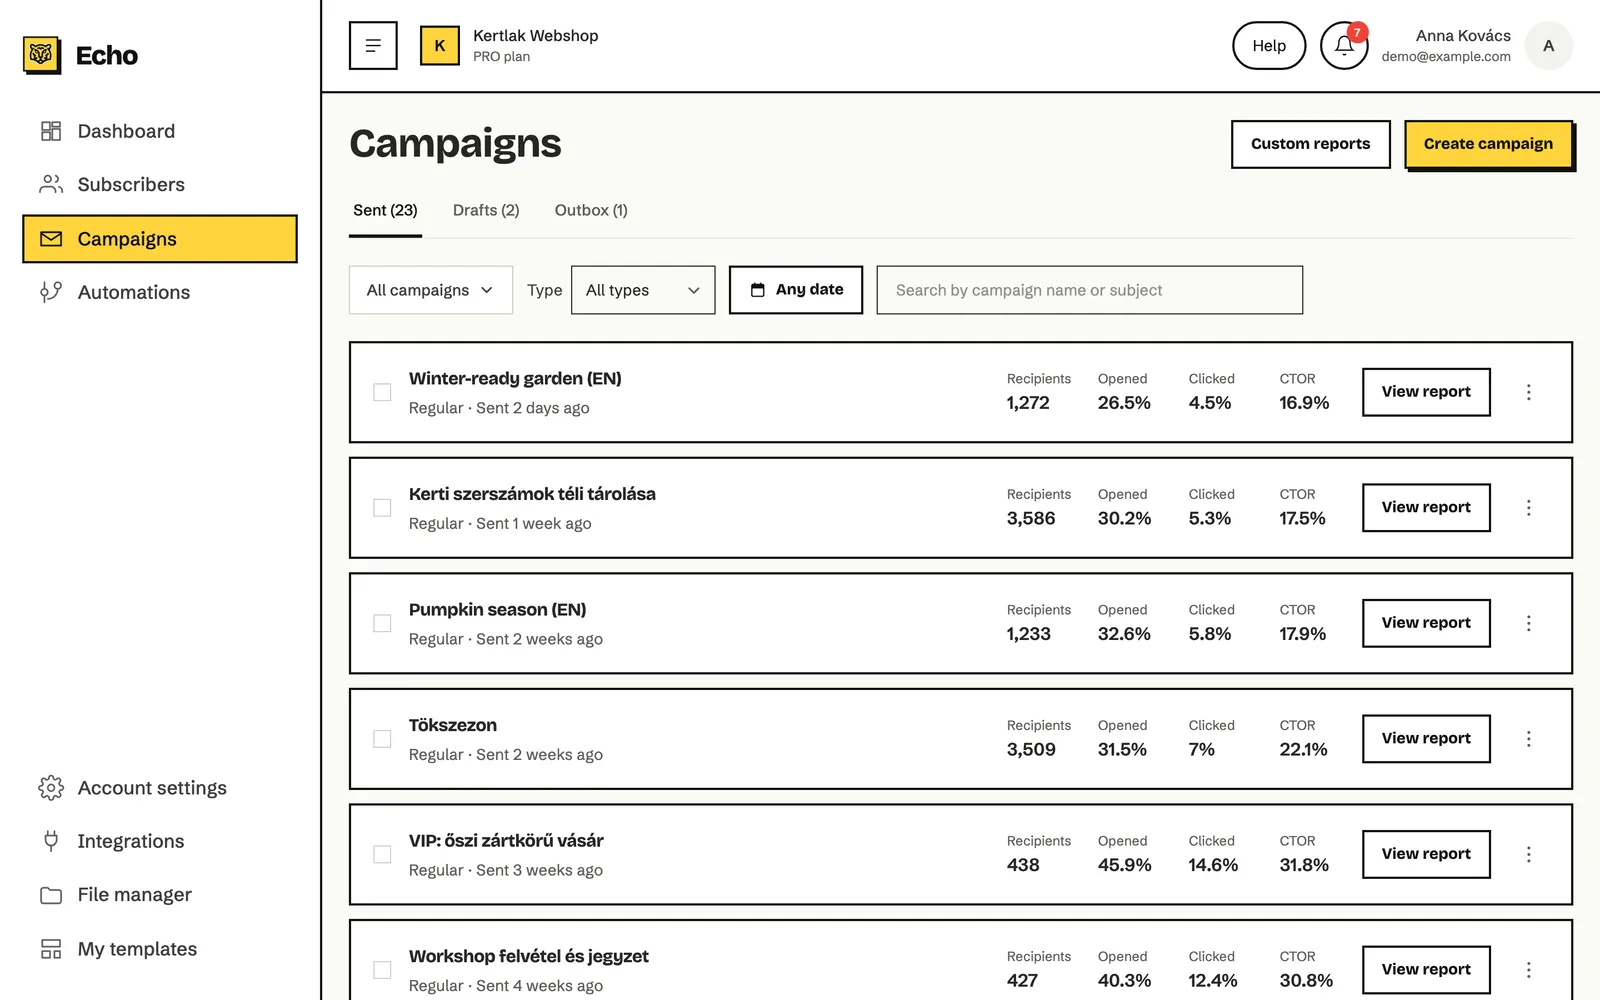
Click the name of a sent campaign or View report to open its report. Reports are covered in the Reports chapter.
Above the list you can filter:
- All campaigns: by folder. Use + Create folder in that list to add a folder, and Move to to put the selected campaigns in one.
- Type: by campaign type.
- Any date: by date (the Outbox tab has no date filter).
- Search by campaign name or subject: by part of the name or the subject.
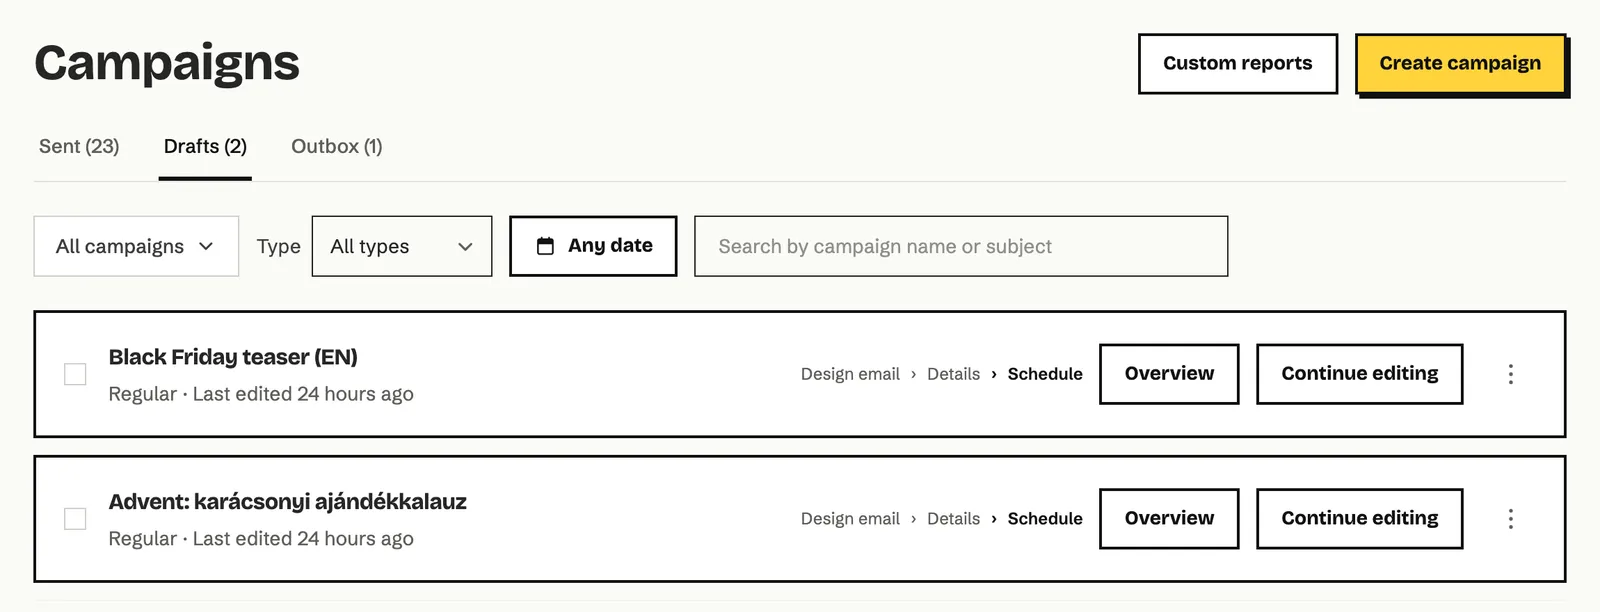
On a draft, Overview shows the email preview and the settings, and Continue editing takes you back to where you left off.
Campaign types
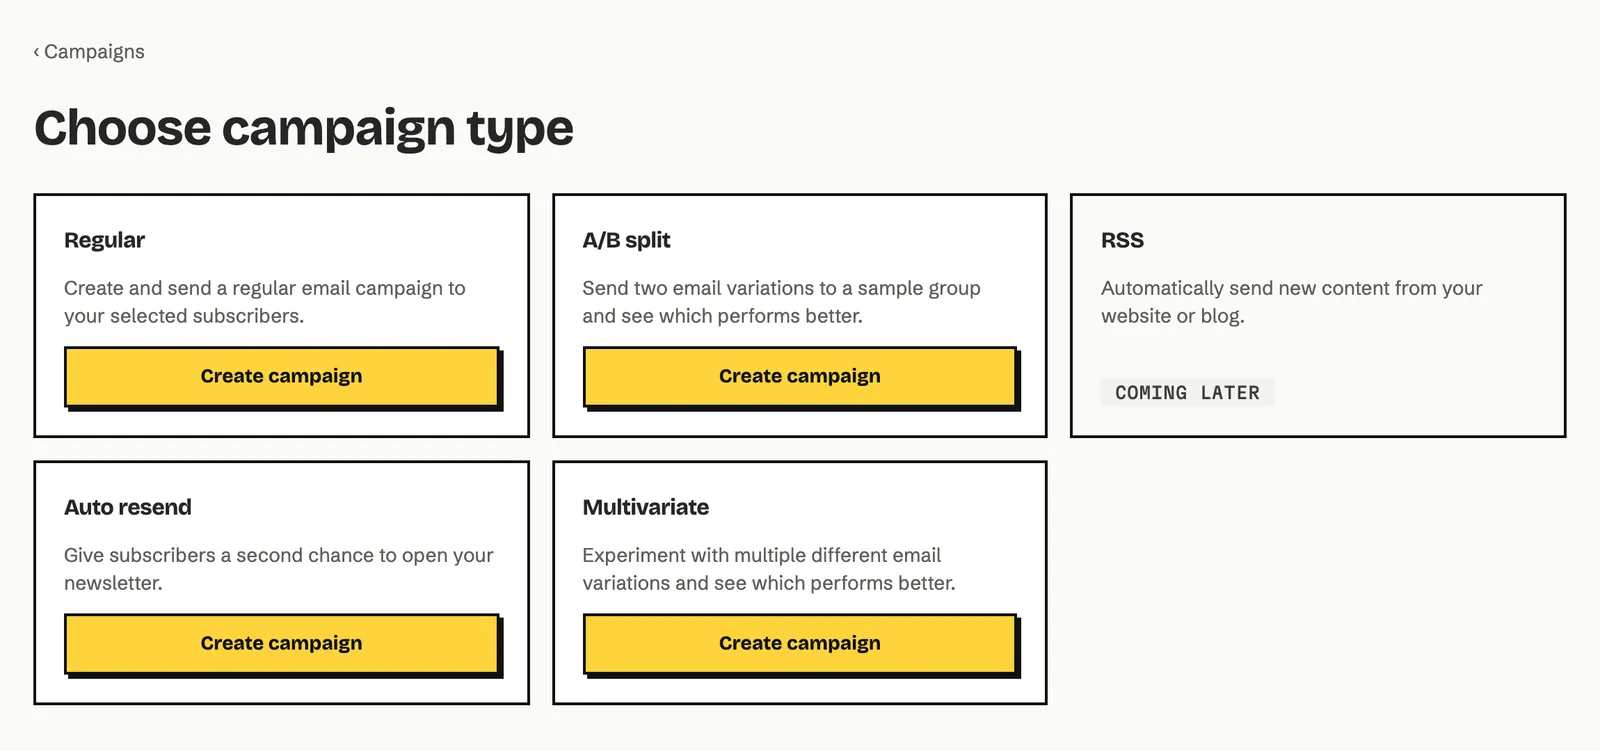
Section titled “Campaign types”When you start a new campaign, you choose its type first. You can’t change it later.
| Type | What it’s for |
|---|---|
| Regular | One email to the subscribers you select. Most newsletters are regular campaigns. |
| A/B split | You try one thing (subject line, sender, content or sending time) in two versions on part of your recipients, and the better version goes to everyone else. |
| Auto resend | After the first email, a second one goes to those who didn’t open it or didn’t click in it. |
| Multivariate | Like an A/B split, but you can test up to 3 things at once, with 2-4 versions each. |
| RSS | Not available yet: its card says Coming later. |
How to create a campaign
Section titled “How to create a campaign”- On the Campaigns page, click Create campaign.
- Pick the type and click Create campaign on its card. Echo creates the draft right away (named, for example, Regular campaign Oct 22, 2026) and opens the wizard.
- The wizard has three steps, and its header always shows where you are:
- Design email: choose a starting point and edit the email.
- Details: name, subject, sender, recipients, language and tracking.
- Schedule: send now or later.
The wizard saves every change by itself, and the header then shows ● Saved. You can leave at any time with × in the top left corner: the campaign waits on the Drafts tab, and Continue editing takes you back to where you left off.
How to choose what the email starts from
Section titled “How to choose what the email starts from”On the Design email step you have three starting points.
-
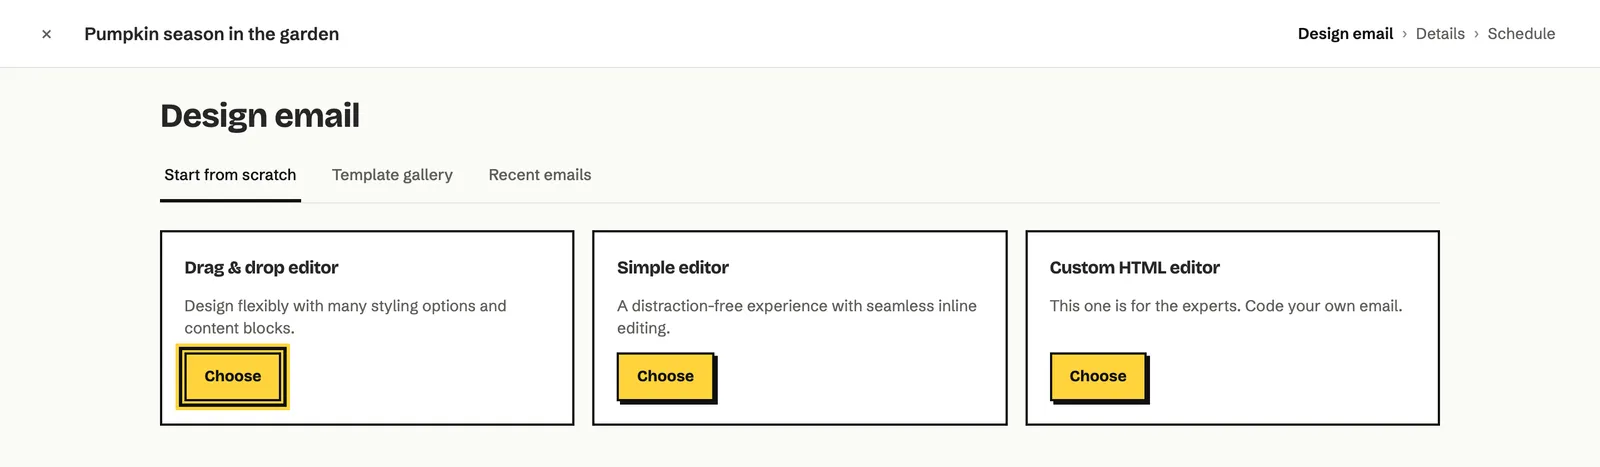
Start from scratch: pick an editor and click Choose on its card.
- Drag & drop editor: you build the email from blocks, with many layouts and styles.
- Simple editor: you write as in a word processor, and the email’s style comes from your brand styles.
- Custom HTML editor: you code the email yourself.
-
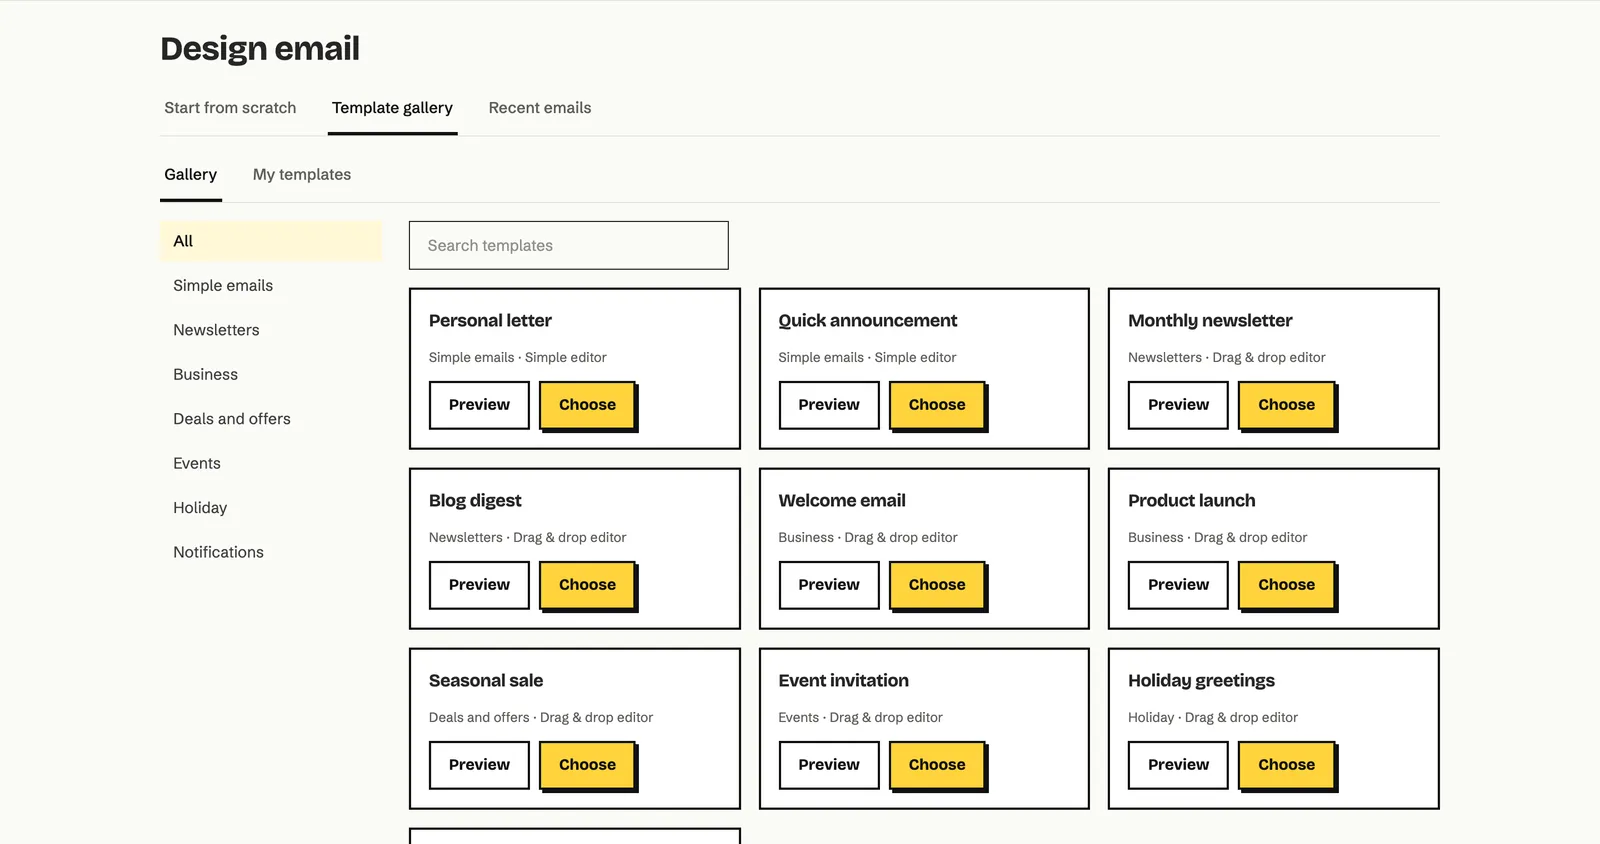
Template gallery: the Gallery tab has ready-made designs by category (for example Newsletters, Deals and offers, Events), and the My templates tab has your own templates. Preview lets you look inside, and the Choose button starts from it.
-
Recent emails: you start from a copy of a sent campaign, a draft or an automation email. This is the quickest way when your newsletters keep the same structure month after month.
After you choose, the editor opens.
How to edit the email in the Drag & drop editor
Section titled “How to edit the email in the Drag & drop editor”The editor has three columns: the blocks on the left, the email in the middle and the settings of the selected block on the right. With nothing selected, the right column shows Email settings: the email width, the font and the colours. Colours you leave empty come from your brand styles (Brand colour).
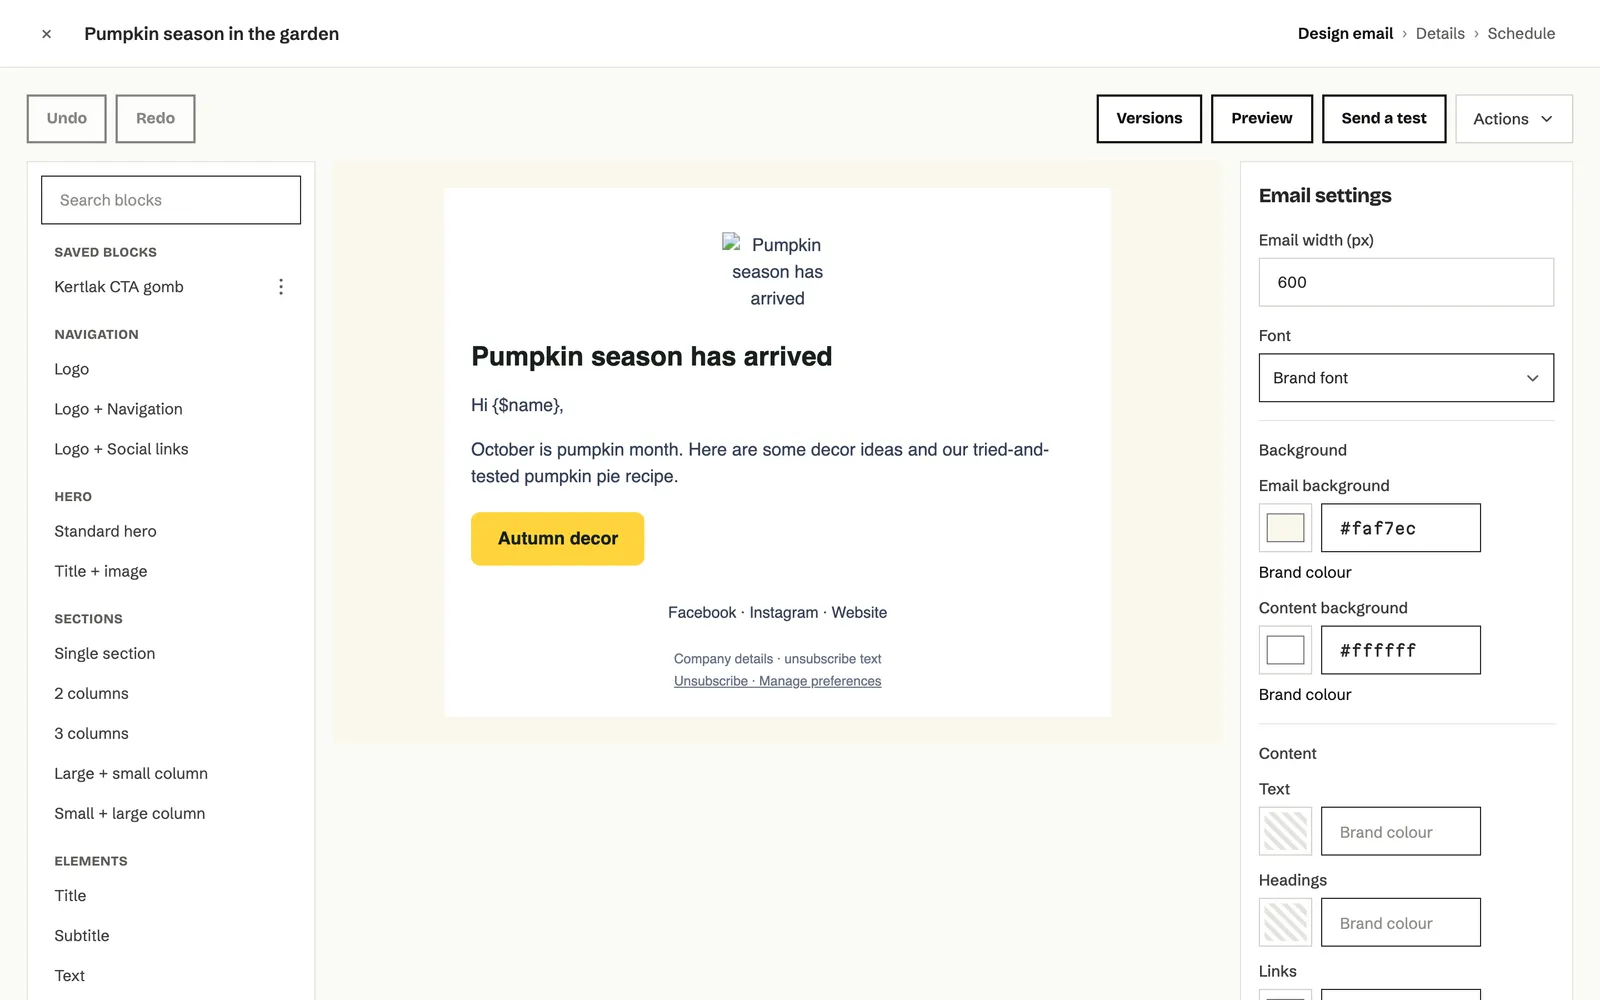
- Click a block in the list on the left, or drag it into the email where you want it. A clicked block goes below the selected block; with nothing selected, it goes to the end of the email, above the footer.
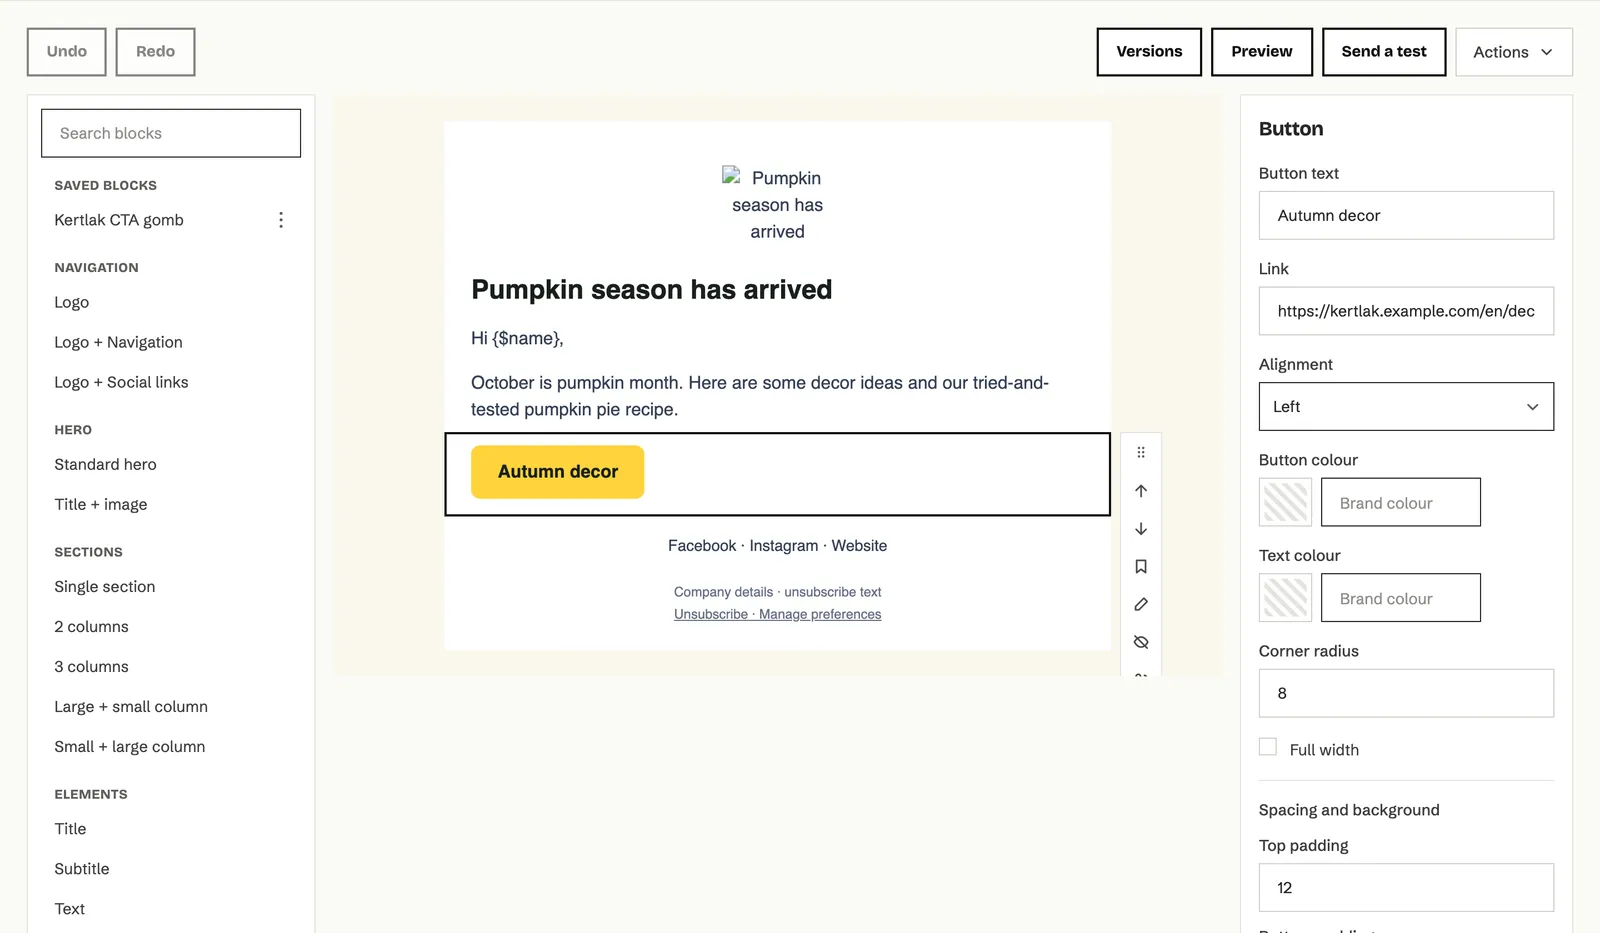
- Click a block in the email. Its settings appear on the right, for example the label, link, alignment and colours of a button.
- Edit the texts directly in the email.
- When you’re done, click Done editing in the bottom right corner. If a button has no link, Echo tells you so you can fix it.
The blocks
| Group | Blocks |
|---|---|
| Saved blocks | Your own saved blocks (see below). |
| Navigation | Logo, Logo + Navigation, Logo + Social links |
| Hero | Standard hero, Title + image |
| Sections | Single section, 2 columns, 3 columns, Large + small column, Small + large column. You can put other blocks in the columns; on mobile they stack. |
| Elements | Title, Subtitle, Text, Image, Button, Divider, Spacer, Video, Links, Custom HTML |
| Content | Basic CTA, Image + content |
| Special | Accordion, Carousel, Countdown timer, App download, Survey, Quiz, Event (RSVP) |
| Social and sharing | Social links |
| Footer | Centered footer, Basic footer, Aligned footer, Footer + navigation |
The block toolbar
A toolbar appears beside the selected block, to the right of the email. From top to bottom: drag, Move up, Move down, Save block, Edit, Hide in email, Visibility, Duplicate and Delete. When the block sits inside a column or another block, or there’s no room beside the email, the toolbar appears above the block instead, in the same order from left to right.
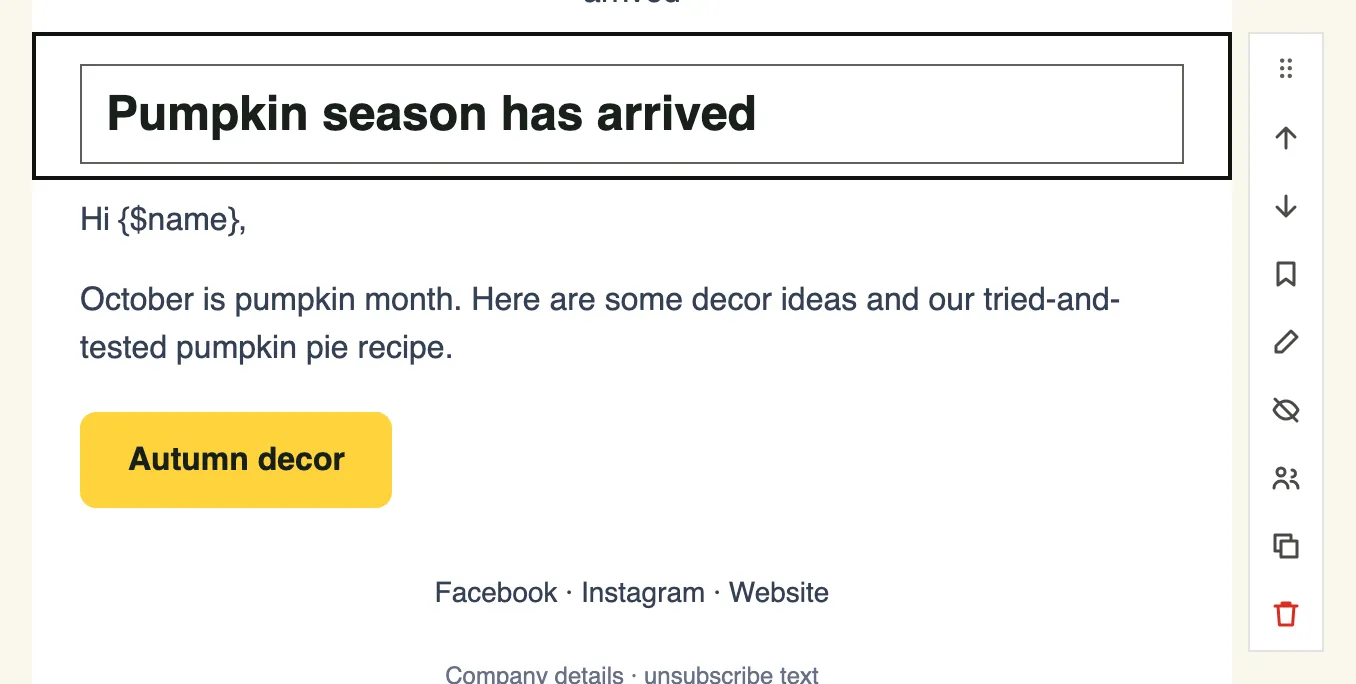
- Hide in email: the block stays in the editor but isn’t put in the email. Handy when you want to leave a part out for now.
- Visibility: choose who sees the block: Everyone, Members of groups, Everyone except groups, or a Custom rule. This way, for example, your VIP customers can get a different offer in the same email. Who sees a conditional block is decided when the email is sent.
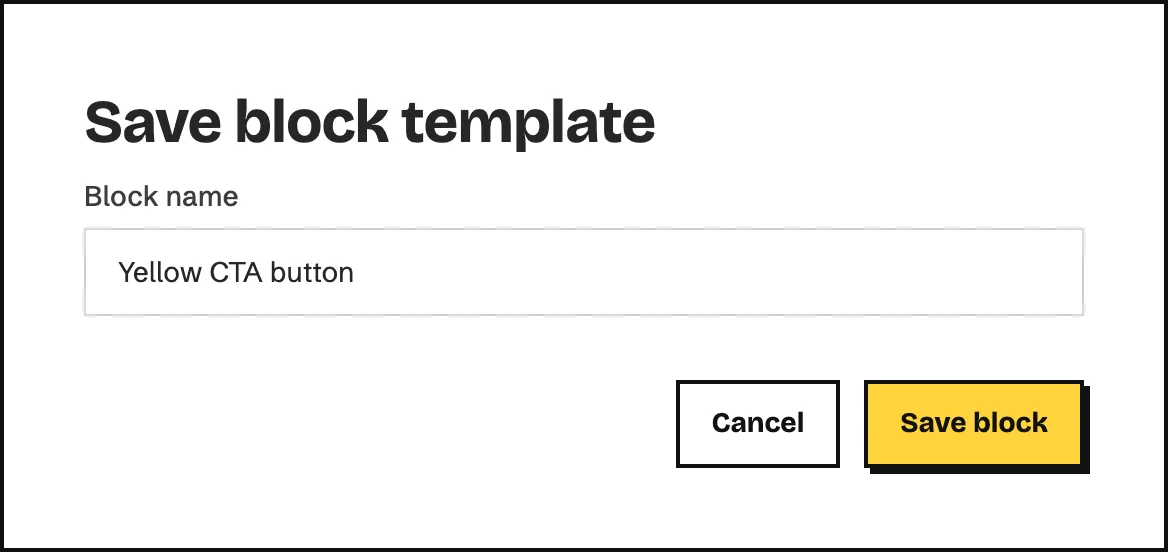
- Save block: save the block under a name, and it will be under Saved blocks in any email later.
How to add a survey, a quiz or an event to the email
Section titled “How to add a survey, a quiz or an event to the email”With these three blocks, subscribers can answer right from the email with one click. An answer opens a confirmation page, and you see the results on the Responses tab of the campaign report (see the Reports chapter).
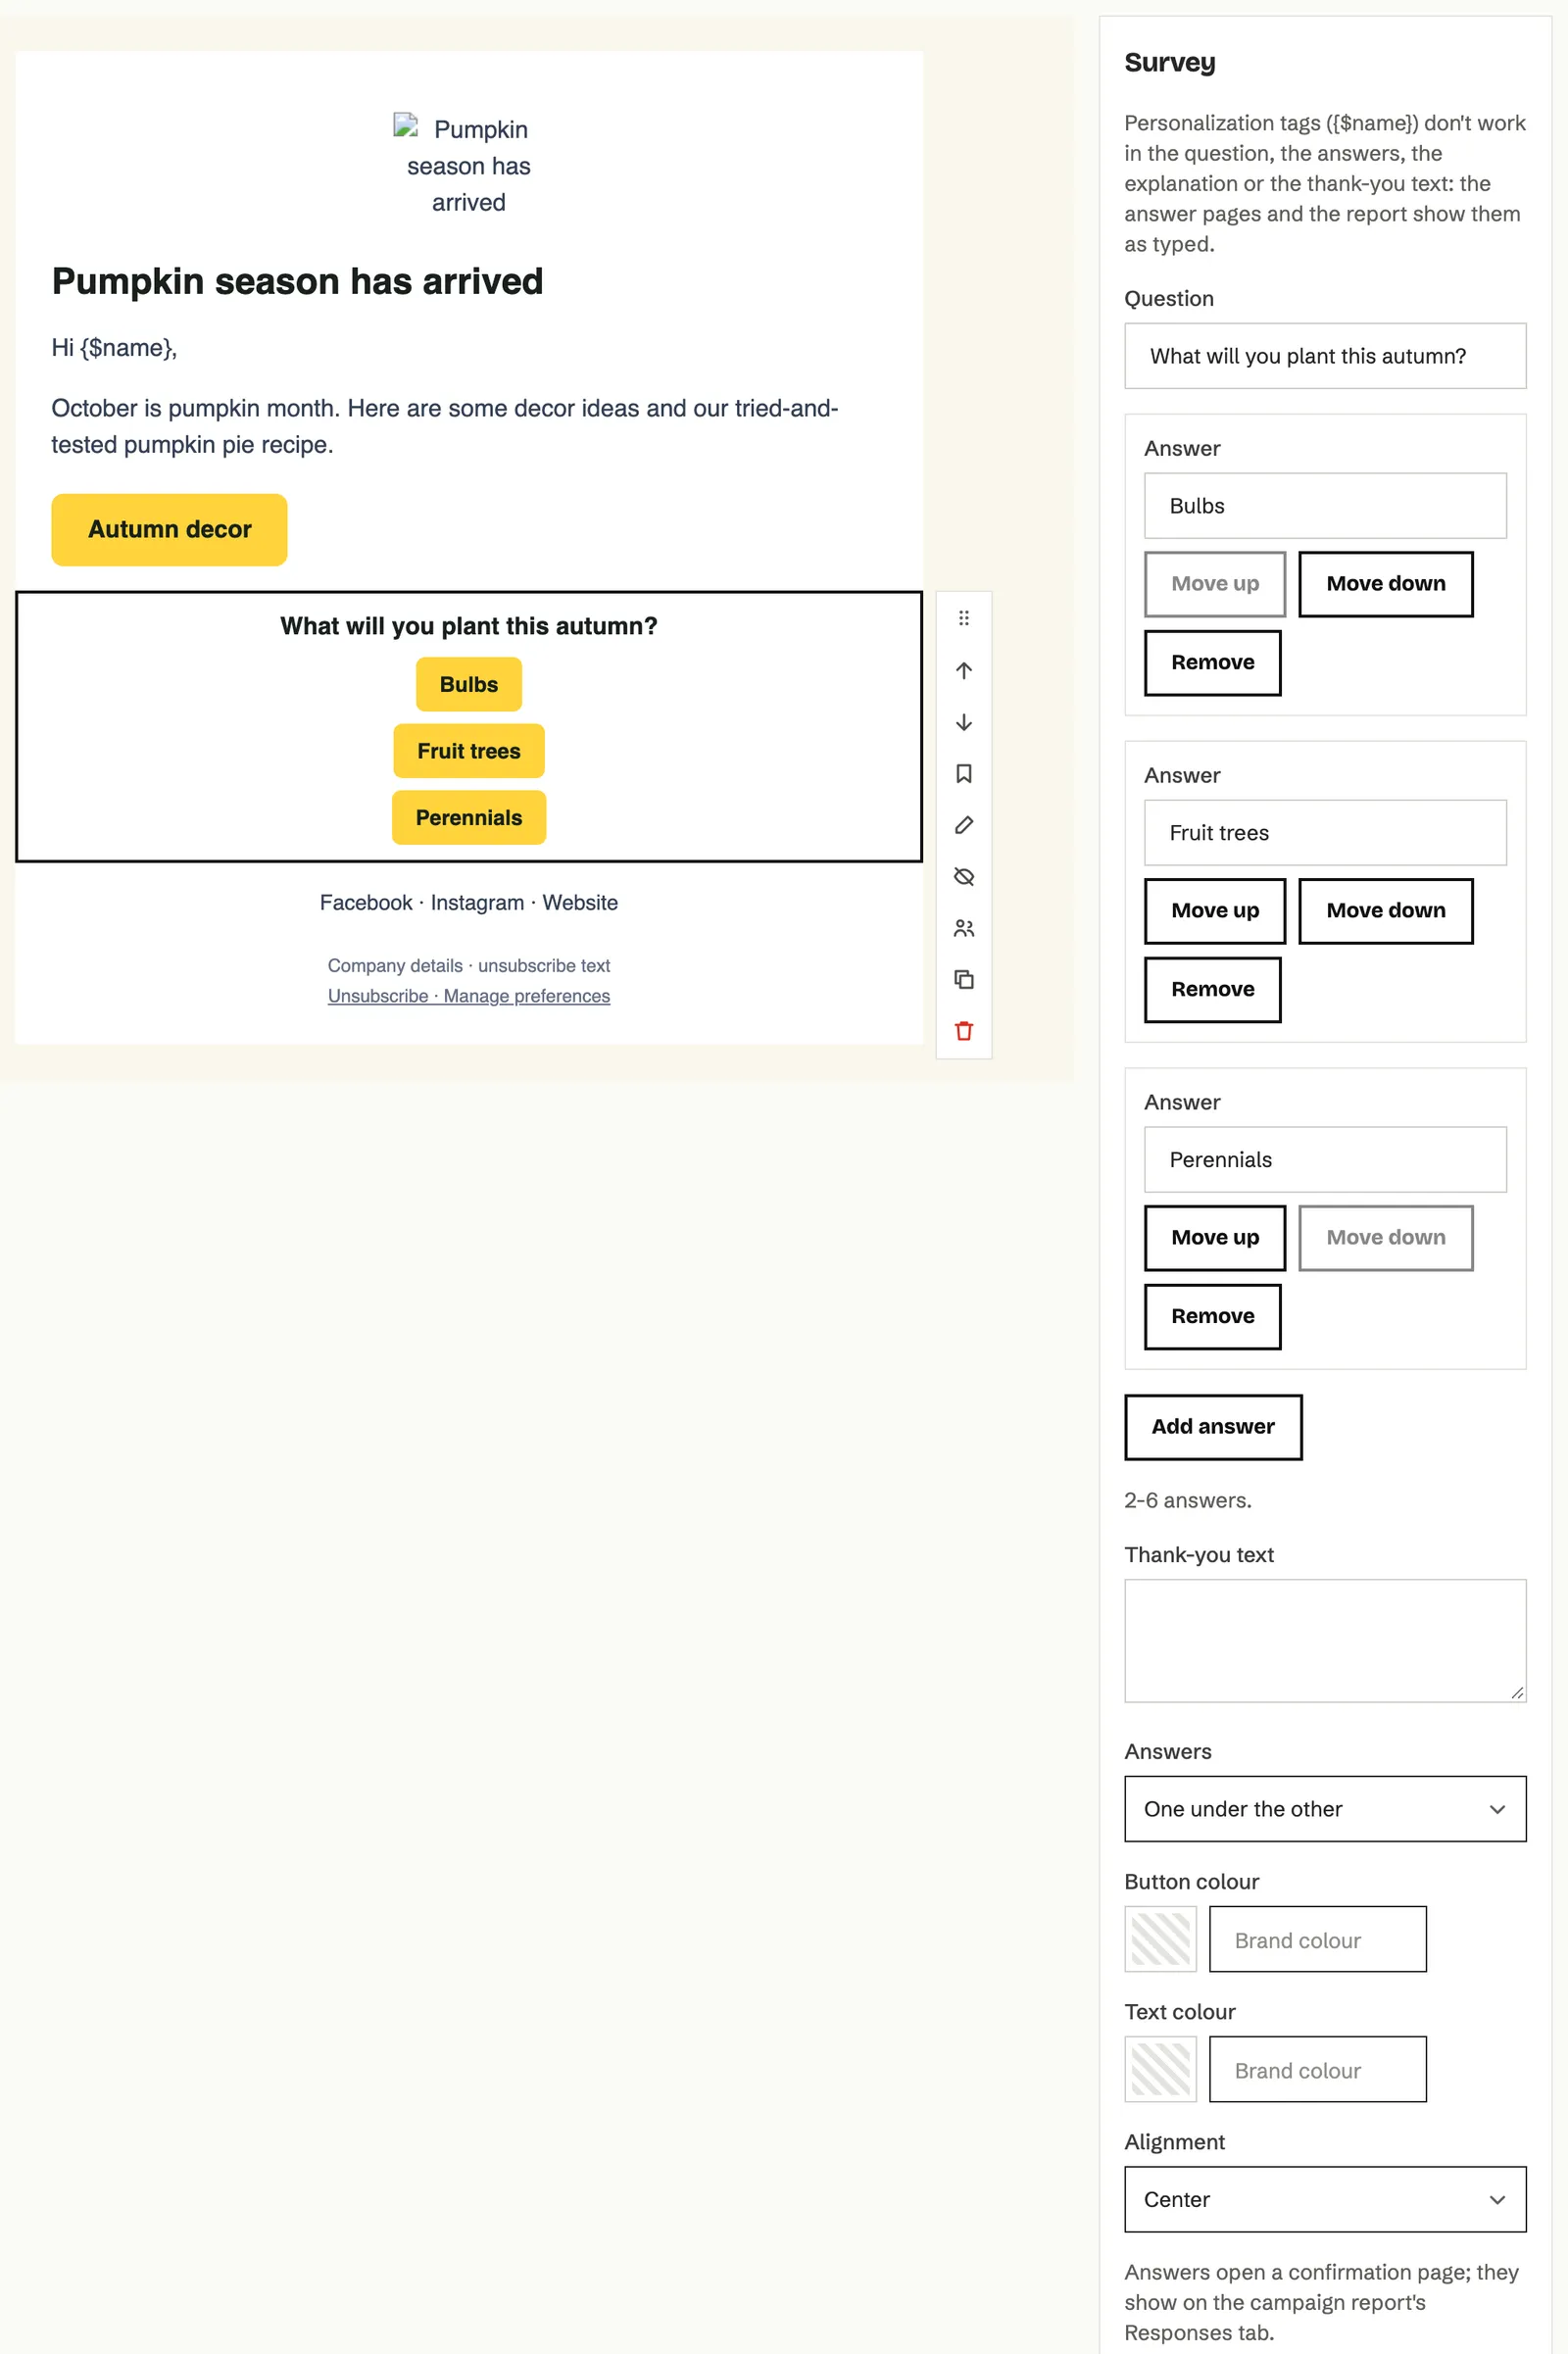
Survey
- Click Survey in the block list.
- Type the question in Question and the possible answers in the Answer fields. Add answer adds one more, and Move up and Move down put them in order.
- If you like, fill in Thank-you text. The person who answers sees it on the confirmation page.
- In the Answers list, choose whether the buttons go one under the other or in one row.
Quiz
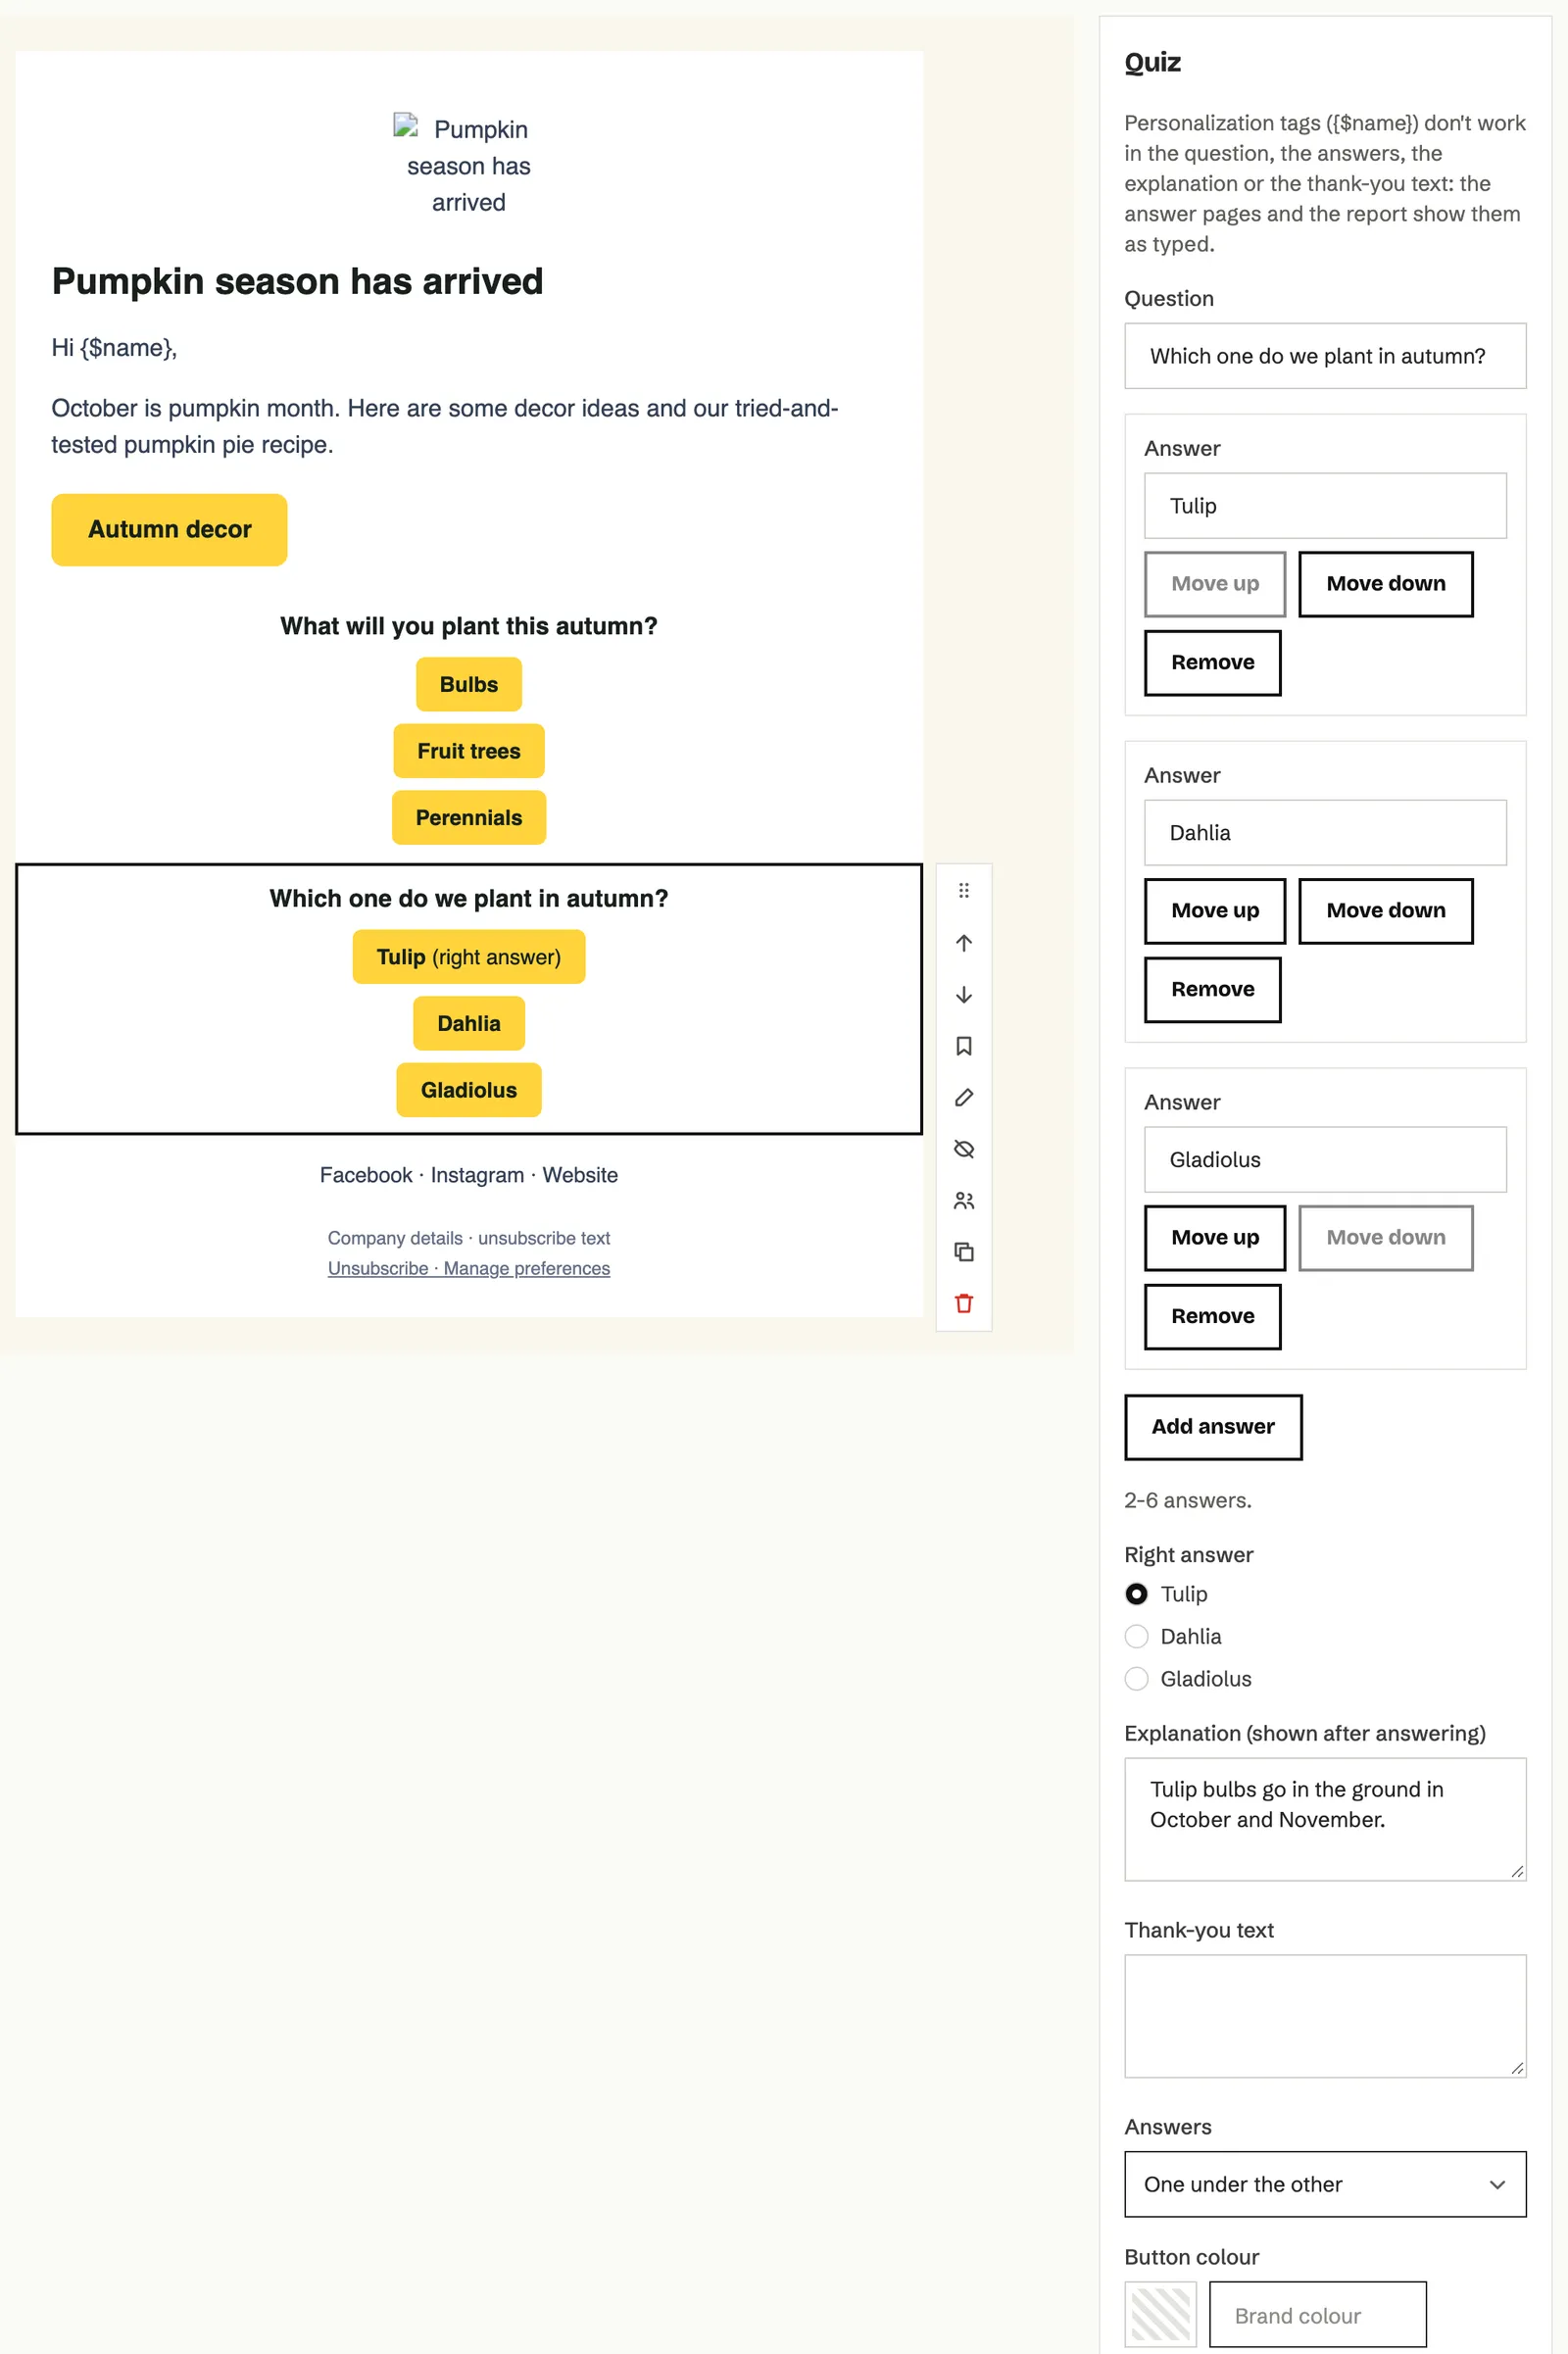
A quiz is built the same way, with two differences: under Right answer you mark the correct one, and in Explanation (shown after answering) you can add a short reason. Until a right answer is marked, the quiz isn’t put in the email.
Event (RSVP)
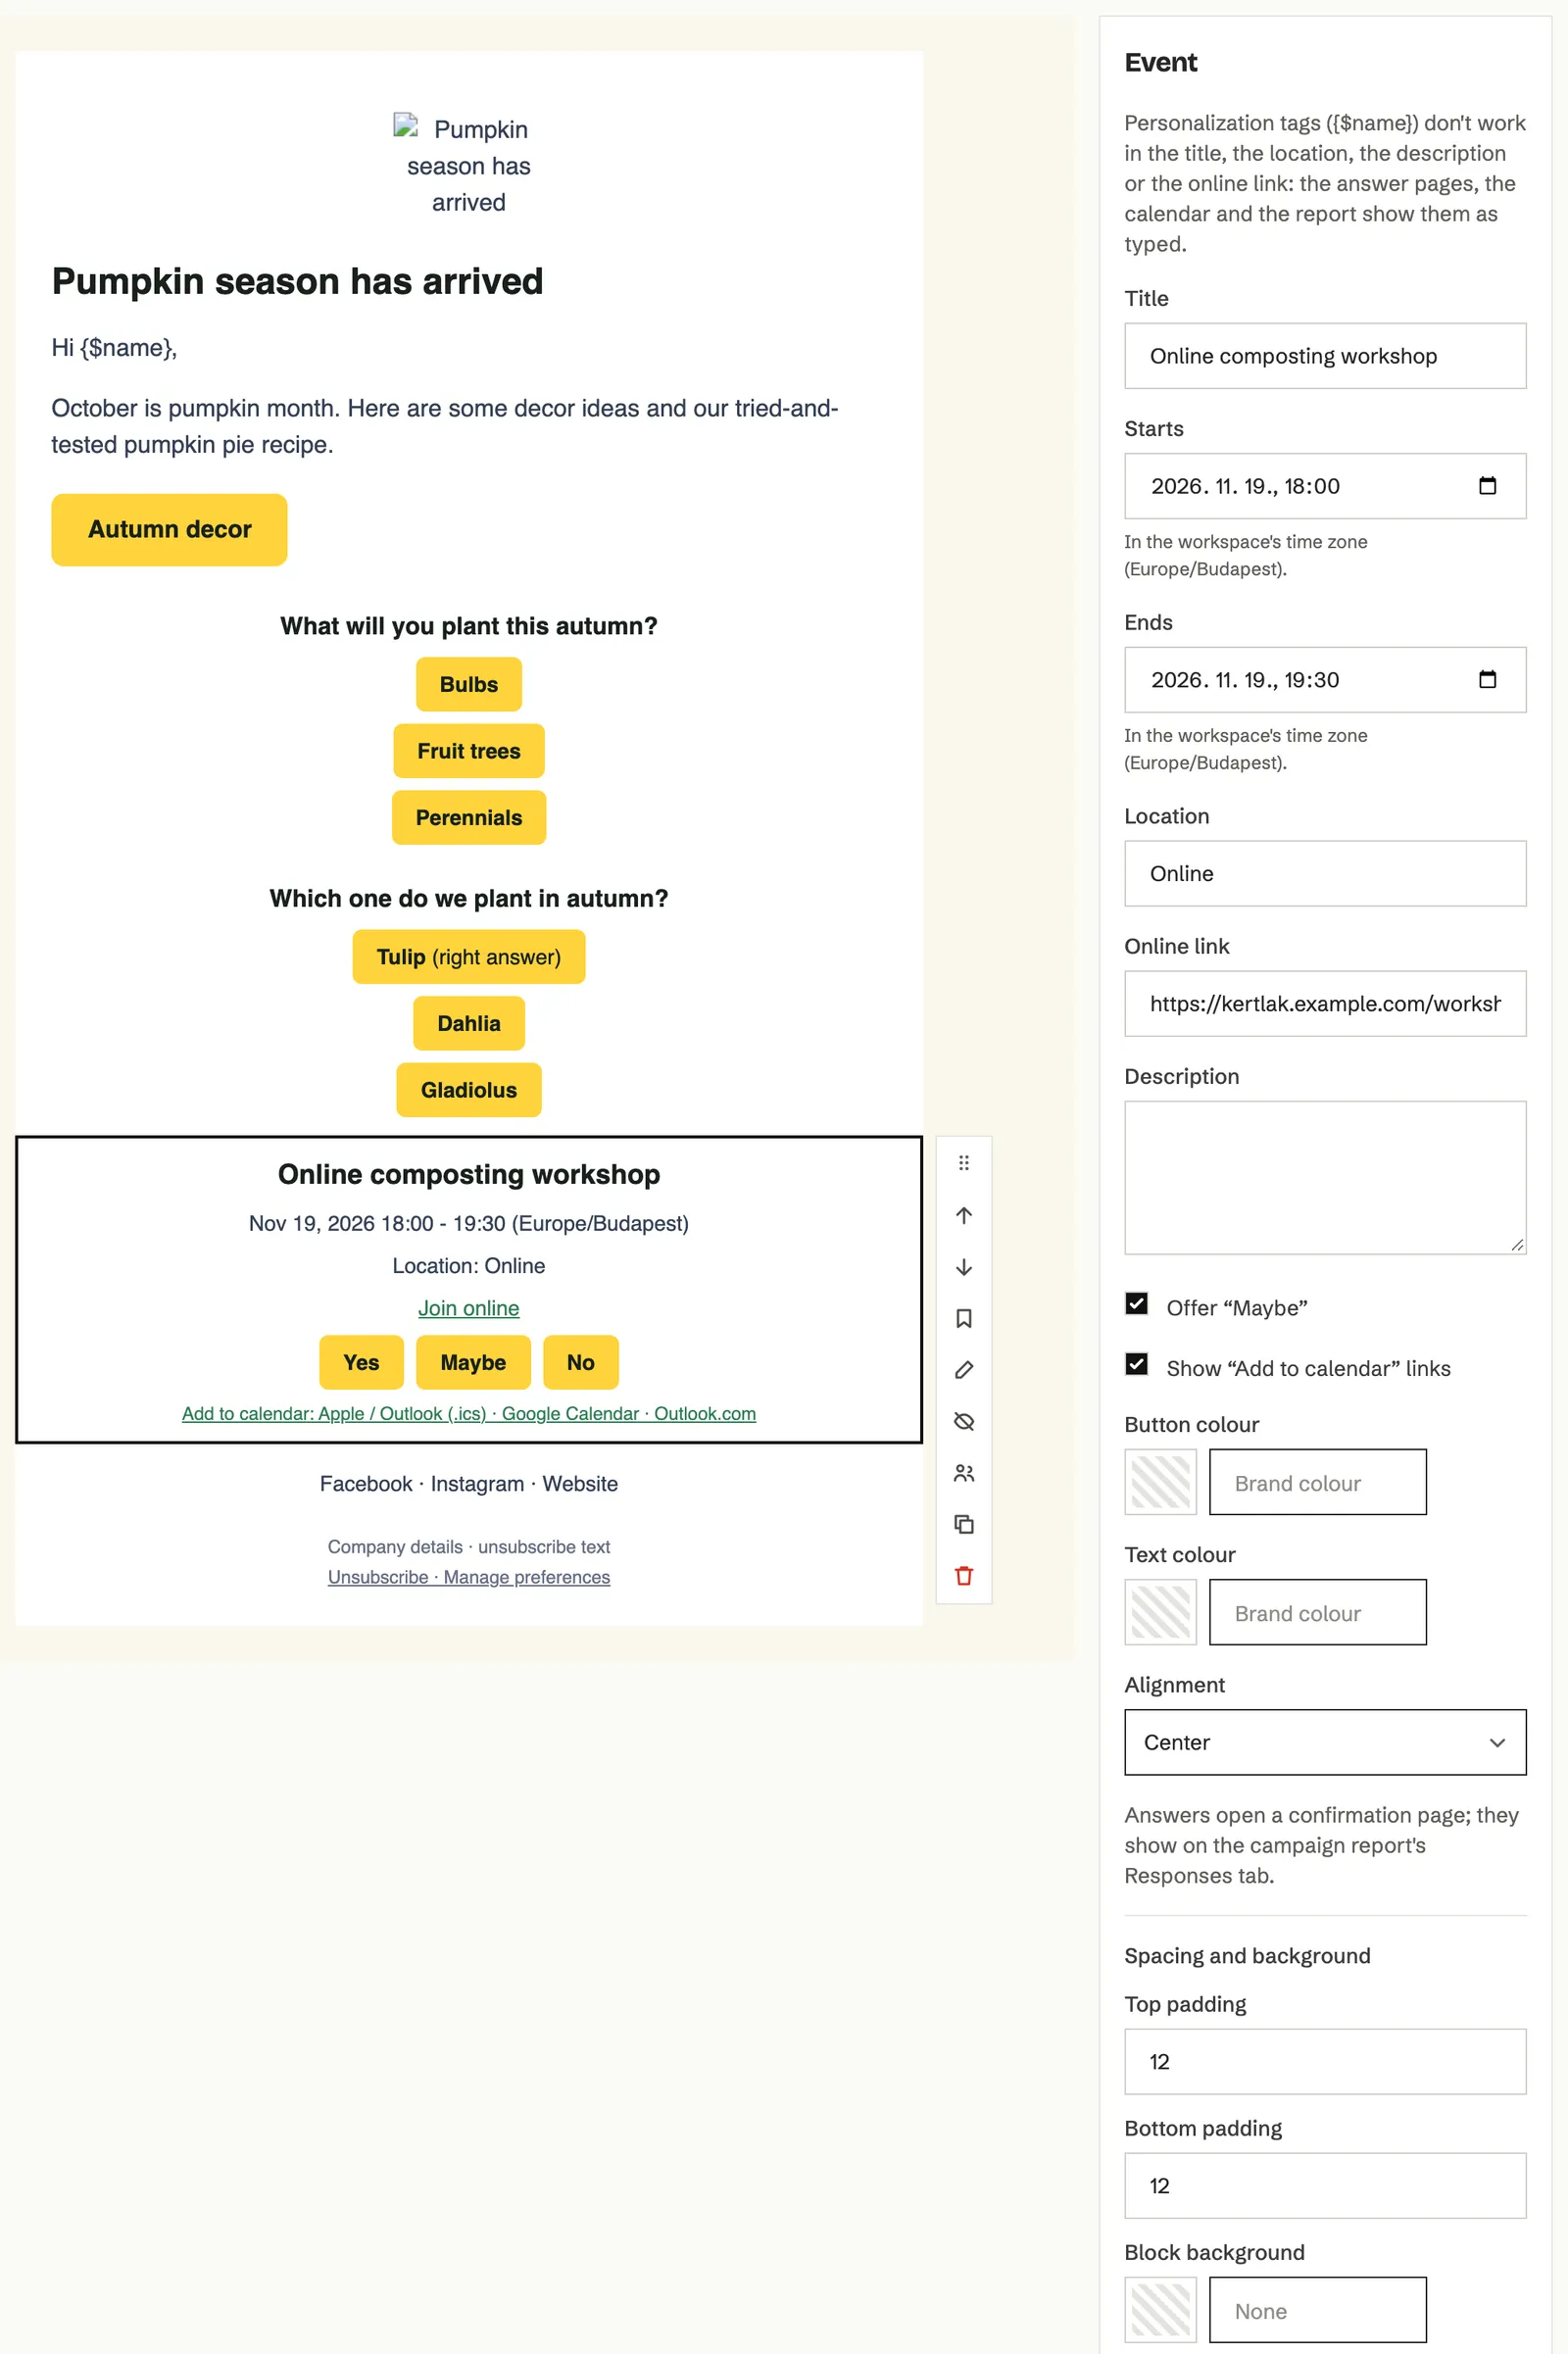
- Click Event (RSVP) in the block list.
- Fill in Title, Starts and Ends. The times are in the workspace’s time zone.
- If needed, fill in Location, Online link and Description.
- Offer “Maybe” gives three buttons (Yes, Maybe, No), and Show “Add to calendar” links adds Apple / Outlook, Google Calendar and Outlook.com calendar links below them.
How to write an email in the Simple editor
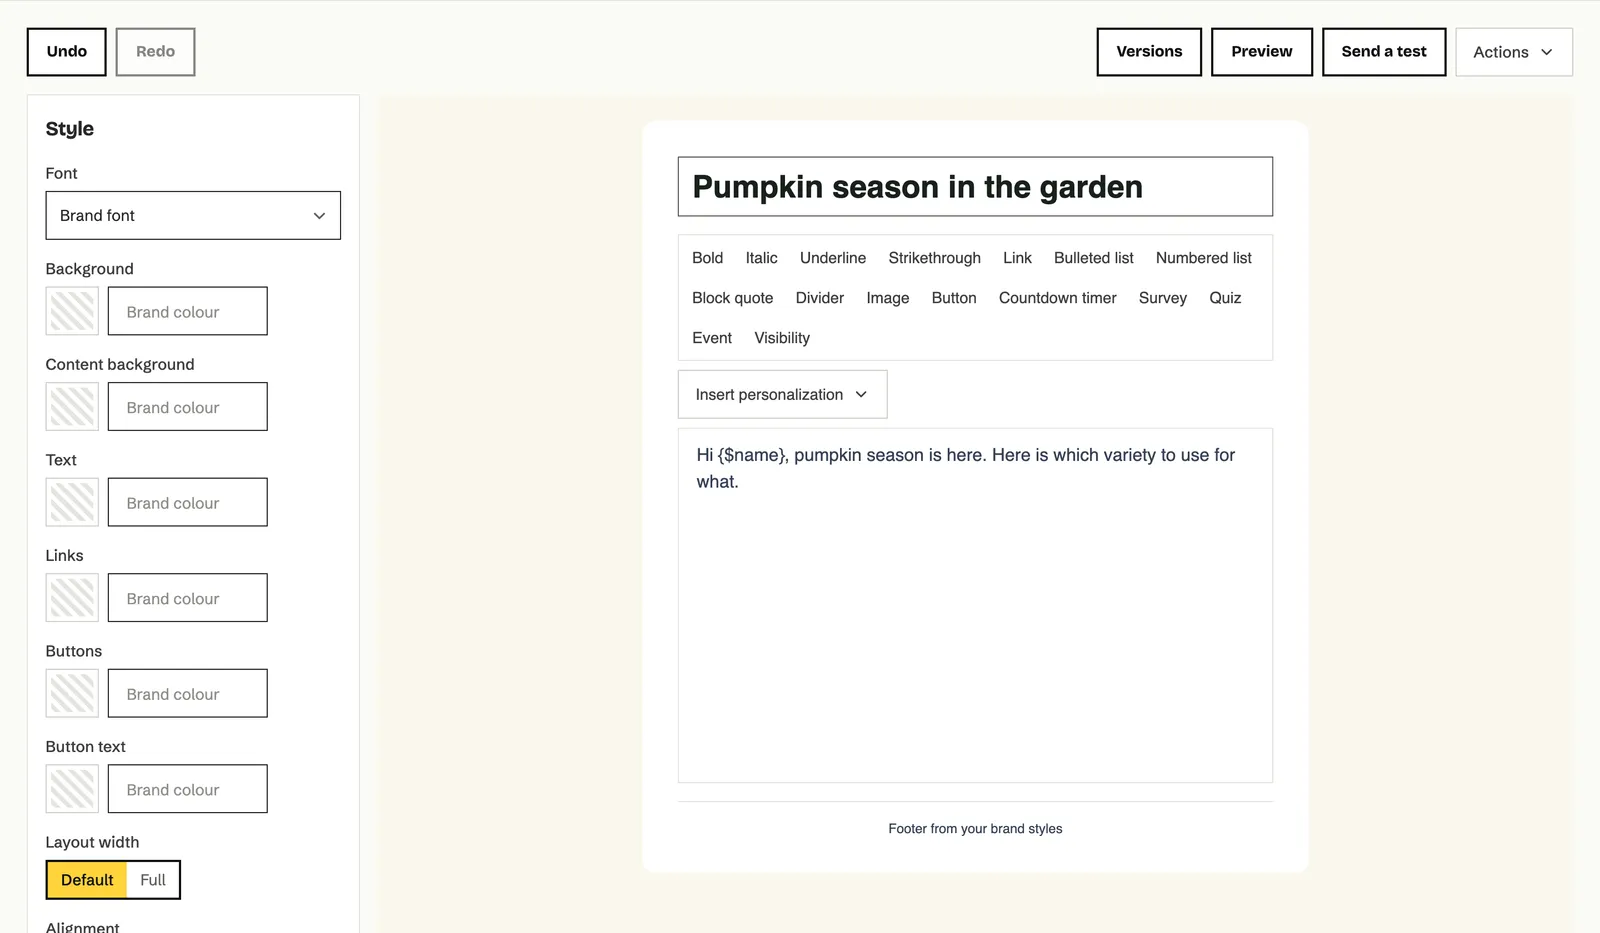
Section titled “How to write an email in the Simple editor”The Simple editor is a good choice when the email is mostly text, such as a personal message.
- Type the email’s title in Title (optional).
- Write the text in the field below. The formatting bar inserts bold, italic, links, lists, quotes, images, buttons, countdown timers, surveys, quizzes and events. You get the same by typing
/. - In the Style panel on the left, set the font, colours, width and alignment.
- Show footer puts your brand’s footer at the bottom of the email, with company details, social links and the unsubscribe link.
How to code the email yourself
Section titled “How to code the email yourself”The Custom HTML editor shows the preview on the left and the code on the right.
- Type or paste the HTML code. The preview updates as you type, and Desktop and Mobile switch between views.
- Problems lists unclosed tags, elements not allowed in emails and unknown personalization tags, with line numbers.
- You can bring in a ready HTML email with Import HTML (ZIP). The ZIP can be up to 10 MB, and its images go to the file manager.
- Format tidies up the indentation of the code.
Personalization tags
Section titled “Personalization tags”With tags, each subscriber gets their own data in the email, such as their name. A tag looks like {$fieldkey}, for example {$name}. You find the keys in the Tag column on the Fields tab under Subscribers (see the Subscribers chapter).
- Next to the subject, and in the Simple and the HTML editor, click Insert personalization.
- Pick the field. The tag goes where the cursor is.
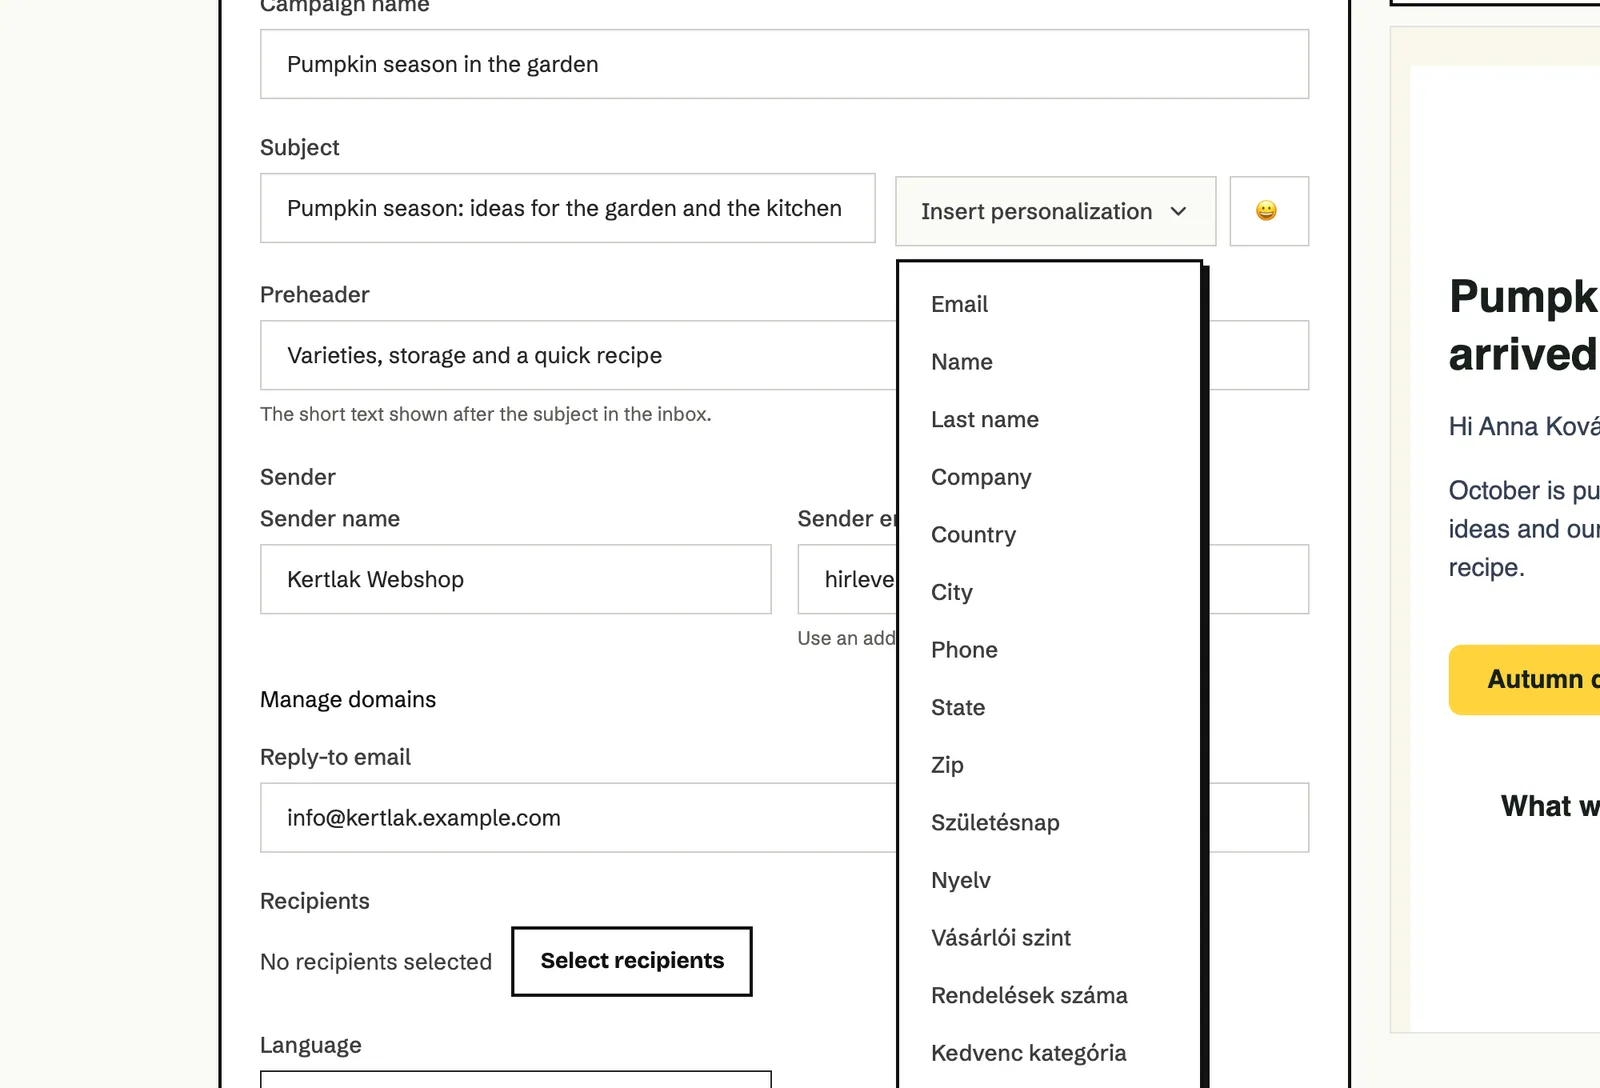
If a subscriber’s field is empty, you can give a default: {$name|default('there')}.
In the HTML editor, the menu also inserts these links:
| Tag | What it does |
|---|---|
{$unsubscribe} |
Unsubscribe link |
{$preferences} |
Preference center link |
{$webview} |
View in browser link |
{$forward} |
Forward to a friend link |
How to preview and test the email
Section titled “How to preview and test the email”The editor’s top bar has these:
-
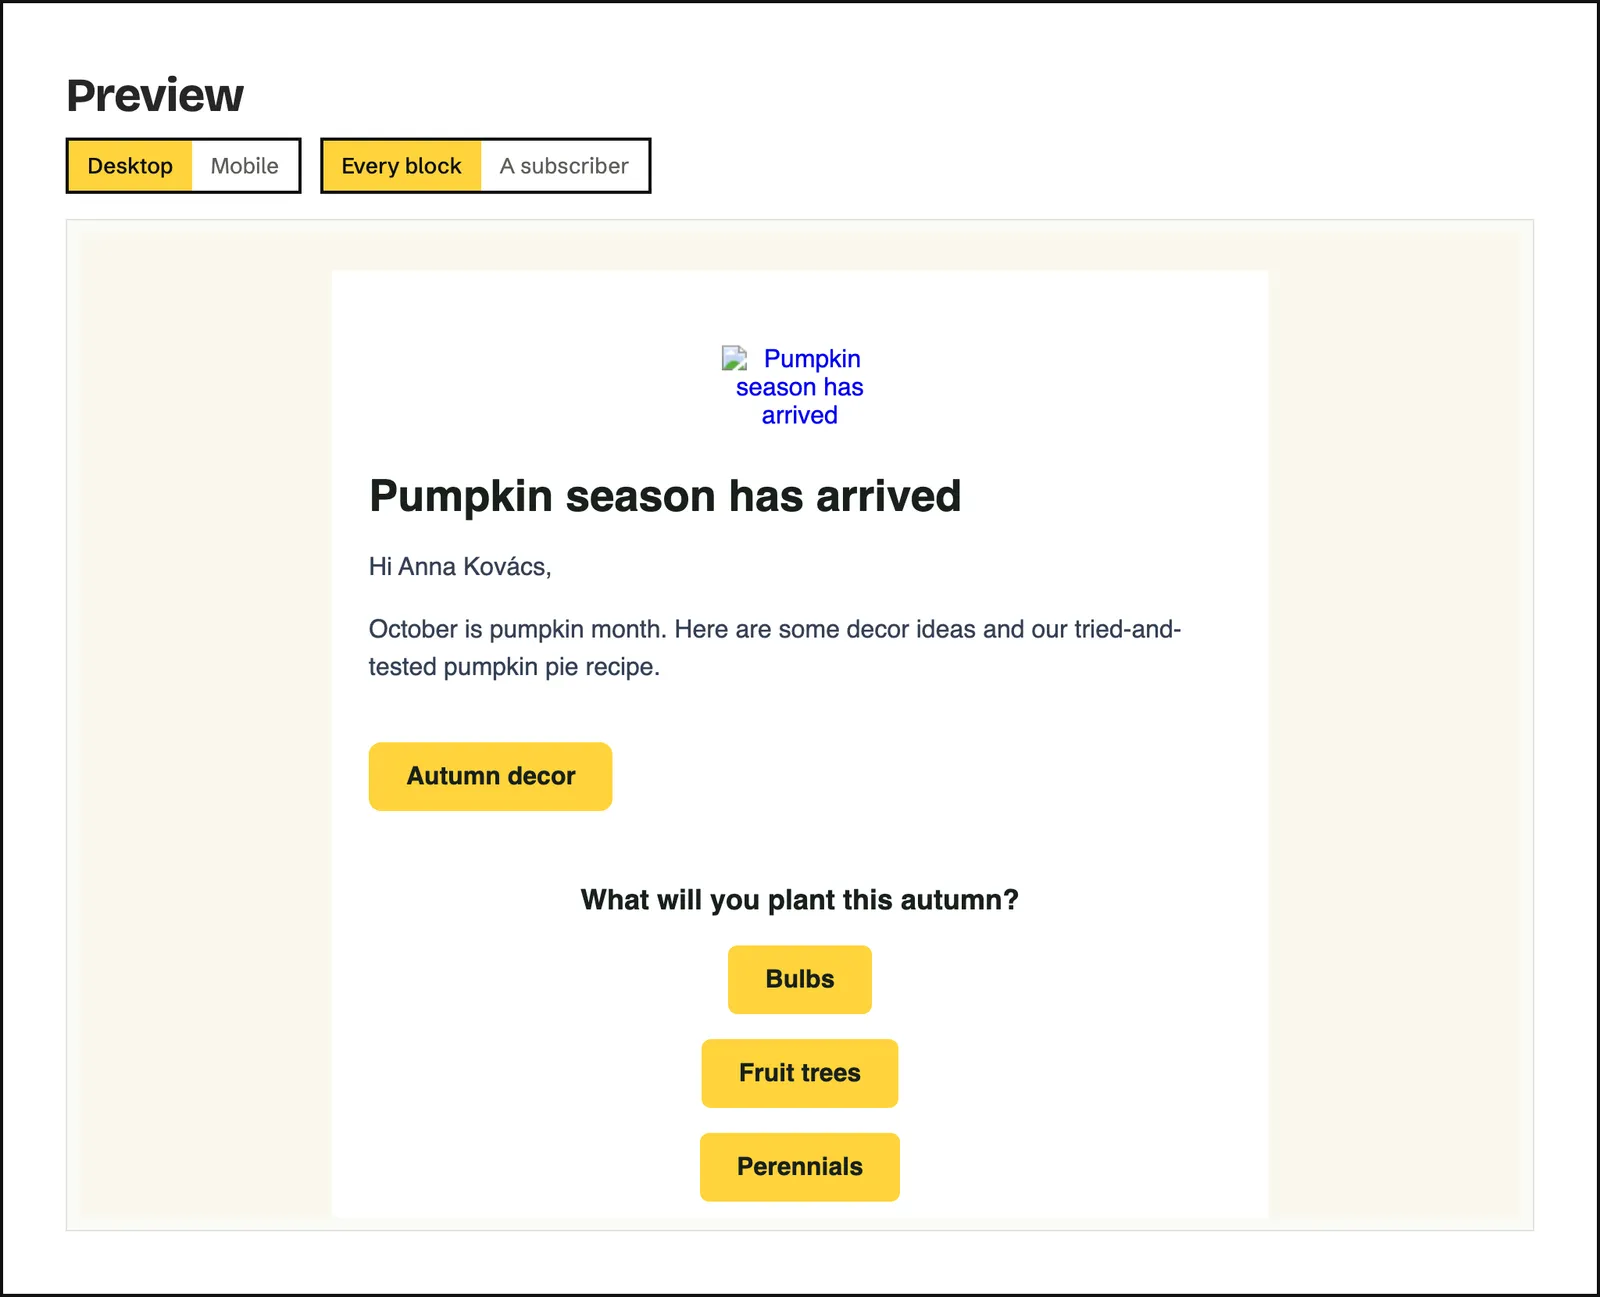
Preview: the email as it appears in the inbox, in Desktop and Mobile view. In A subscriber view you can enter a subscriber’s address and see which blocks they get.
-
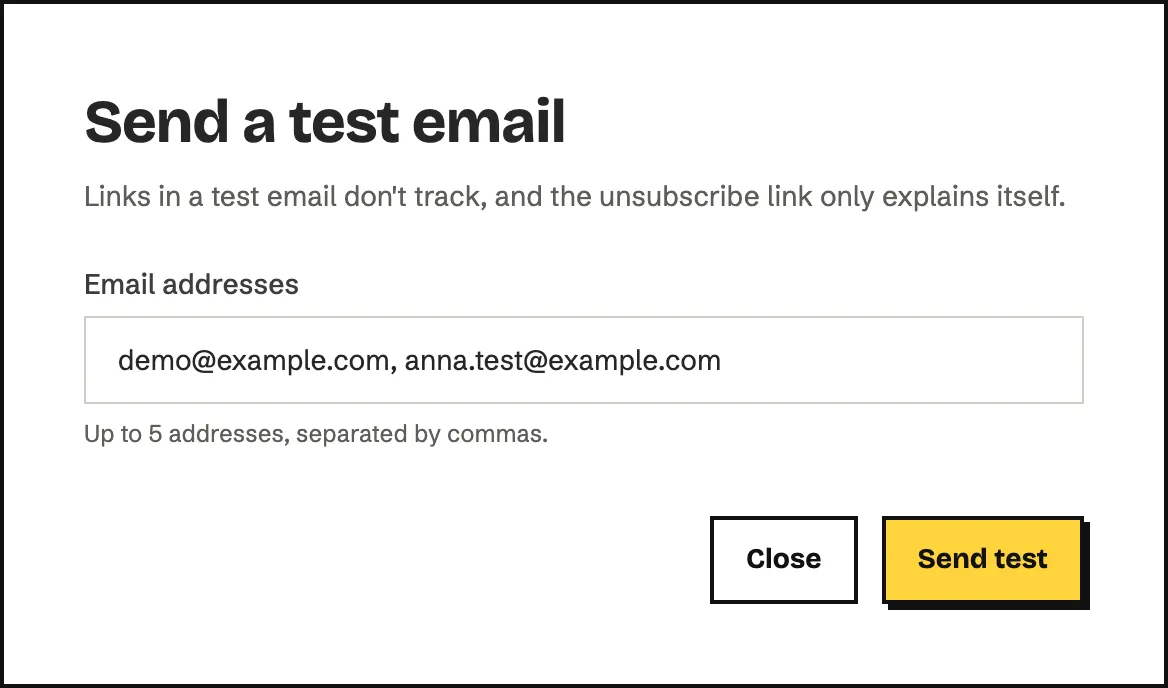
Send a test: enter up to 5 addresses separated by commas, then click Send test.
-
Versions: Echo keeps earlier states of the email as versions. You can view any of them and bring it back with Restore this version. The current content then stays in the list as a version.
-
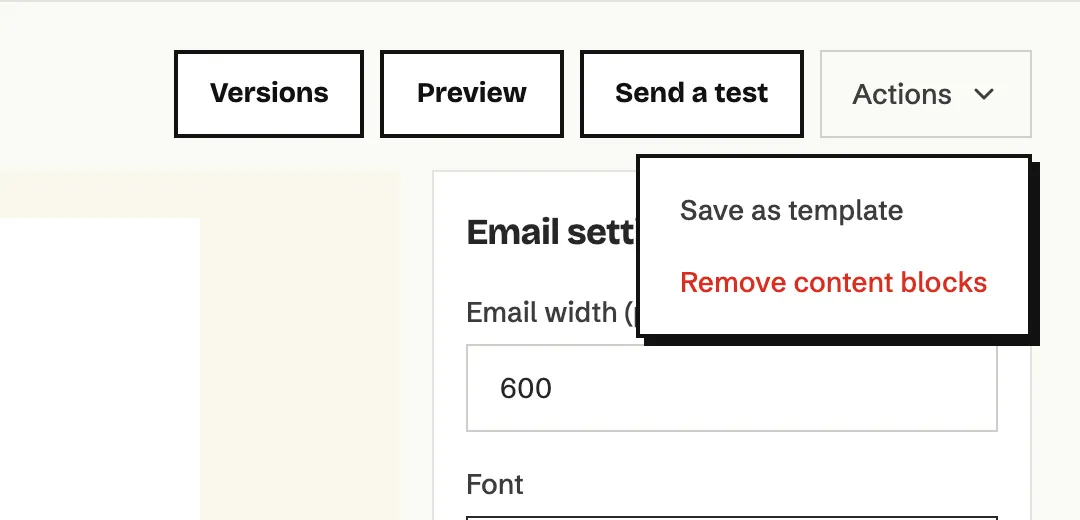
Actions: Save as template saves the email to My templates, and Remove content blocks empties the email (you can undo this).
How to fill in the campaign details
Section titled “How to fill in the campaign details”- On the Details step, fill in Campaign name. Only you see it in the list.
- Write the Subject. Next to it are Insert personalization and the emoji button.
- Preheader is the short text shown after the subject in the inbox. It’s worth filling in; otherwise the email app shows the first lines of the email.
- Check Sender name, Sender email and Reply-to email. They come filled in from your workspace defaults.
- Click Select recipients (see the next section).
- Pick the Language. It’s also the language of the unsubscribe page and the footer.
- Decide whether to turn on Track opens and Google Analytics (UTM tags). The UTM tags are added to every link in the email, and an empty utm_campaign becomes the campaign name.
- Click Continue.
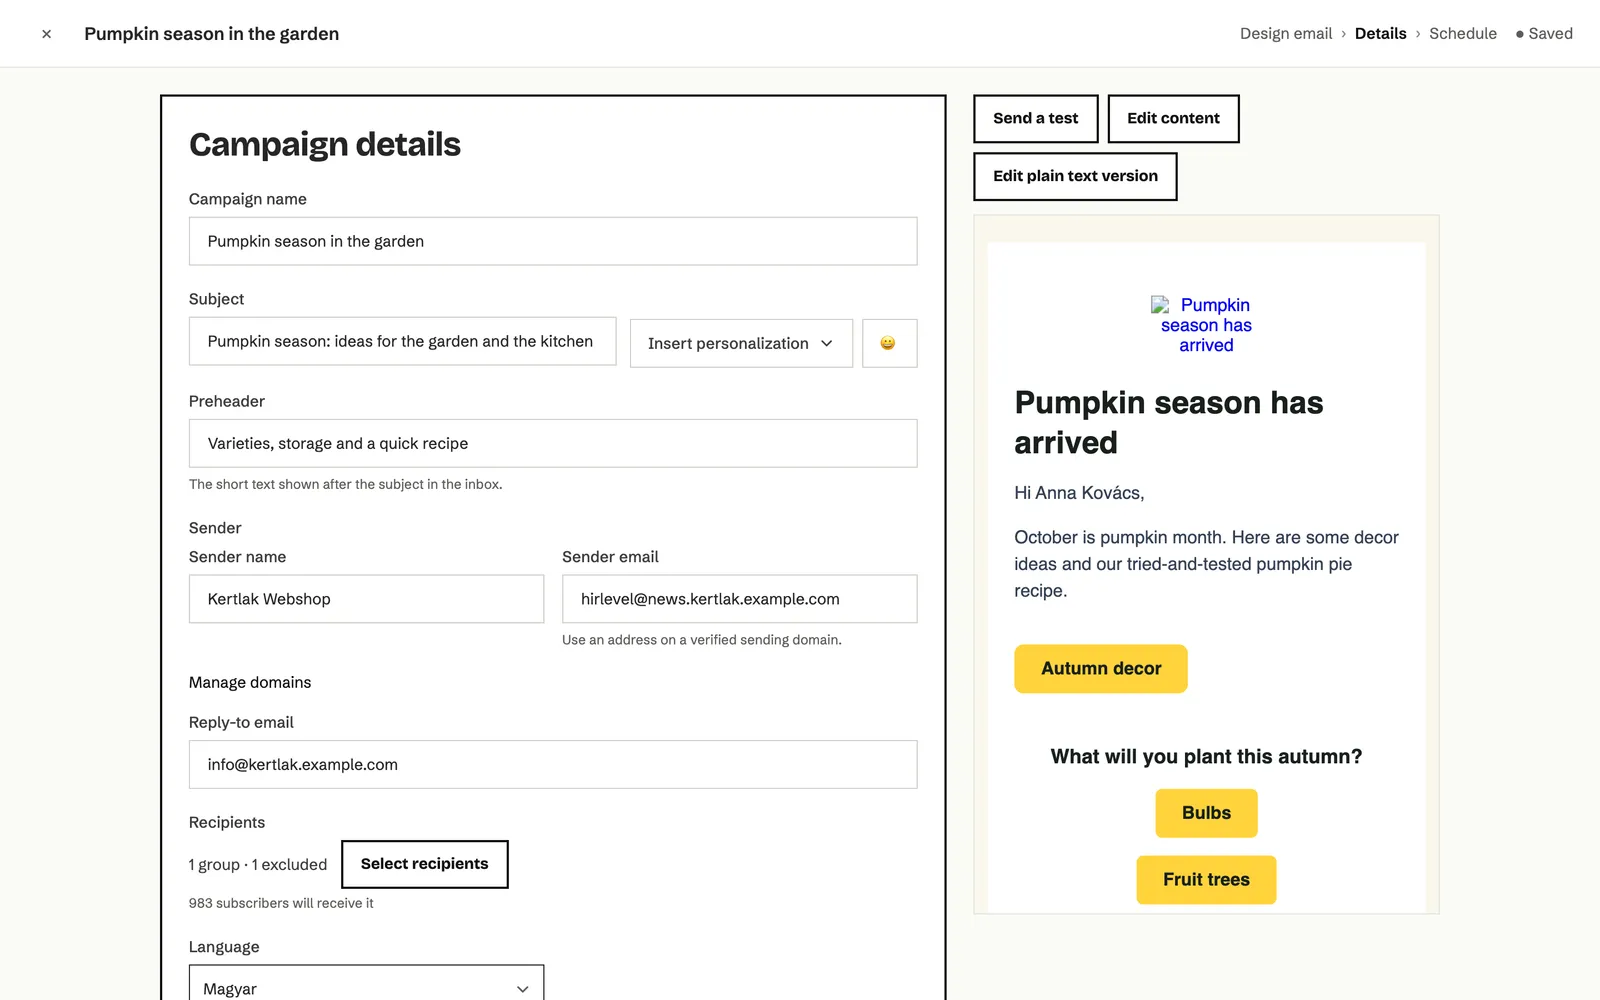
The email preview is on the right. From here you can also send a test, go back with Edit content and edit the plain text version.
How to select the recipients
Section titled “How to select the recipients”- On the Details step, click Select recipients.
- In the Basic view, tick who gets it:
- All active subscribers,
- one or more segments under Segments,
- one or more groups under Groups.
- To leave people out, click Exclude at the end of their row. Members of an excluded group or segment don’t get the email even if they’re in a selected list too.
- Recipients selected: at the bottom of the window shows how many subscribers get it.
- Click Select.
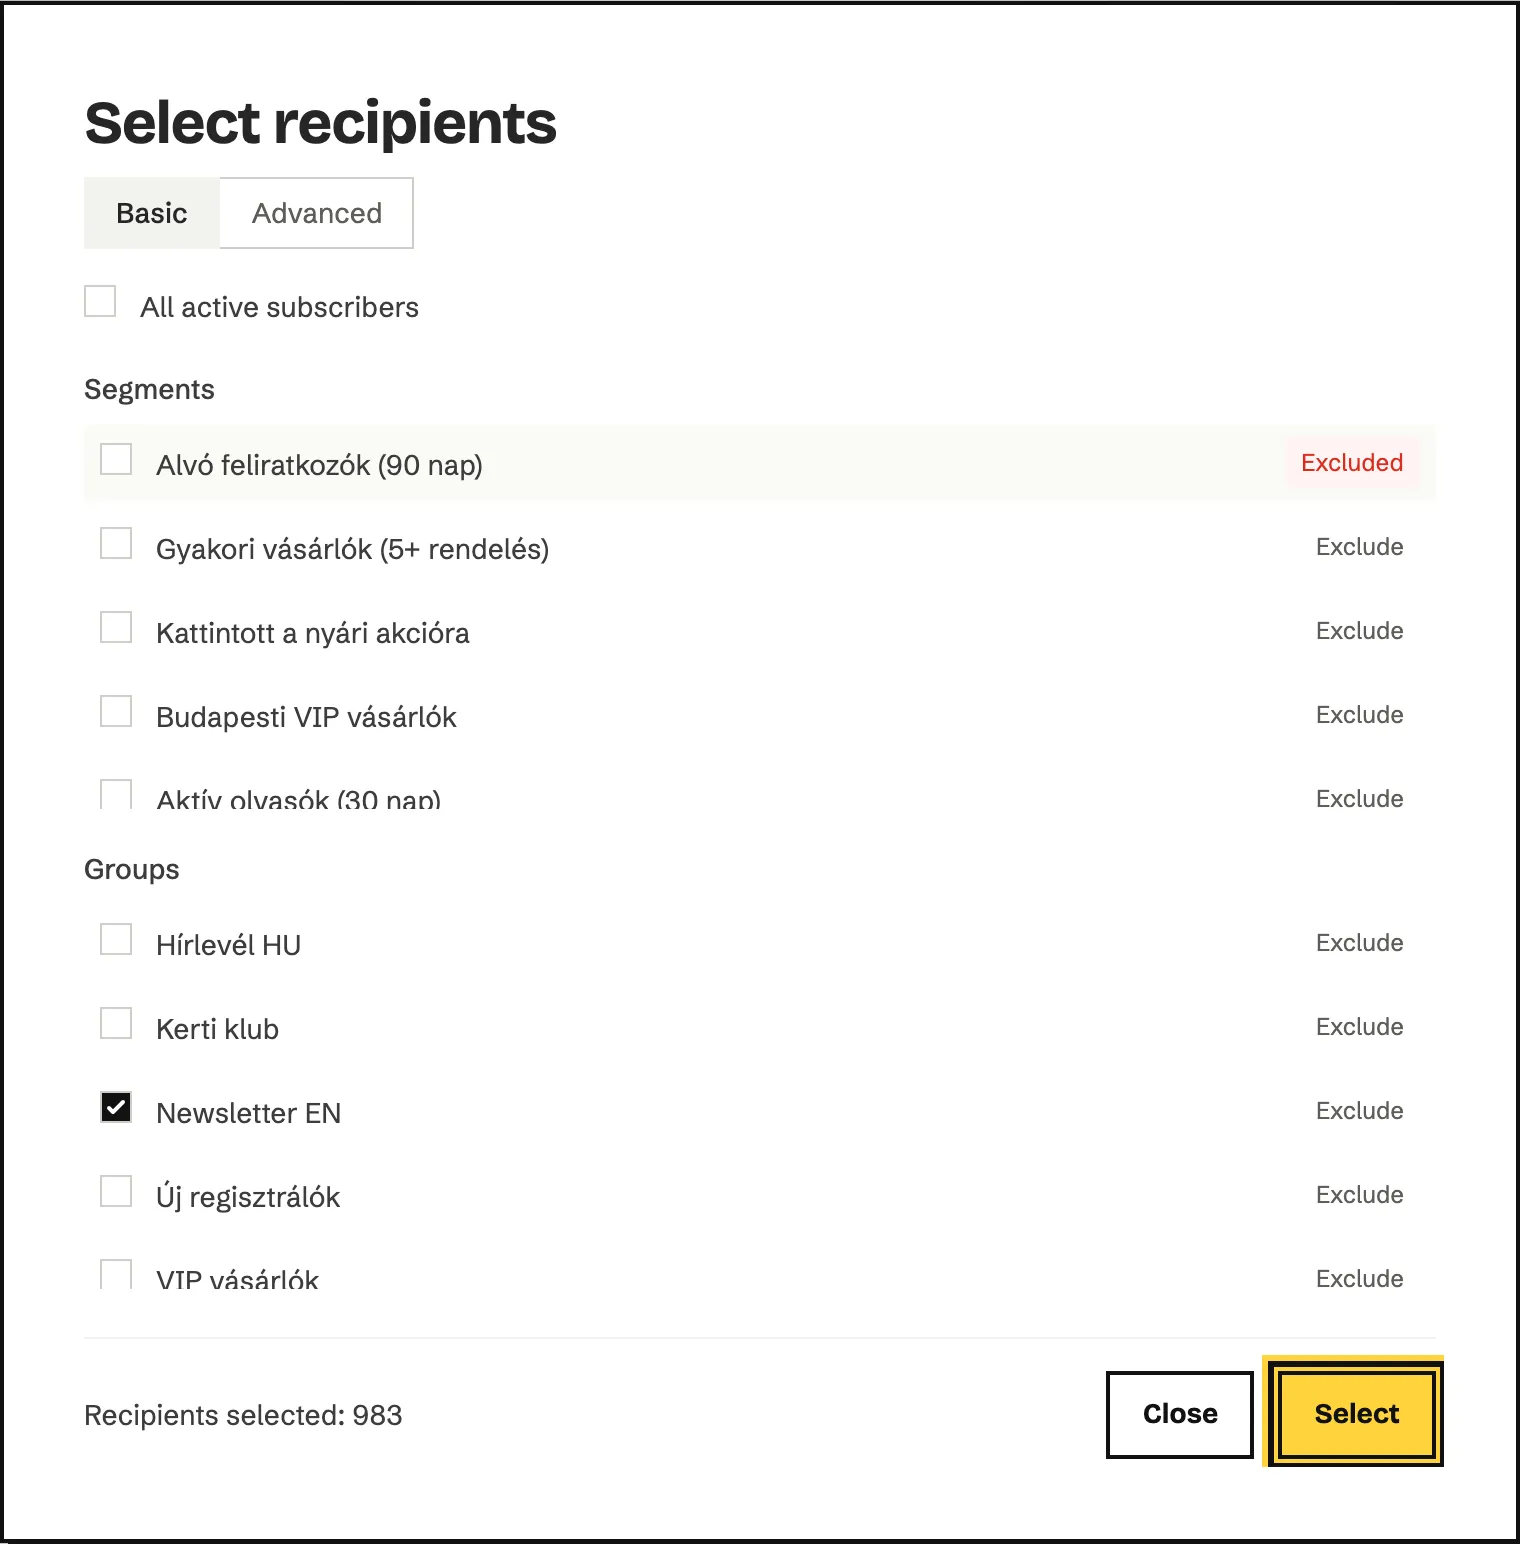
If you need a one-off filter without saving it, switch to Advanced and set the conditions the same way as when you filter subscribers. The conditions are described in the Groups and segments chapter.
How to send or schedule the campaign
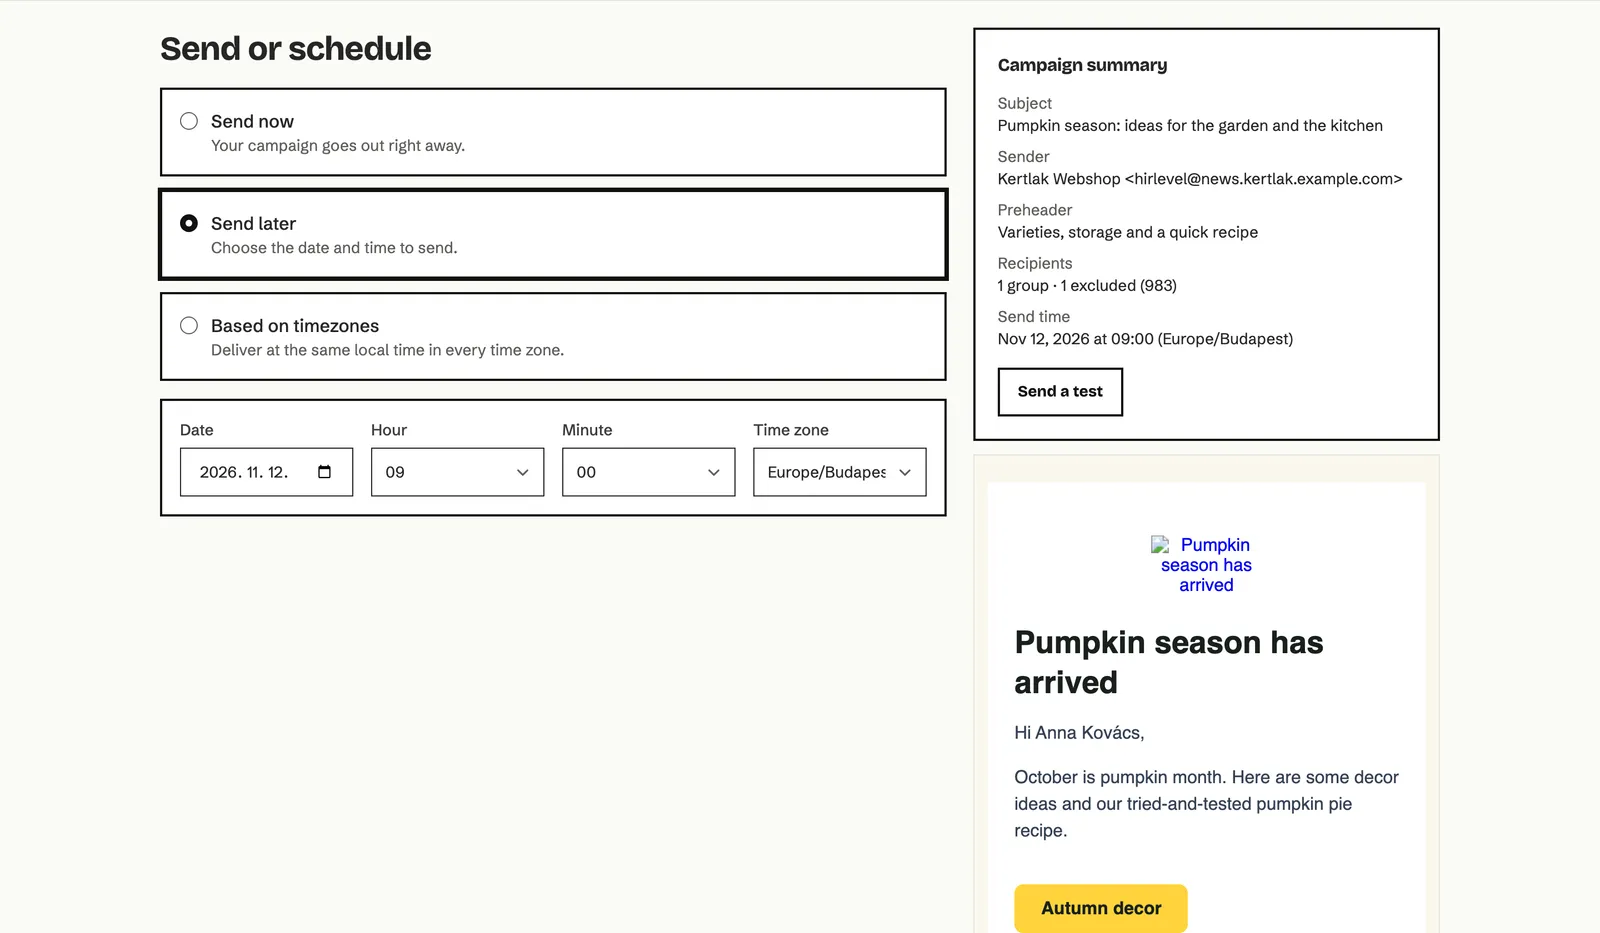
Section titled “How to send or schedule the campaign”On the Schedule step, the campaign summary and the email preview are on the right.
- Choose when it goes:
- Send now: the campaign goes out right away.
- Send later: set the Date, Hour, Minute and Time zone. Minutes go in 15-minute steps.
- Based on timezones: each subscriber gets the email at the chosen time in their own time zone; those without a known time zone get it by your account’s time zone.
- Check the summary: subject, sender, preheader, recipients and send time.
- Click Schedule in the bottom right corner, or Send when sending now. For an immediate send, Echo asks once more and tells you how many subscribers it goes to.
If something is missing
If the campaign can’t be sent yet, a Fix these before sending: list appears at the top of the page, with a Fix link on each line that takes you where you can fix it. Examples: a missing subject, an empty email, no unsubscribe link, a sender that isn’t verified, no recipients, or a company name or postal address missing in Default settings.
The Check these before sending (you can still send): list only warns you, for example about an unfinished countdown or survey.
What happens after sending
Section titled “What happens after sending”- While it’s sending, the campaign is on the Outbox tab, and its card shows the progress (for example Sending… 1,200 of 3,500). The list refreshes by itself.
- When it’s done, the campaign moves to the Sent tab and its report opens. Opens and clicks keep coming in over the following days.
- You get a notification under the bell icon in the header when the sending finishes, and an email too if you asked for one in the settings.
- The content of a sent campaign can’t be changed any more. To send a corrected version, copy it to your drafts.
- If sending gets stuck, the card shows why. If sending is paused (for example by the email provider), you can continue with Resume sending once the problem is fixed.
Reports are described in detail in the Reports chapter.
How to run an A/B split test
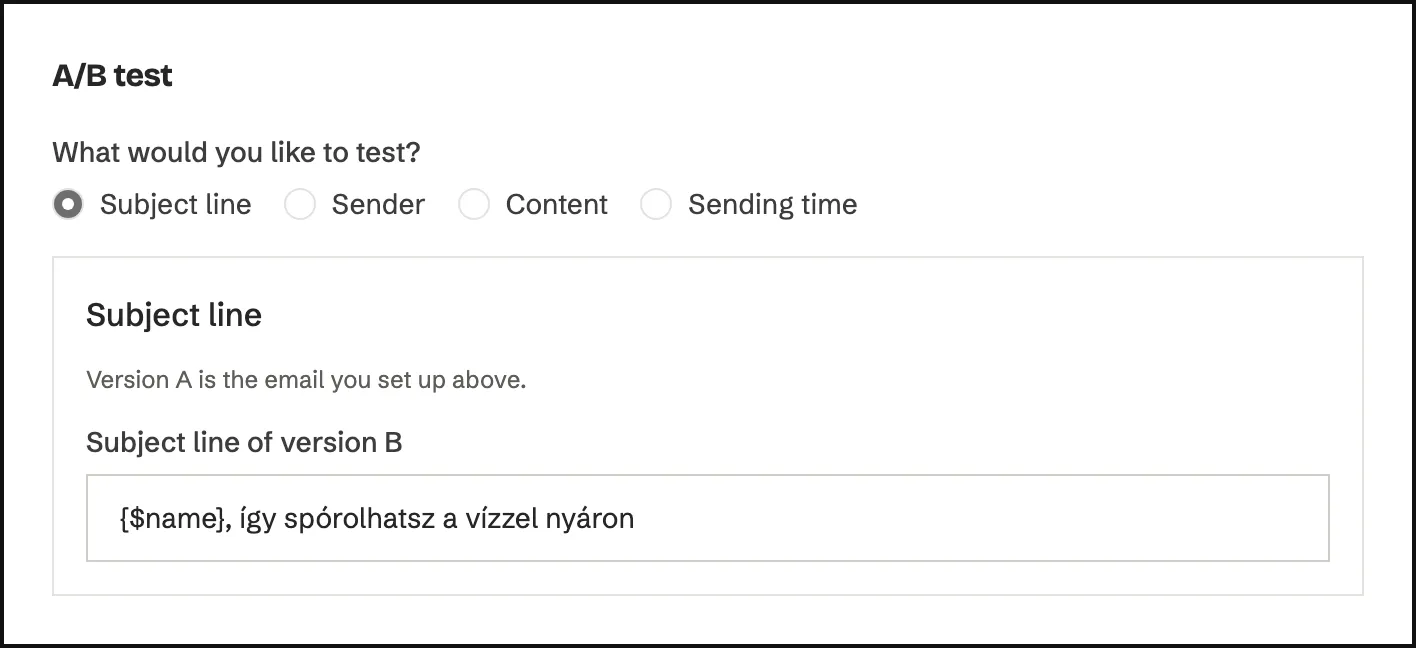
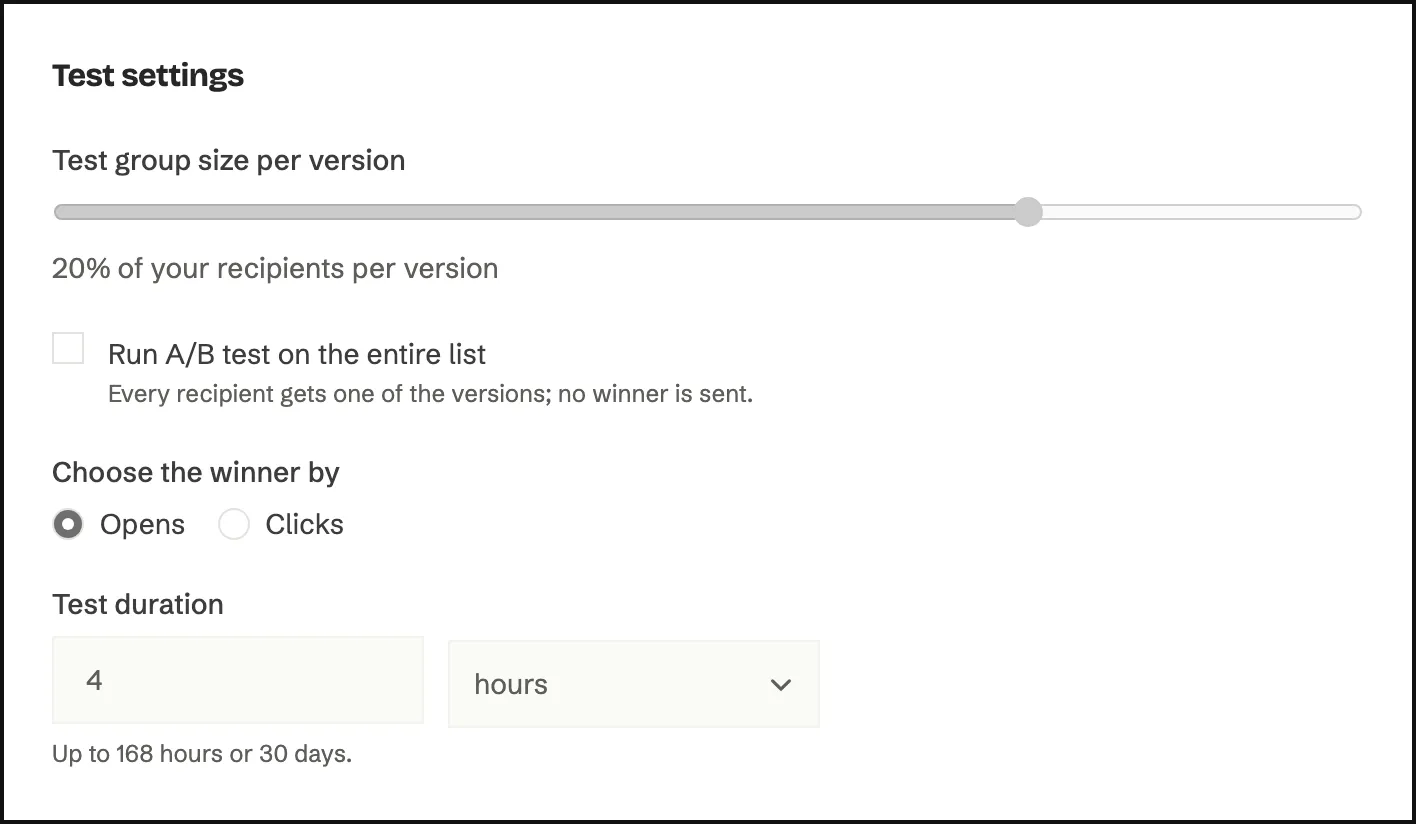
Section titled “How to run an A/B split test”An example: the Nyári öntözés A/B teszt campaign tried two subject lines on the Hírlevél HU group. 20% of the recipients got version A and another 20% version B, and after 4 hours version B, which got more opens, went to everyone else.
-
Create an A/B split campaign and design the email like a regular one. This is version A.
-
At the bottom of the Details step, on the A/B test card, choose What would you like to test?: Subject line, Sender, Content or Sending time.
-
Set up version B: for example, enter the other subject in Subject line of version B. When testing content, version B starts as a copy of A and you edit it separately.
-
On the Schedule step, set these on the Test settings card:
- Test group size per version: the share of recipients who get each version (5-25%).
- Choose the winner by: Opens or Clicks.
- Test duration: in hours or days, up to 168 hours or 30 days.
-
Schedule or send the campaign.
During the test, the campaign is on the Outbox tab with the Waiting for winner label. When the time is up, Echo picks the version with the better rate and sends it to the rest of the recipients.
Multivariate test
A Multivariate campaign works the same way, but you can test up to 3 things at once, with 2-4 versions each and at most 8 combinations in all. The test group can be 10-50% of the recipients per combination.
How to give non-openers a second chance
Section titled “How to give non-openers a second chance”There are two ways.
An Auto resend campaign
On the Schedule step, set these on the Auto resend settings card:
- What changes in the second email?: only the Subject line, Subject line and a personal message, or Subject line and content.
- Who gets it?: Subscribers who didn’t open the first email or Subscribers who didn’t click the first email.
- When?: The next day at the same time or At a specific time, at least 24 hours after the first email.
A resend from a sent campaign
On the Sent tab, choose Resend to non openers or Resend to new subscribers in the campaign’s three-dot menu. Echo creates a new draft with a copy of the email, and of its recipients only those who didn’t open the original, or didn’t get it at all, receive it. You edit and schedule the draft like any other.
How to copy, rename, cancel or delete a campaign
Section titled “How to copy, rename, cancel or delete a campaign”Each campaign card ends with a three-dot menu. What it offers depends on the tab.
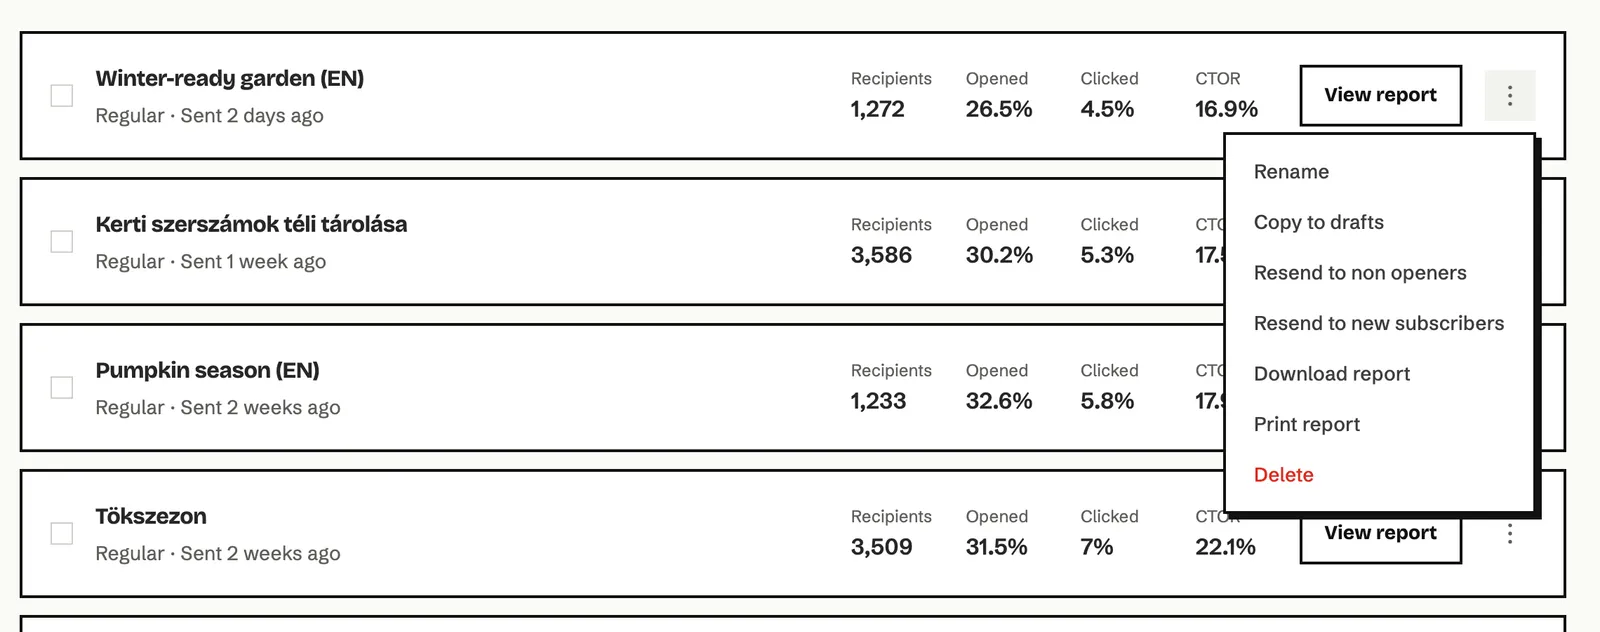
| Menu item | Where | What it does |
|---|---|---|
| Rename | every tab | Gives the campaign a new name. Recipients don’t see it. |
| Duplicate | Drafts | Makes a copy of the draft. |
| Copy to drafts | Sent | Makes a new draft from the sent campaign with the same email and settings. |
| Resend to non openers / Resend to new subscribers | Sent | See the previous section. |
| Download report / Print report | Sent, Outbox | The campaign’s numbers as a CSV file or in a printable view. |
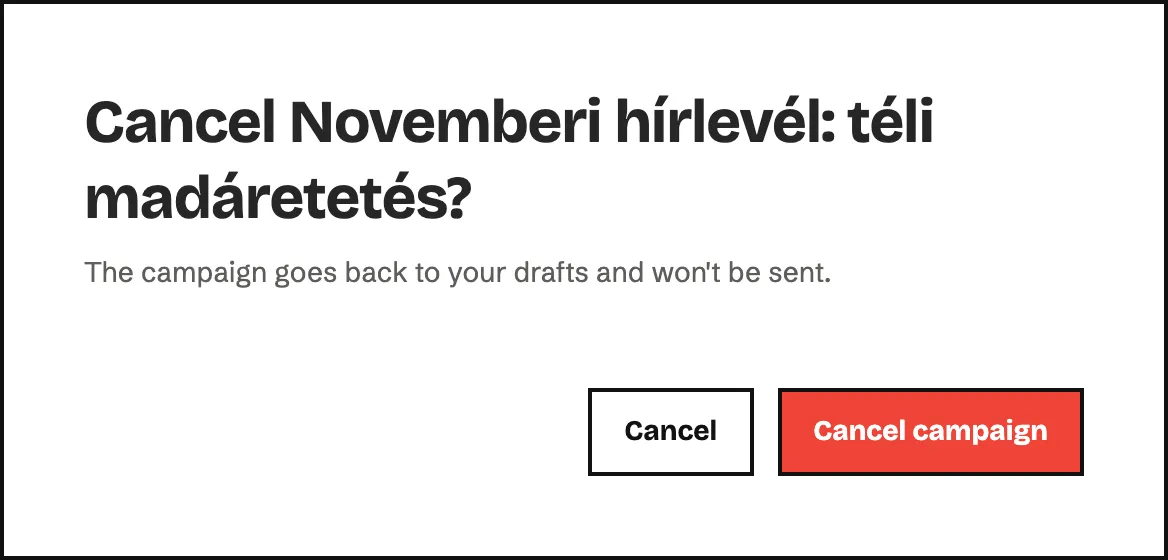
| Cancel | Outbox | A scheduled campaign goes back to your drafts. A campaign being sent stops: those who haven’t got it yet won’t get it. |
| Delete | Sent, Drafts | Deletes the campaign for good, and for a sent campaign its report too. |
How to use templates
Section titled “How to use templates”A template is a reusable email design. My templates in the left menu shows your own.
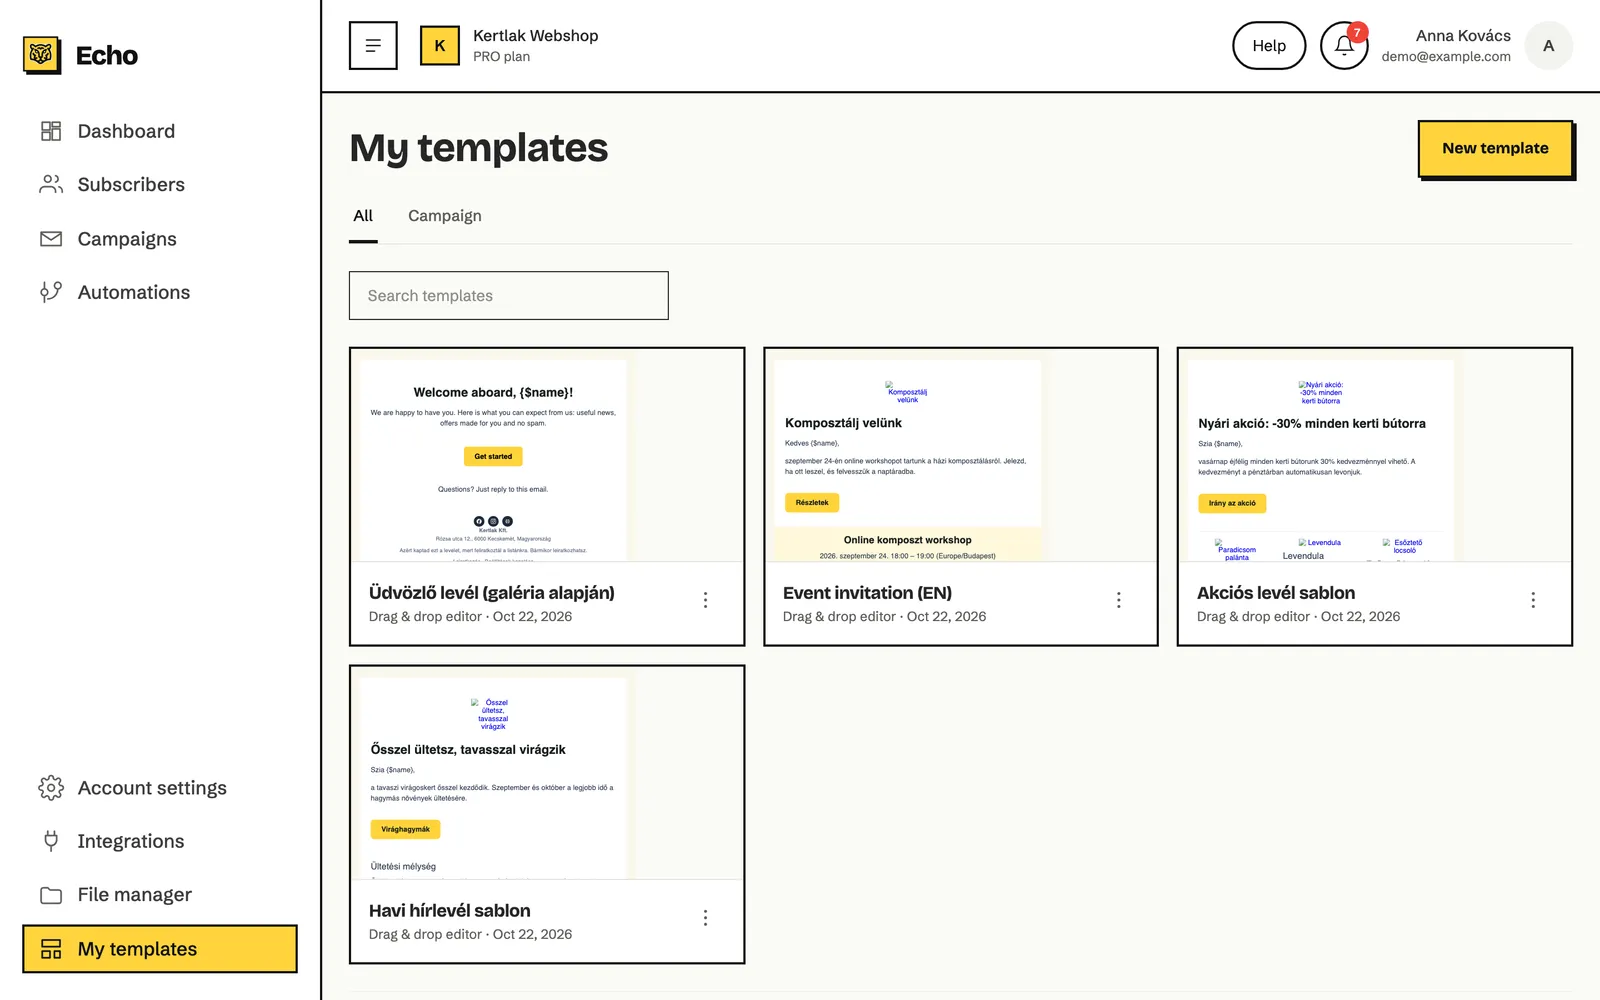
Save a template from an email
- In the editor, click Actions, then Save as template.
- Fill in Template name and save. The template goes to My templates.
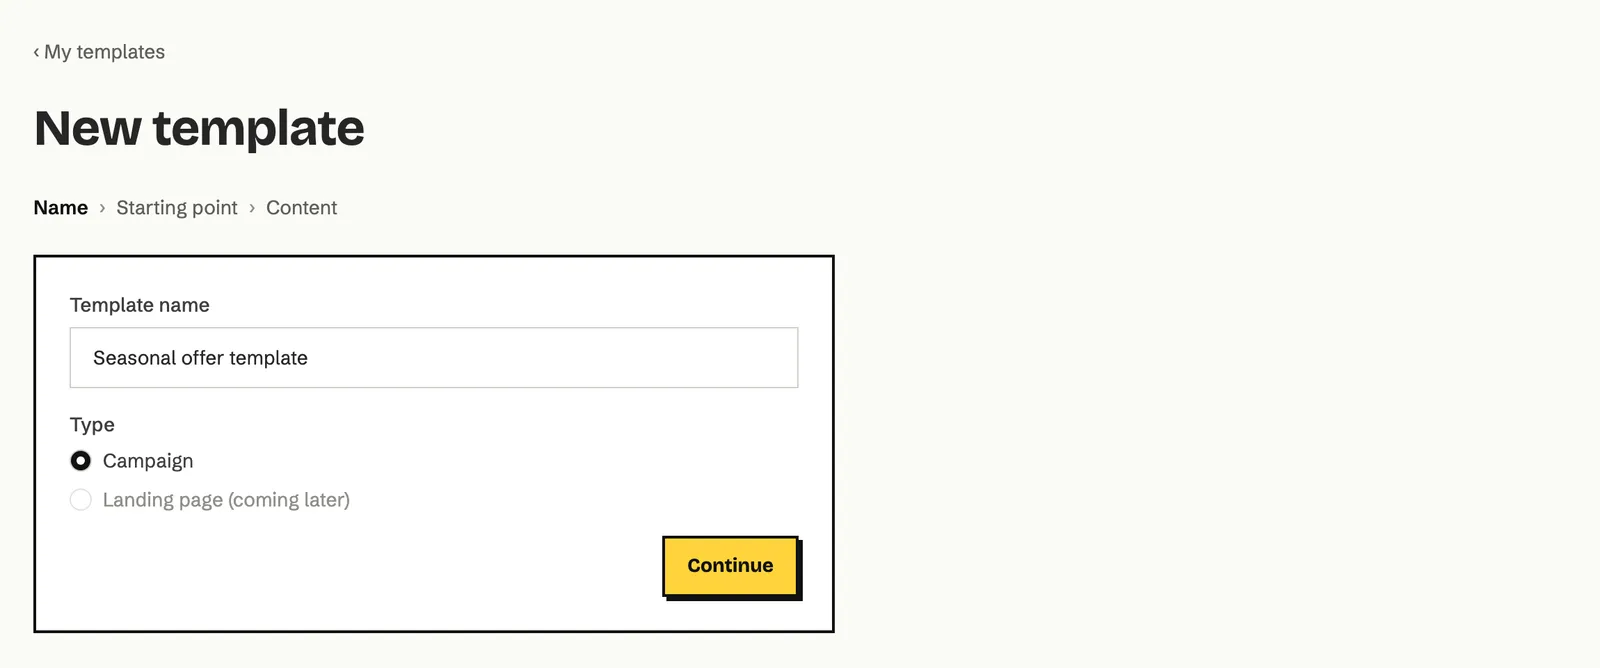
Create a new template
- On the My templates page, click New template.
- Fill in Template name and click Continue.
- Choose a starting point the same way as for a campaign: Start from scratch, Template gallery or Recent emails.
- Edit the email, then click Save template.
Use a template
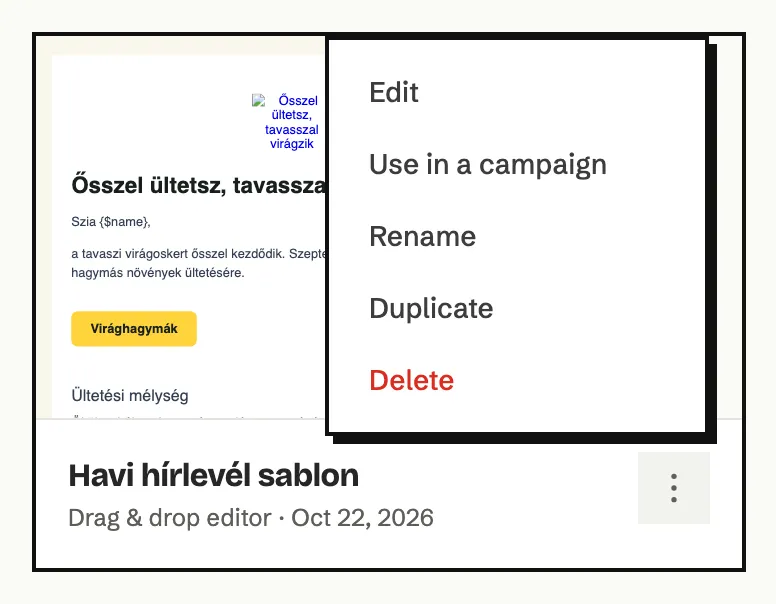
In the template card’s three-dot menu, choose Use in a campaign. Echo creates a regular campaign with the template’s name and content and opens the editor. When you start a new campaign, you can also pick it on the My templates sub-tab of the Template gallery tab.
How to manage your images in the File manager
Section titled “How to manage your images in the File manager”File manager holds the images and PDF files you use in your emails. The same file manager opens in the editor when you choose an image.
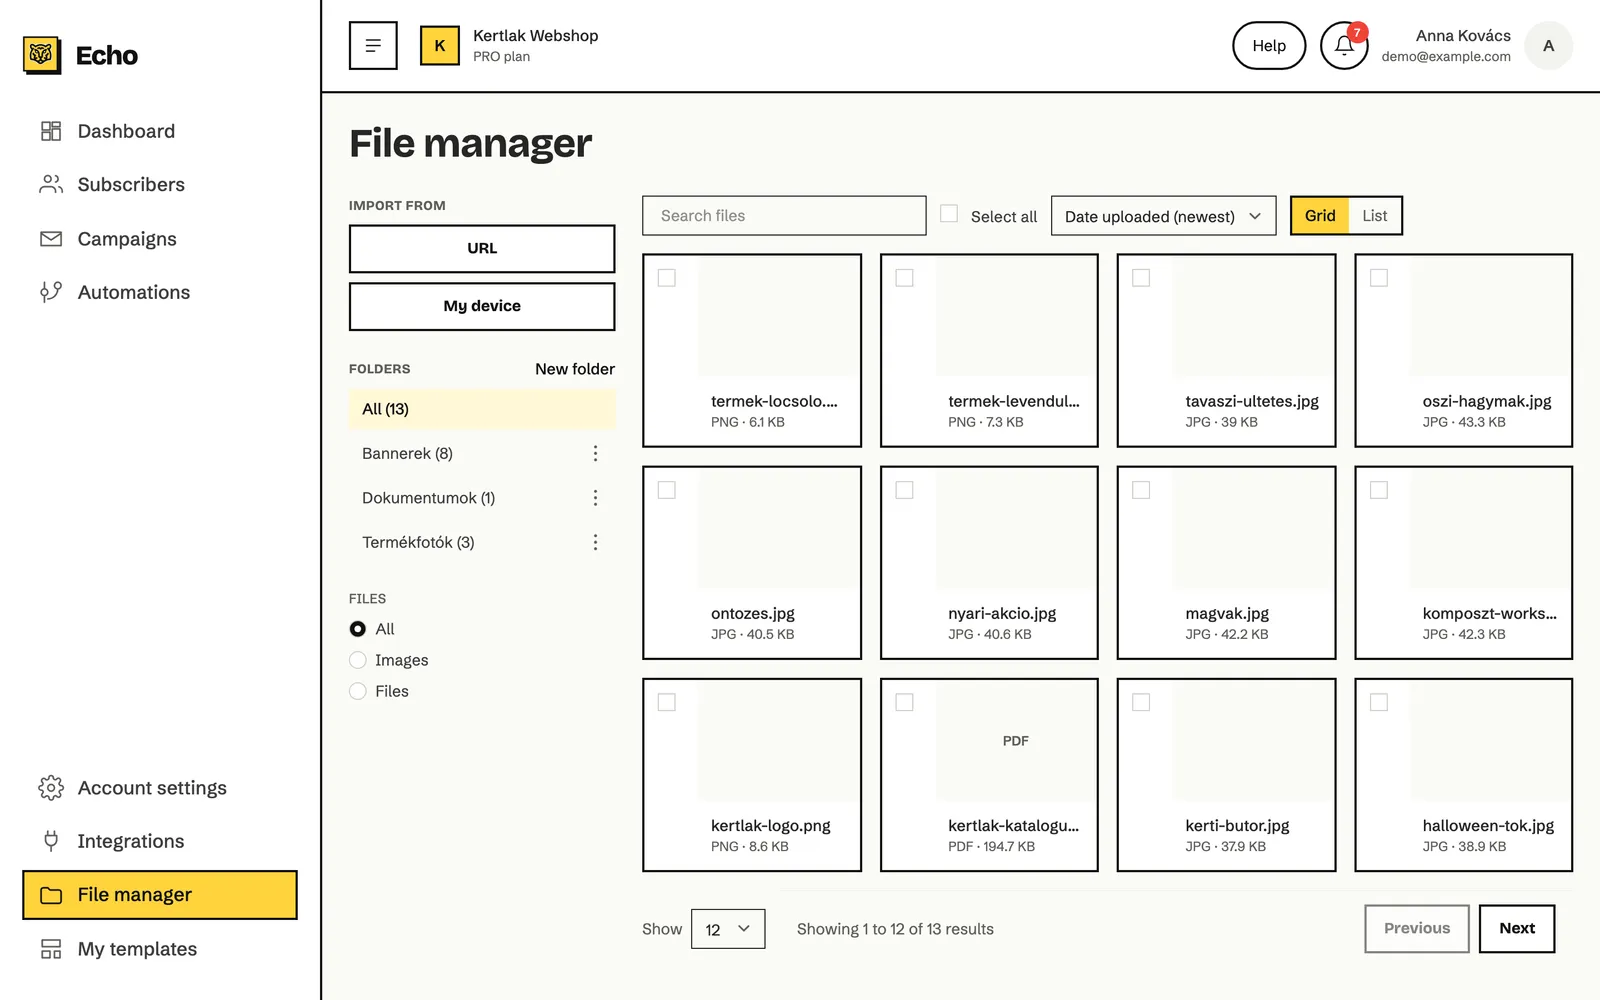
- To upload, click My device under Import from and choose the files. You can upload several at once.
- To bring in an image from the web, click URL, paste its address and click Import.
- Under Folders, use New folder to organise your files. Move the selected files into a folder with Move to.
- Under Files, filter between Images and Files (PDF); at the top you can search, sort and switch between Grid and List view.
I sent a campaign with a wrong link. Can I fix it? A sent email can’t be changed. Use Copy to drafts in the three-dot menu to make a corrected copy, and if needed, send it to the recipients with a short correction.
Why can’t I schedule my campaign? The Fix these before sending: list at the top of the Schedule step shows what’s missing, and the Fix link takes you there. Common causes are a sending domain that isn’t verified and a company name or postal address missing in Default settings.
Can I change a campaign that’s already scheduled? Yes. On the Outbox tab, choose Cancel in the campaign’s menu. The campaign goes back to your drafts, where you can change it and schedule it again.
How many recipients will the campaign go to? You see the number under Recipients on the Details step and at the bottom of the Select recipients window. The final list is settled when sending starts, and only Active subscribers get it.
Why can’t I delete a sent campaign? A campaign sent in the last 30 days can’t be deleted, so the links in its emails keep working. After 30 days you can delete it. It’s also kept if a segment’s filter refers to it.