
Integrations
Under Integrations you connect Echo with your own systems: with an API token your webshop or CRM can add and update subscribers, and webhooks tell your systems right away when something happens in Echo.
The Integrations page
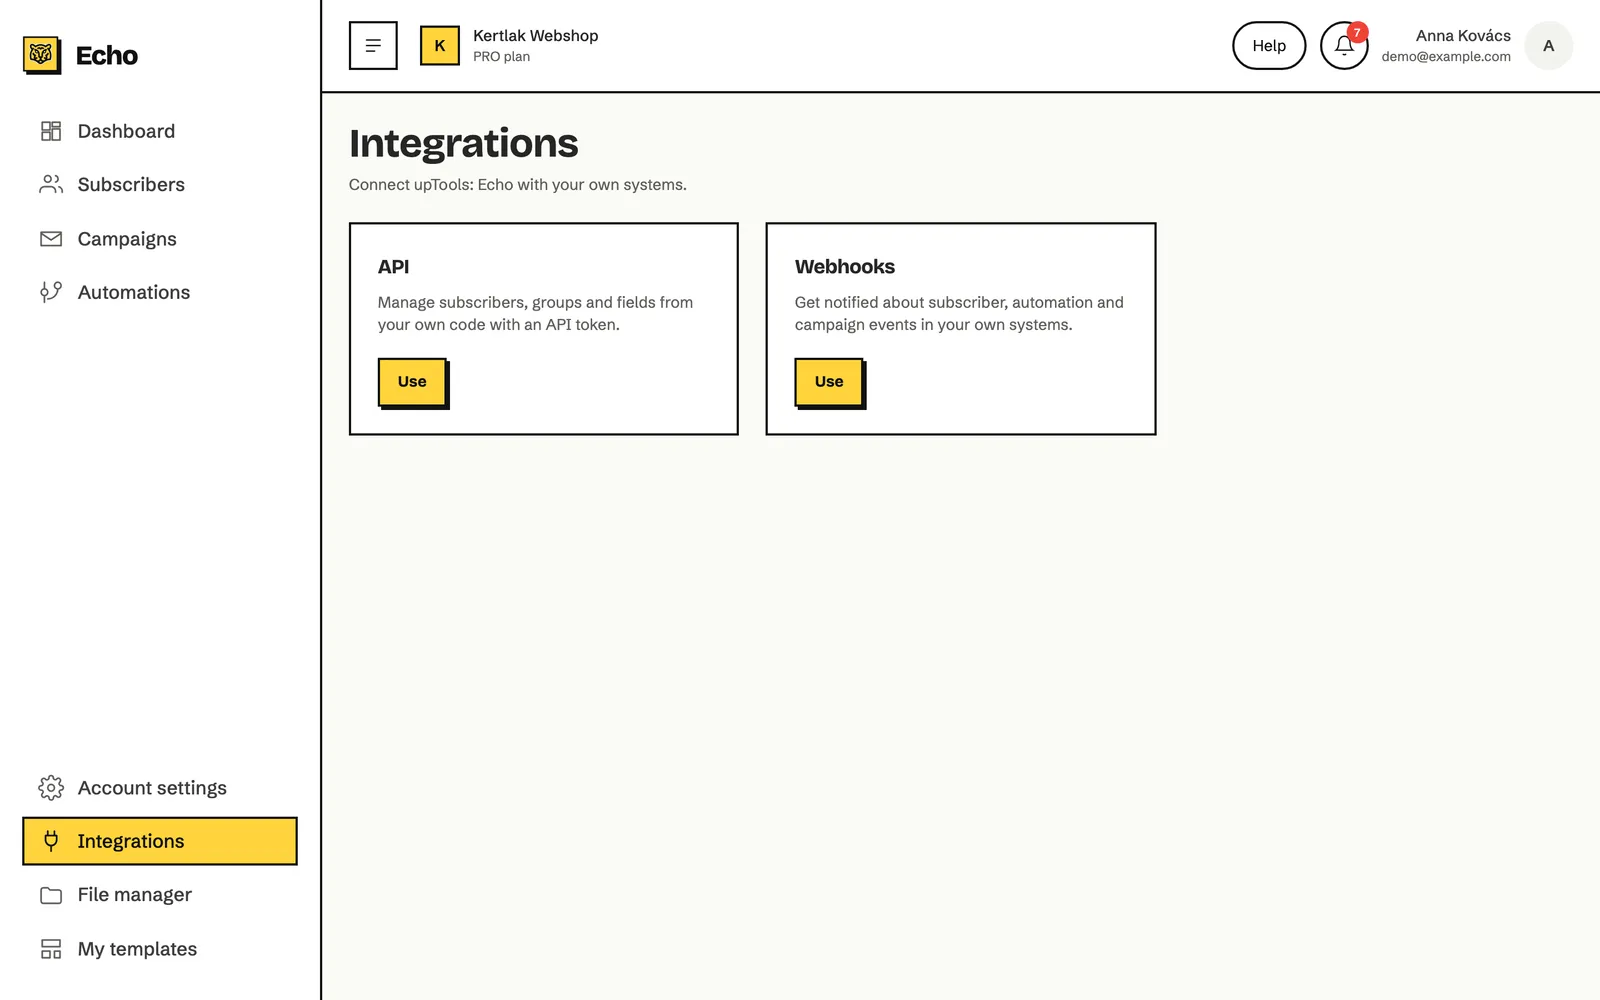
Section titled “The Integrations page”Open Integrations in the left menu. The page has two cards: API and Webhooks. Click Use on a card to open it.
How to create an API token
Section titled “How to create an API token”An API token is a key your own system uses to reach your Echo account. Create a separate token for each system, so you can revoke one without touching the others.
-
Open Integrations, then click Use on the API card.
-
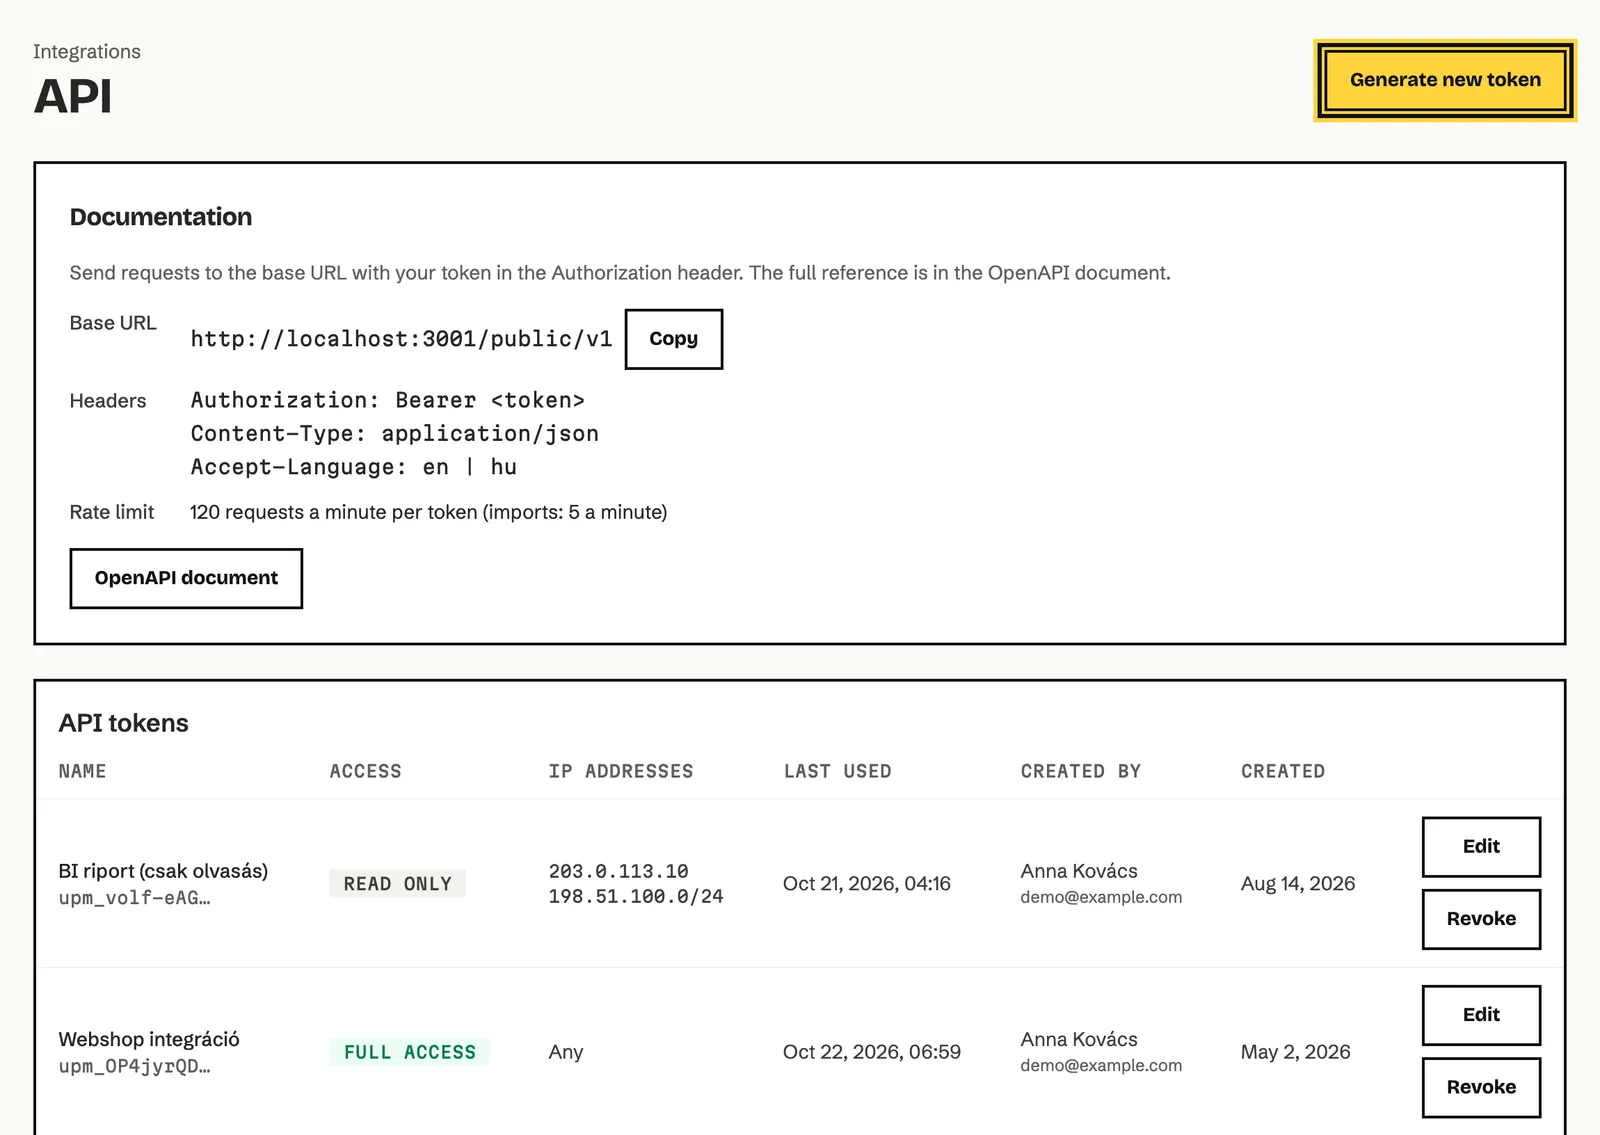
Click Generate new token.
-
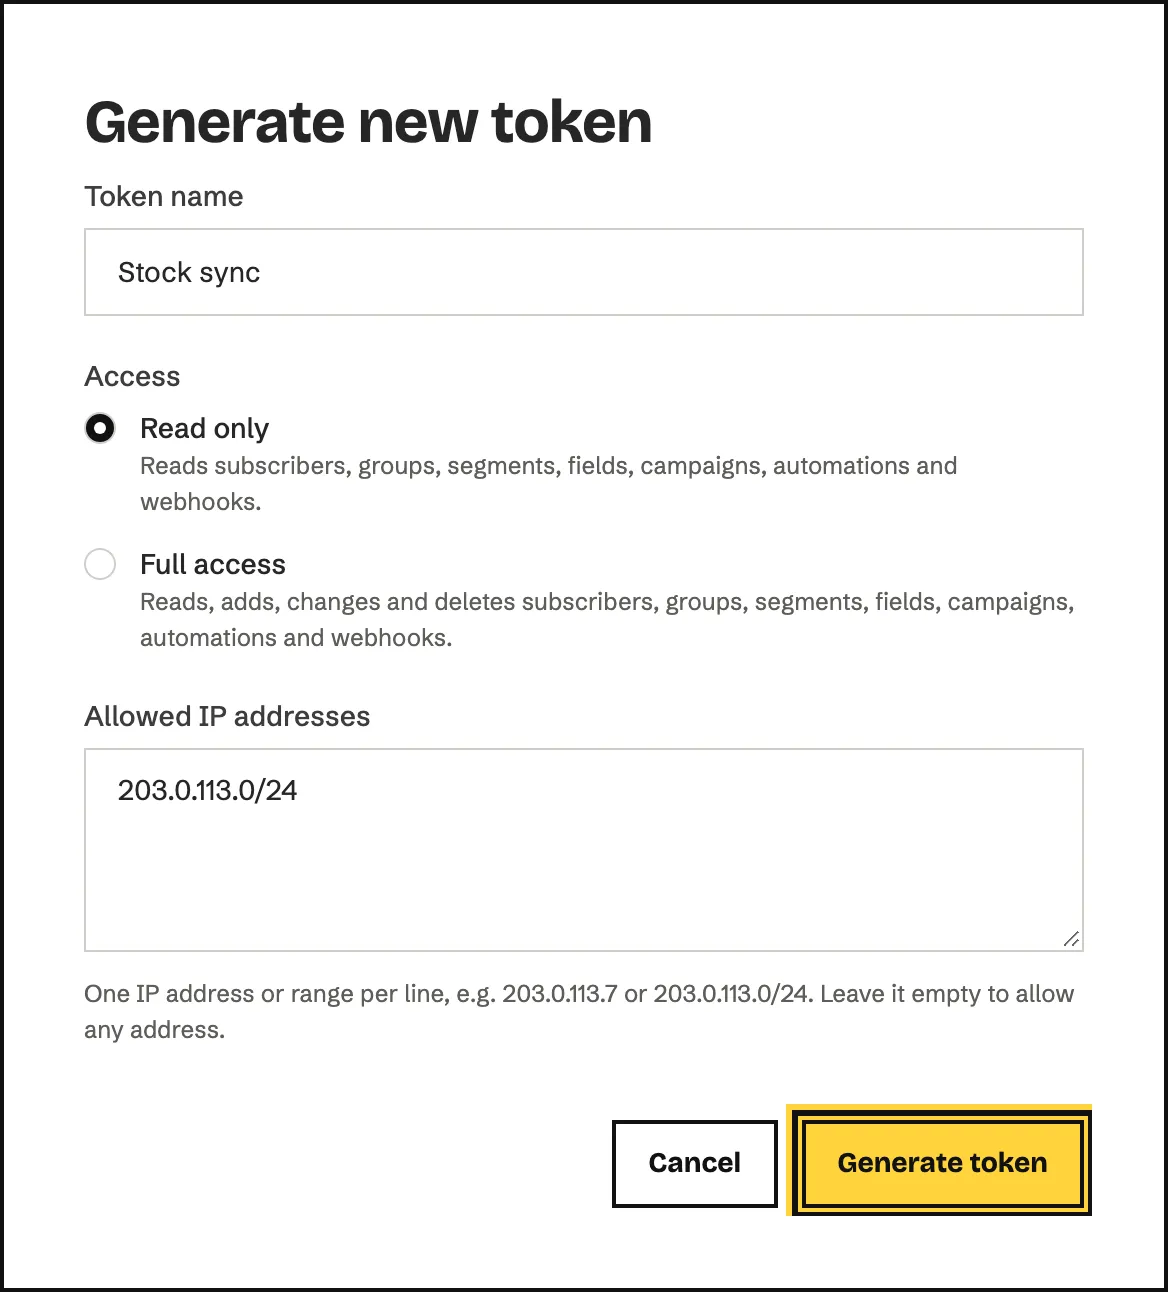
In Token name, enter what the token is for, for example the name of your webshop.
-
Under Access, choose Read only or Full access.
-
If the system calling Echo always uses the same IP address, enter it in Allowed IP addresses, one address or range per line. Leave it empty to allow any address.
-
Click Generate token.
-
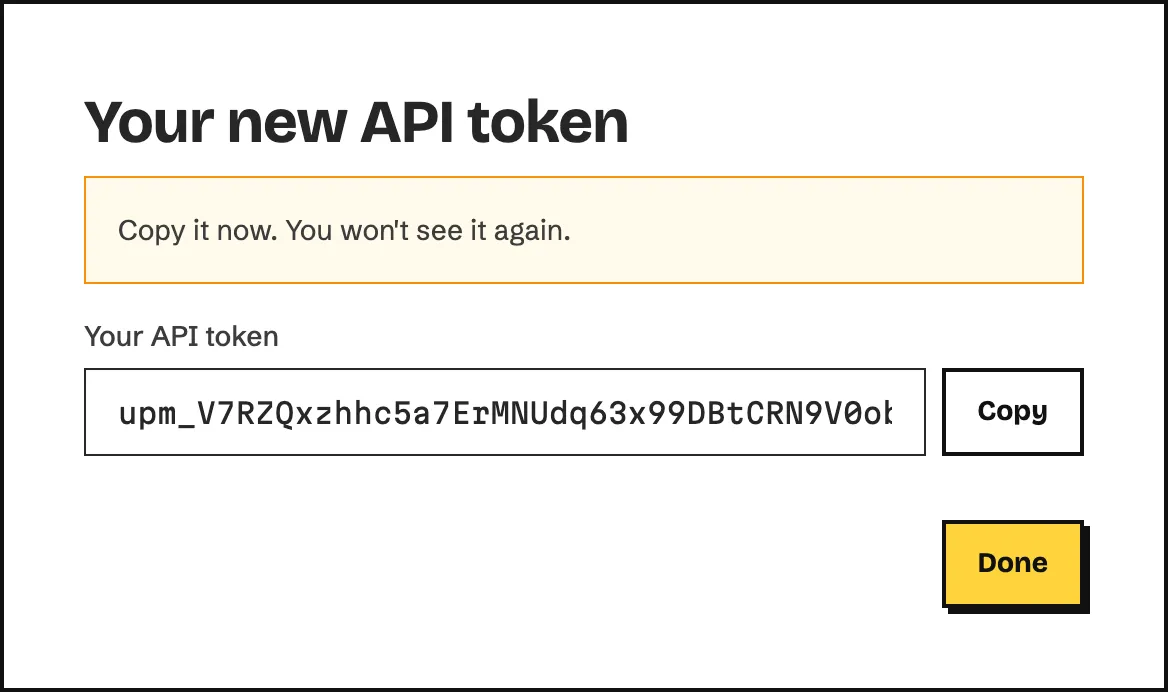
Copy the token with Copy and paste it into your system’s settings, then click Done.
| Access | What the token can do |
|---|---|
| Read only | Reads subscribers, groups, segments, fields, campaigns, automations and webhooks. |
| Full access | Also adds, changes and deletes them. |
How to edit or revoke an API token
Section titled “How to edit or revoke an API token”- Open the API page under Integrations.
- In the API tokens list, find the token. The list shows its start, its Access, the allowed IP addresses, when it was Last used and who created it.
- To change its name or IP addresses, click Edit, change them and click Save changes. The access can’t be changed: for different access, create a new token.
- To revoke it, click Revoke, then click Revoke again in the confirmation window.
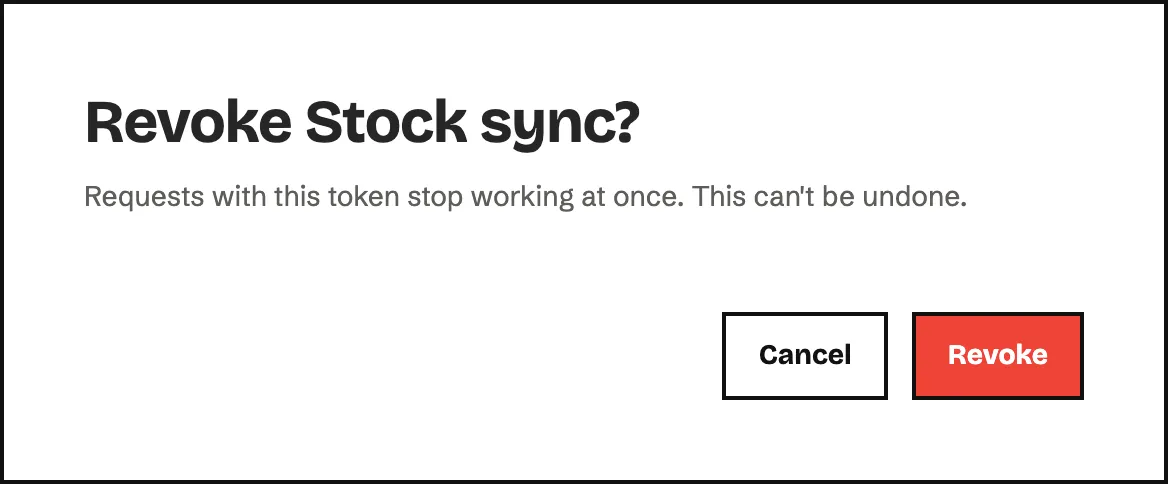
Requests with a revoked token stop working at once. Revoking can’t be undone.
How to find the details your developer needs
Section titled “How to find the details your developer needs”The Documentation box on the API page has everything a developer needs to start:
- Base URL: the address the requests go to. Copy it with Copy.
- Headers: the headers every request needs.
- Rate limit: how many requests a token can send in a minute.
- OpenAPI document: the full technical reference as a downloadable file.
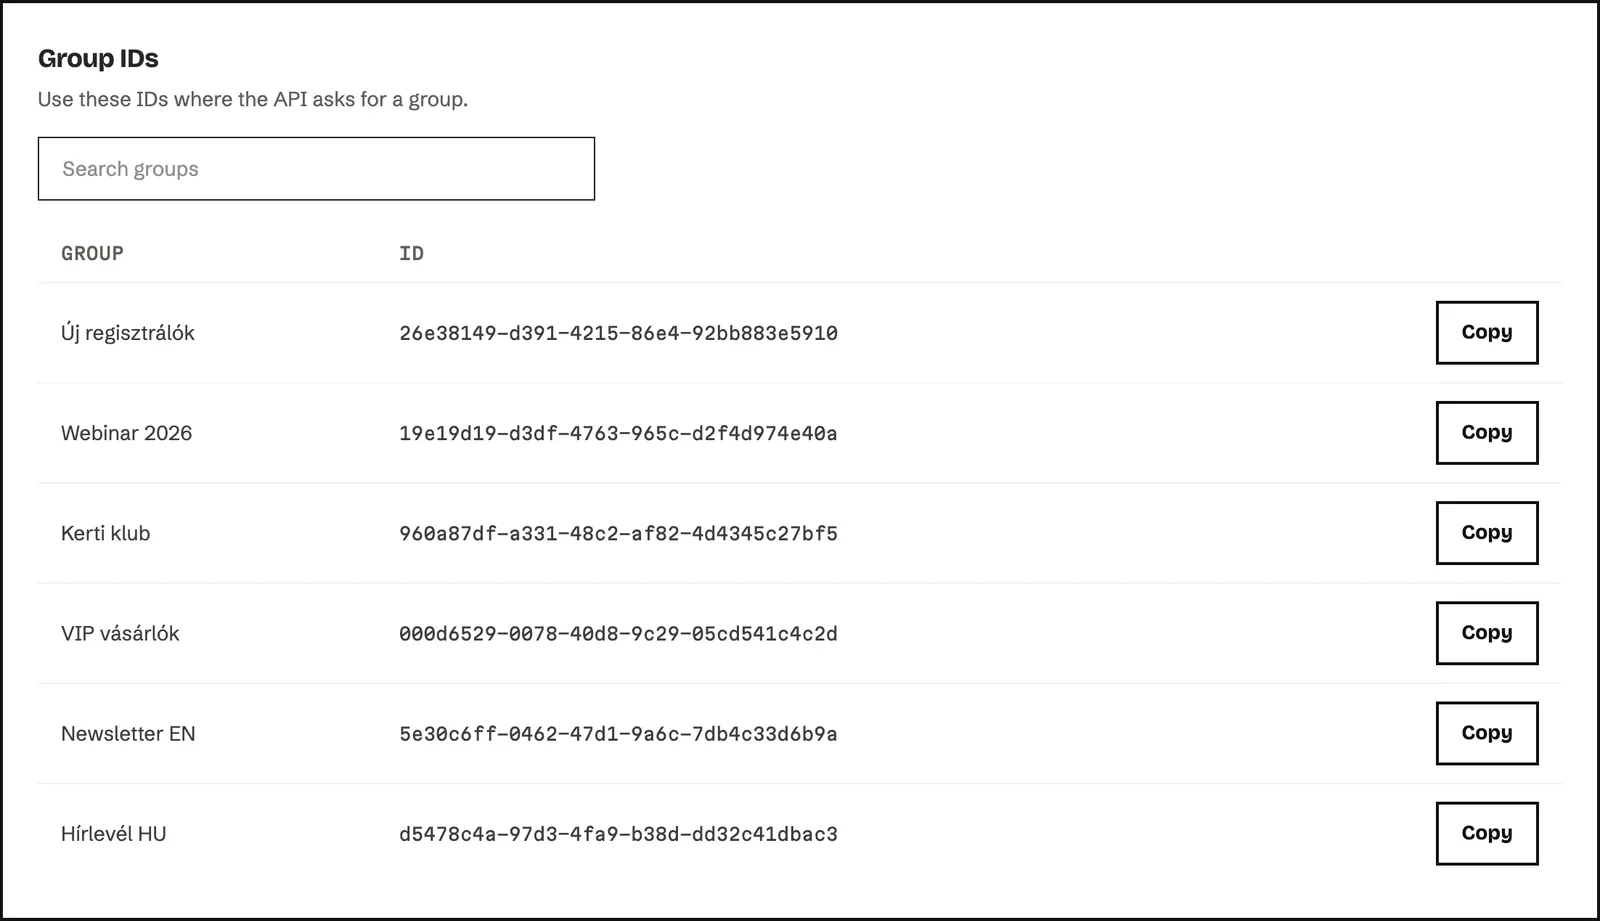
Below the token list, the Group IDs box lists the ID of every group. The API asks for these IDs when a subscriber should join a group. Find a group with Search groups, then copy its ID with Copy.
How to set up a webhook
Section titled “How to set up a webhook”A webhook sends a message (an HTTP POST request) to an address you give whenever the events you chose happen, for example when someone subscribes or unsubscribes.
-
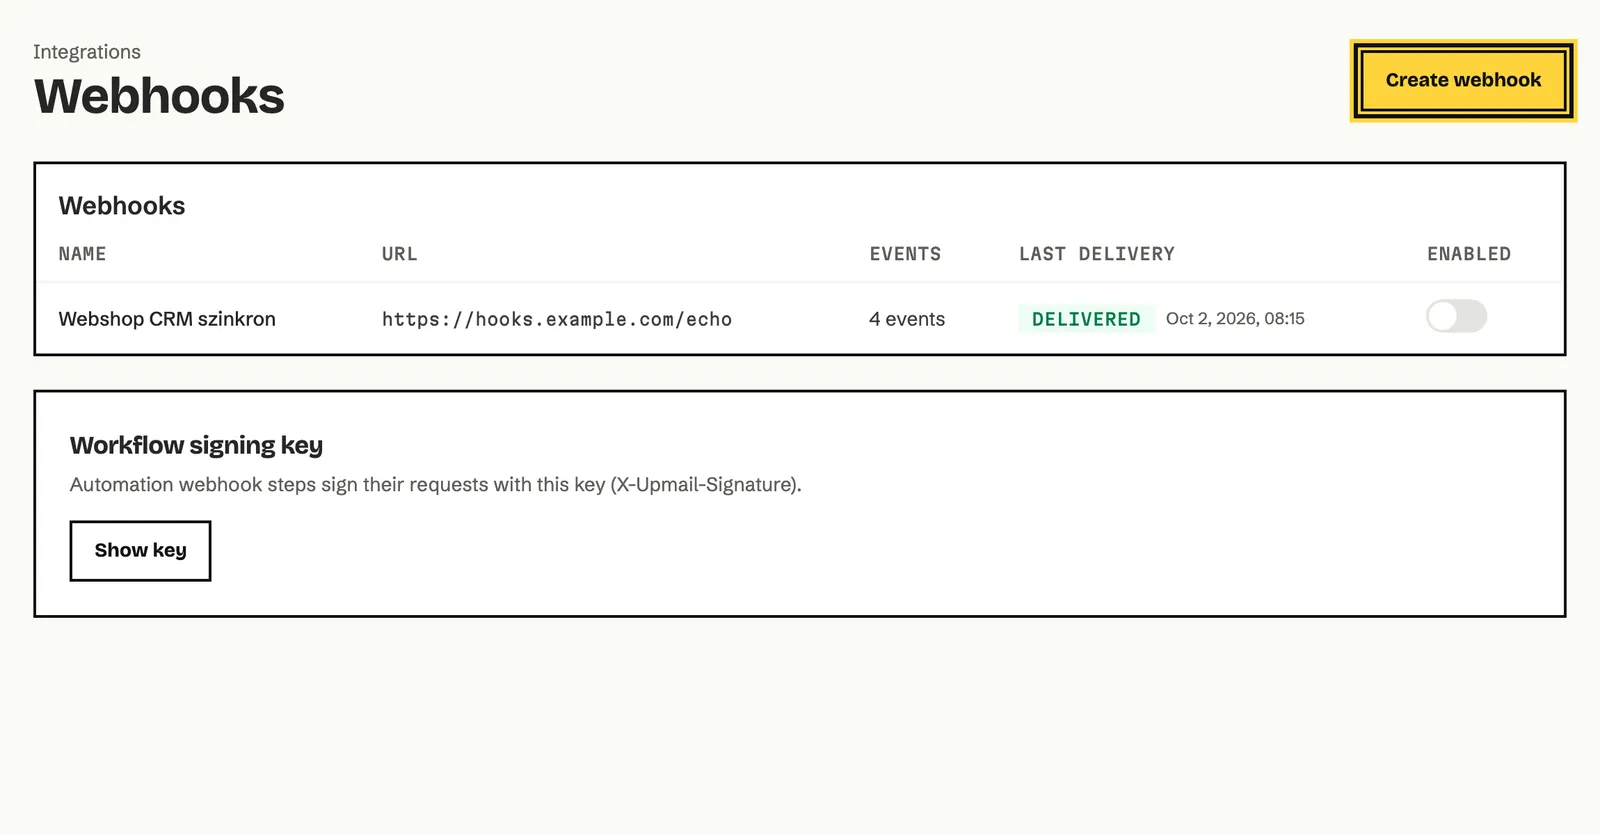
Open Integrations, then click Use on the Webhooks card.
-
Click Create webhook.
-
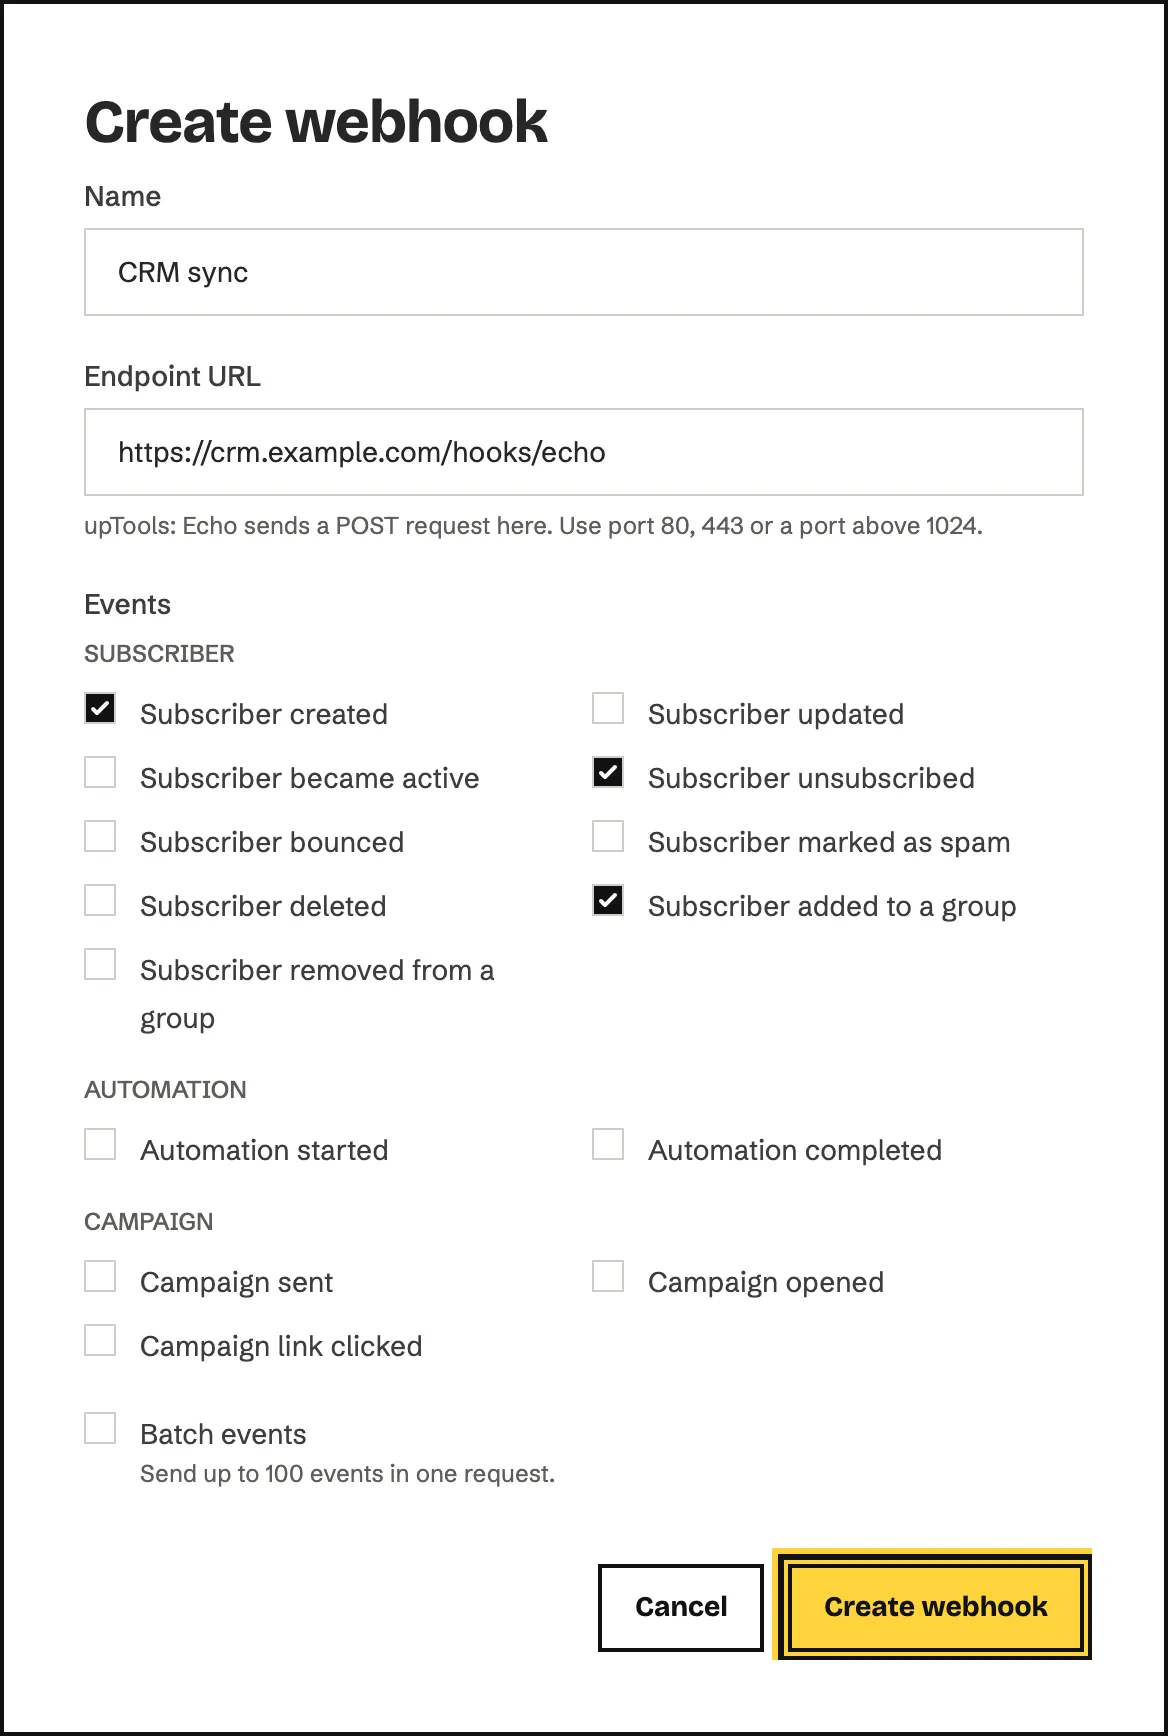
In Name, enter what the webhook is for.
-
In Endpoint URL, enter the address of your system that receives the messages. Ask your developer for it.
-
Under Events, tick the events you want to receive. They are grouped as Subscriber, Automation and Campaign.
-
If your system can handle several events in one message, tick Batch events. One message then carries up to 100 events.
-
Click Create webhook.
-
Echo now shows the webhook’s Signing secret. Copy it with Copy and give it to your developer, then click Done.
Your system can use the signing secret to check that each message really came from Echo. Like an API token, it’s shown only once.
Webhook events
Section titled “Webhook events”| Event | When it’s sent |
|---|---|
| Subscriber created | A new subscriber is added in any way: by hand, import, API or sign-up. |
| Subscriber updated | A subscriber’s email address or field values change. |
| Subscriber became active | A subscriber’s status changes to active, for example after confirming a sign-up. |
| Subscriber unsubscribed | A subscriber unsubscribes or is unsubscribed. |
| Subscriber bounced | A subscriber’s status changes to bounced. |
| Subscriber marked as spam | A subscriber marks your email as spam. |
| Subscriber deleted | A subscriber is deleted or forgotten. After a GDPR erasure the message contains only the subscriber’s ID. |
| Subscriber added to a group | A subscriber joins a group. |
| Subscriber removed from a group | A subscriber is taken out of a group. Deleting the group or the subscriber doesn’t send this. |
| Automation started | A subscriber enters an automation workflow. |
| Automation completed | A subscriber finishes an automation workflow. |
| Campaign sent | A campaign finishes sending. |
| Campaign opened | A recipient opens a campaign email. Every open is sent, and the message says whether it was the first. |
| Campaign link clicked | A recipient clicks a link in a campaign email. |
The campaign events cover campaigns only. Emails sent by automation workflows don’t send Campaign sent, Campaign opened or Campaign link clicked.
How to check webhook deliveries
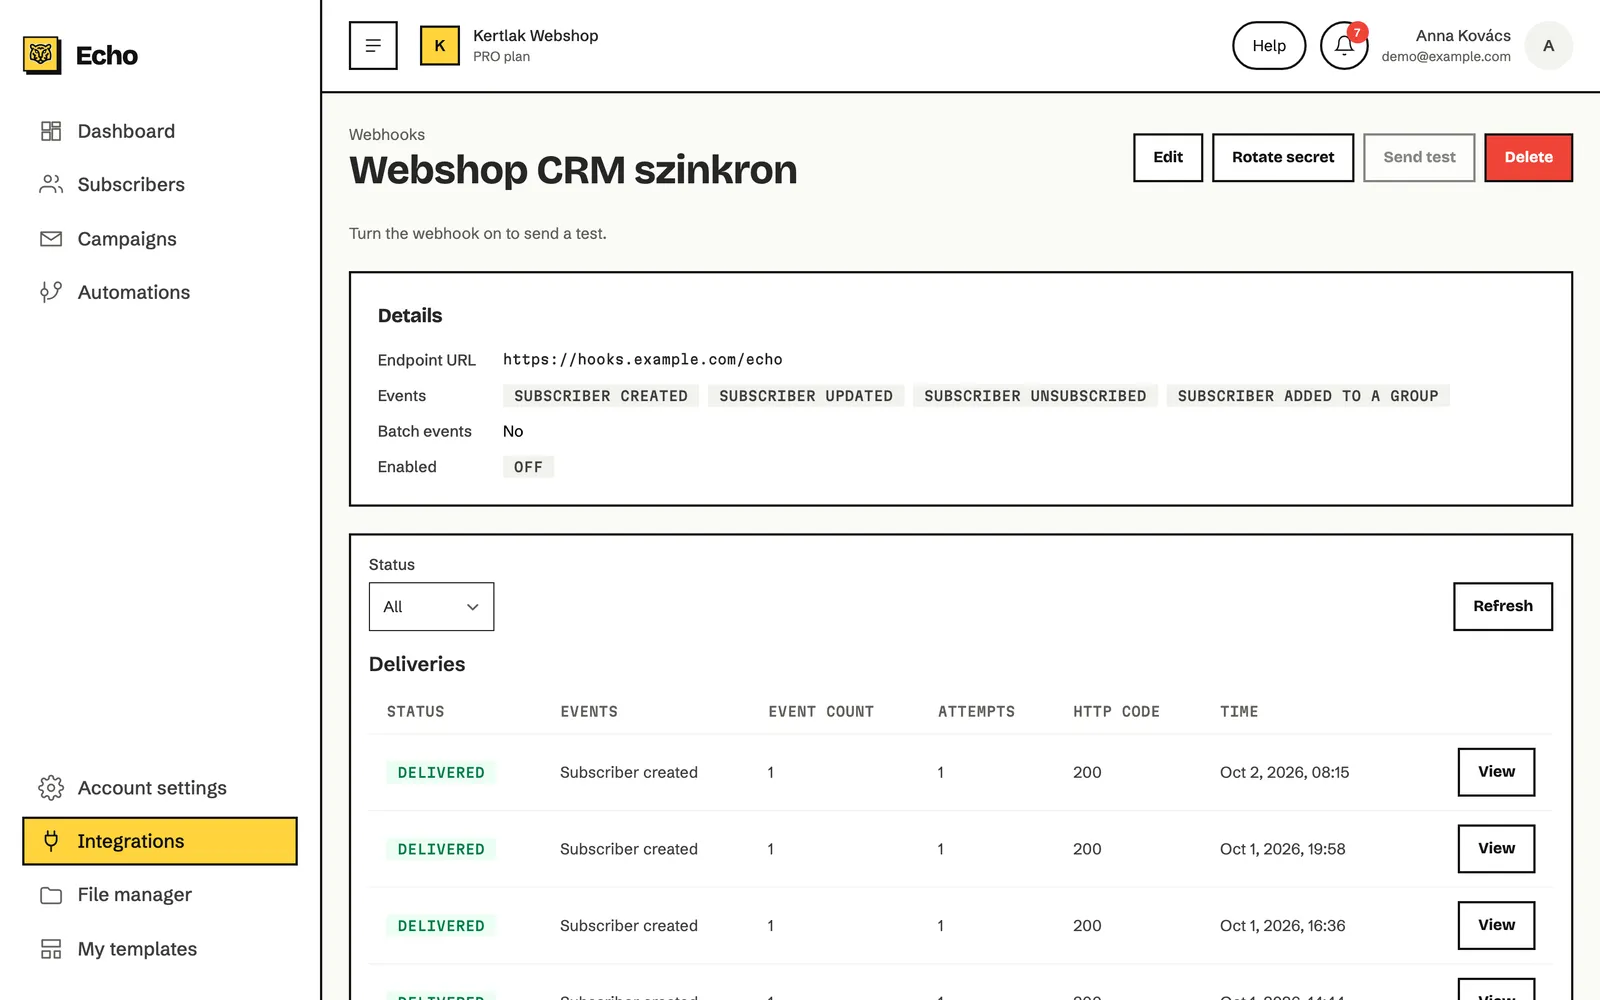
Section titled “How to check webhook deliveries”- On the Webhooks page, click the webhook’s name.
- The Details box shows the address, the events, the batching and whether the webhook is on.
- The Deliveries list below shows the newest messages first: their status, the events in them, how many attempts were made and the HTTP code your system answered with. Use Status to show only some of them, and Refresh to load the latest ones.
| Status | What it means |
|---|---|
| Pending | The message is on its way, or Echo will try again soon. |
| Delivered | Your system answered with a 2xx code within 10 seconds. |
| Failed | Every attempt failed, or the address can’t be reached (for example it isn’t a public address). |
Opening a delivery
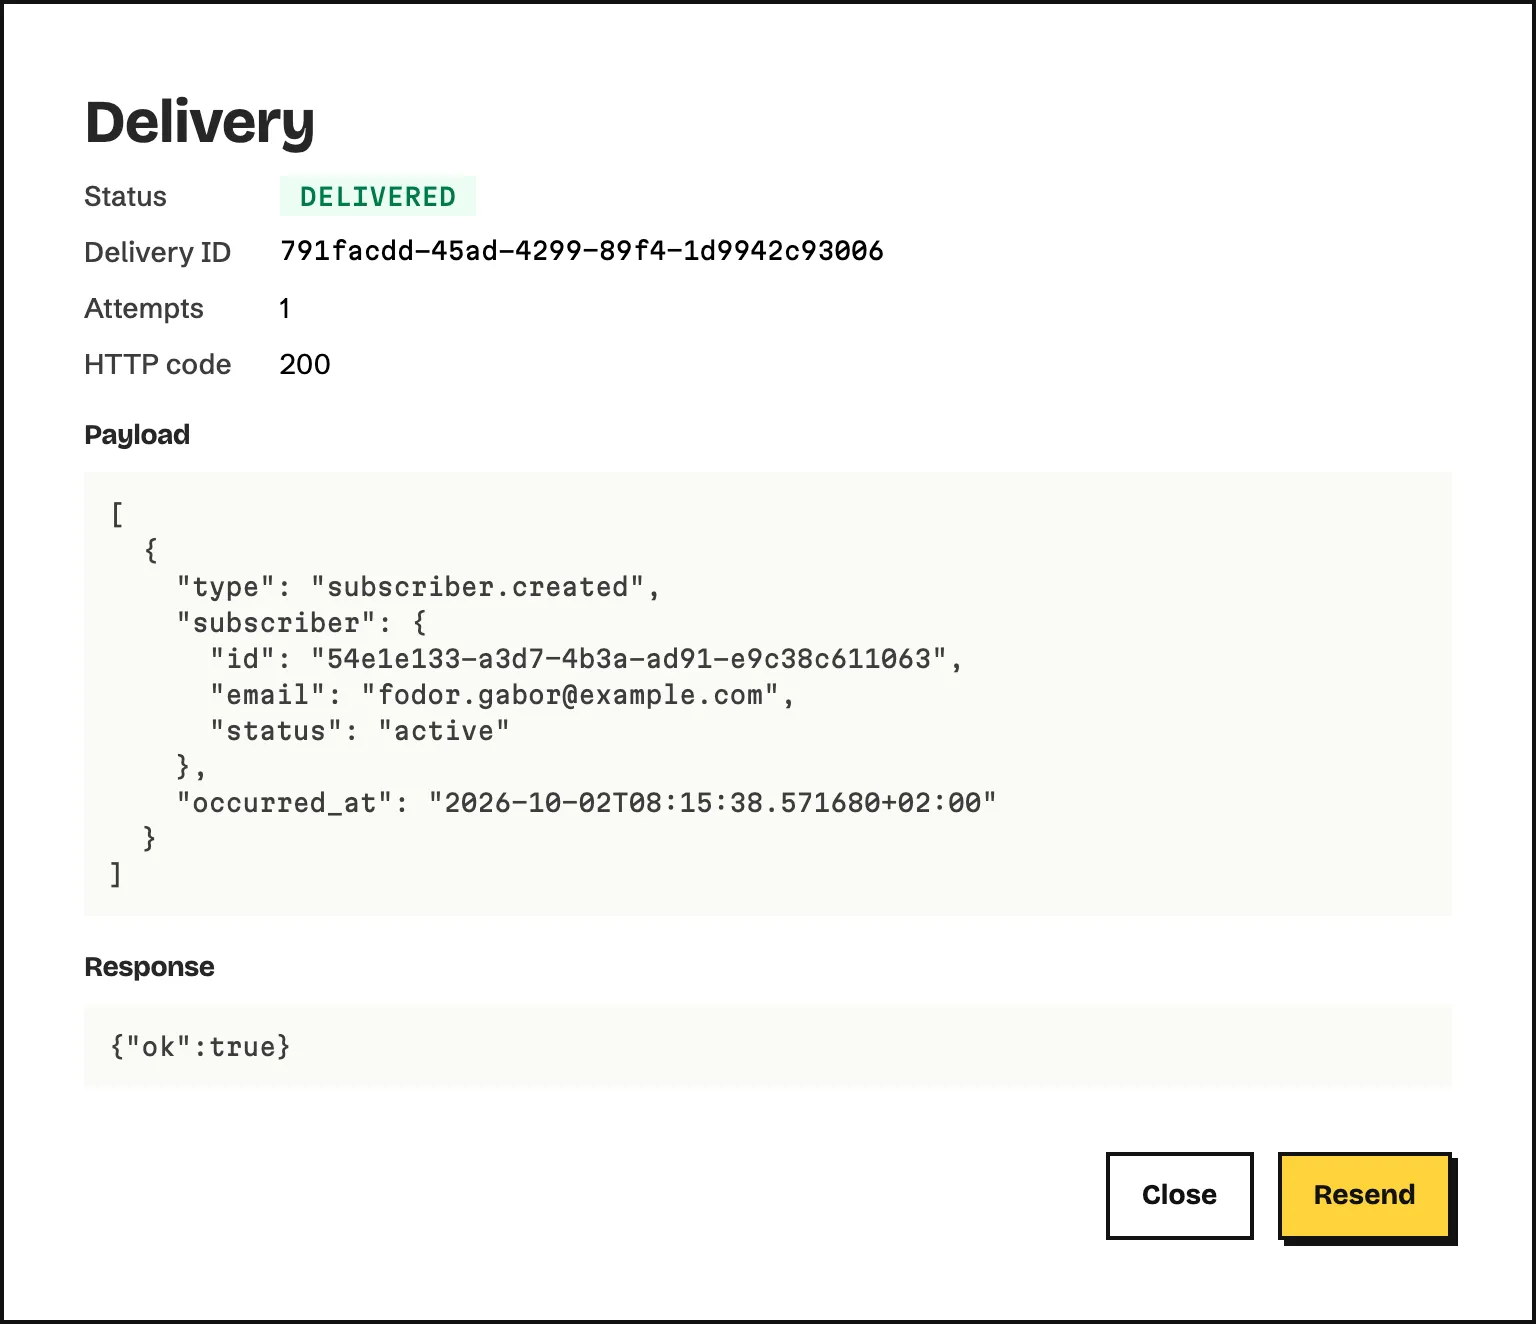
Click View in a row. The window shows the delivery ID, the attempts, the HTTP code, the content of the message (Payload) and the beginning of your system’s answer (Response). If something went wrong on your side and you’ve fixed it, click Resend to send the message again. The resend is added to the list as a new delivery with its own delivery ID, so a system that skips repeated IDs processes it too. The original delivery stays as it was.
How to turn off, change or delete a webhook
Section titled “How to turn off, change or delete a webhook”- Turn off or on: on the Webhooks page, use the switch in the Enabled column. While a webhook is off, Echo doesn’t collect events for it, and these aren’t sent later either. Turning it off also fails the messages still waiting.
- Change: on the webhook’s page, click Edit, change the name, address, events or batching, then click Save changes.
- New signing secret: click Rotate secret and confirm. The old secret stops working at once, so give the new one to your developer right away.
- Delete: click Delete and confirm. The webhook and its delivery list are deleted, and this can’t be undone.
The workflow signing key
Section titled “The workflow signing key”Automation workflows can call your system too, with a webhook step. These requests are signed with one shared key for the whole workspace, the Workflow signing key, at the bottom of the Webhooks page.
- Click Show key.
- Copy the key with Copy and give it to your developer.
- If the key gets into the wrong hands, click Rotate key and confirm. The old key stops working at once for every workflow webhook step.
Only users who manage settings can see and rotate the key. Workflow steps are covered in the Automations chapter.
How to import subscribers through the API
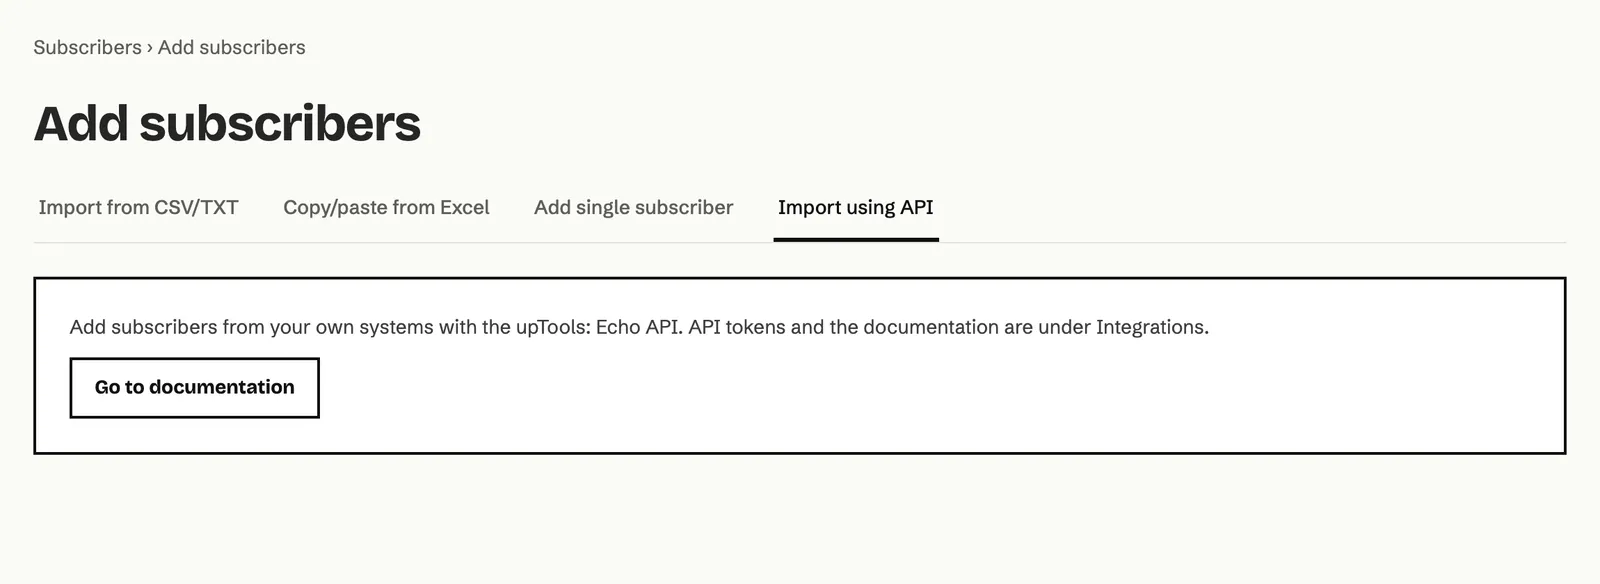
Section titled “How to import subscribers through the API”- Open Subscribers and click Add subscribers.
- Choose the Import using API tab.
- Click Go to documentation. It takes you to the API page under Integrations.
With an API token, your system can add subscribers one by one (for example at checkout in your webshop) or import a whole list into a group in one request. A list imported through the API runs like a file import and shows up on the History tab under Subscribers with the result numbers.
Our developer left the company. What happens to the tokens they created? Once their user is removed from the workspace, their tokens stop working and the list marks them Inactive. Create new tokens under your own user and update them in your systems.
Our system says the API token doesn’t work. What should I check? Check under Integrations, on the API page, that the token is still in the list and isn’t Inactive. If you set Allowed IP addresses, the request has to come from one of them. If the token still doesn’t work, create a new one.
Our system didn’t get a webhook message. Where can I see why? Open the webhook on the Webhooks page and look at the Deliveries list. The HTTP code, and in the View window the Response, tell you what your system answered. Check that the webhook is switched on: while it’s off, events aren’t collected.
How do sign-ups from the form on my website get into Echo? Your website’s form can send the sign-ups to Echo through the API. Your developer needs an API token with Full access and the details from the API page.
Can I see who changed a token or a webhook, or what a token did? Yes, on the Activity log tab of the users page in Account settings. Set Type to Integrations for token and webhook changes. Changes made through the API show the token’s name in the Who column. The Getting started chapter describes the log.